


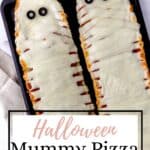
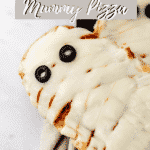
Mummy Pizza is an easy Halloween pizza recipe made with simple ingredients and ready in under 30 minutes. Crispy, cheesy, and fun to serve, it's the perfect festive dinner for Halloween parties, family nights, or a quick seasonal meal.
Updated April 2026: I've refreshed this post with new tips, an expanded FAQ section, and helpful make-ahead instructions based on your questions and feedback. Same fun recipe your family loves, but even more helpful for Halloween night! Originally posted on October 28, 2015, and updated August 28, 2023.
Every Halloween, I find myself looking for a dinner that's quick to pull together, festive enough to get the kids excited, and actually filling before all that candy hits. That's how this French Bread Mummy Pizza became our go-to October tradition. There's something about turning an everyday French bread pizza into a spooky little mummy, complete with cheese "bandages" and olive eyes, that makes the whole family slow down and enjoy the moment before trick-or-treating chaos takes over.
What makes this version extra special is the garlic herb butter base. Before any sauce goes on, the bread gets spread with a mixture of melted butter, fresh garlic, olive oil, Parmesan, and Italian seasoning, then toasted until golden. That step alone sets this mummy pizza apart. You get this incredible savory, buttery crunch underneath the marinara and mozzarella that most French bread pizzas skip entirely.
I've been making this recipe for years, and it's been updated and refined based on your comments and questions. It feeds the whole family in under 30 minutes, and the assembly is easy enough for little hands to help with. Let's get started!
Jump to:
Why You'll Love This Mummy Pizza Recipe
- Garlic butter base - Unlike basic French bread pizzas, this one starts with a seasoned butter spread that toasts onto the bread before the toppings go on. It adds a whole extra layer of savory flavor you'll notice immediately.
- Ready in under 30 minutes - From cold oven to table in less than half an hour, which means you have plenty of time to get the costumes on before the doorbell starts ringing.
- Fun for all ages - Little kids love placing the olive eyes and arranging the cheese strips. Teenagers who "don't care about Halloween anymore" will still show up when this hits the table.
- Easy to customize - The mummy design works with English muffins, personal French bread portions, or even ciabatta rolls, and you can load on toppings or keep it simple, either way, it works.
Ingredients You'll Need
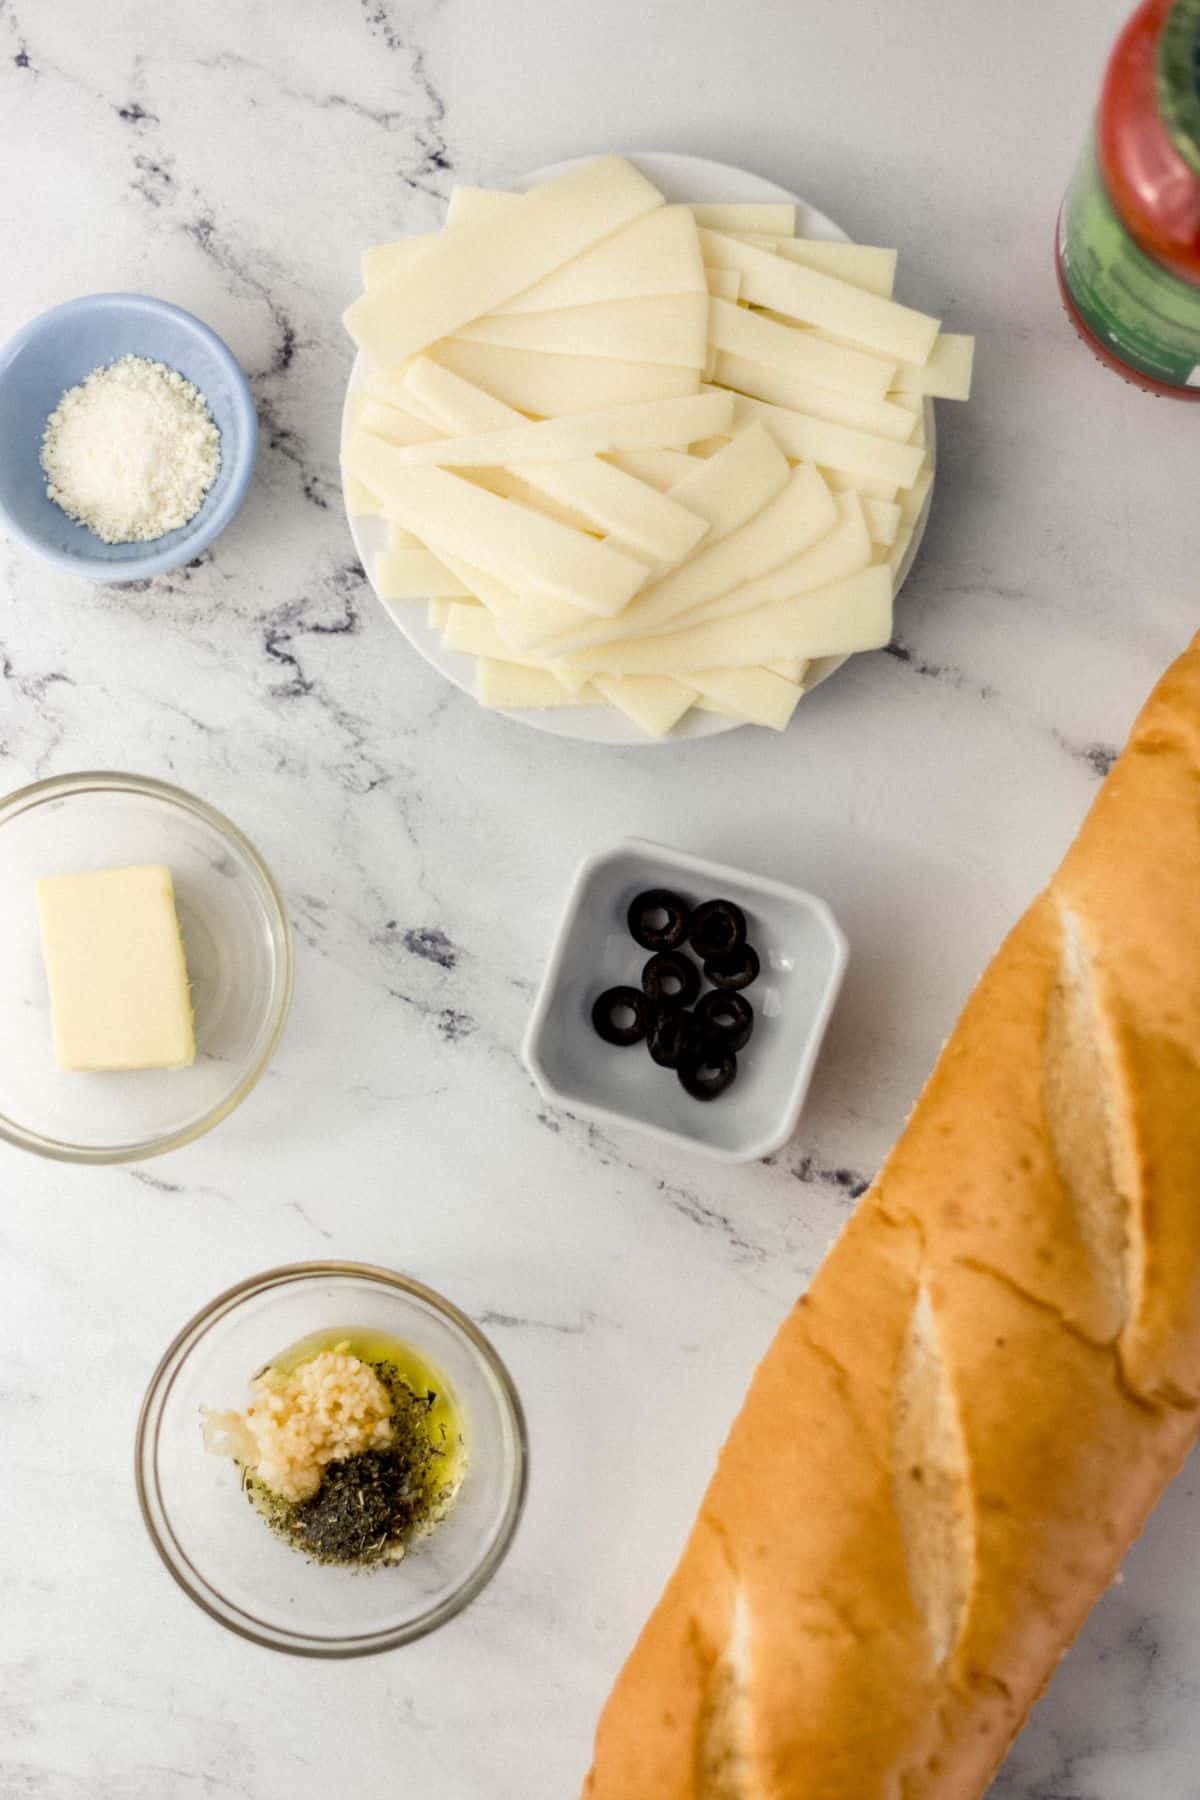
- French Bread is the base of these mummy pizzas. Pick up a freshly baked loaf from your grocery store's bakery section. The fresher the bread, the better it holds up to pressing and toasting. A standard baguette-style loaf works perfectly, giving you two long mummy halves.
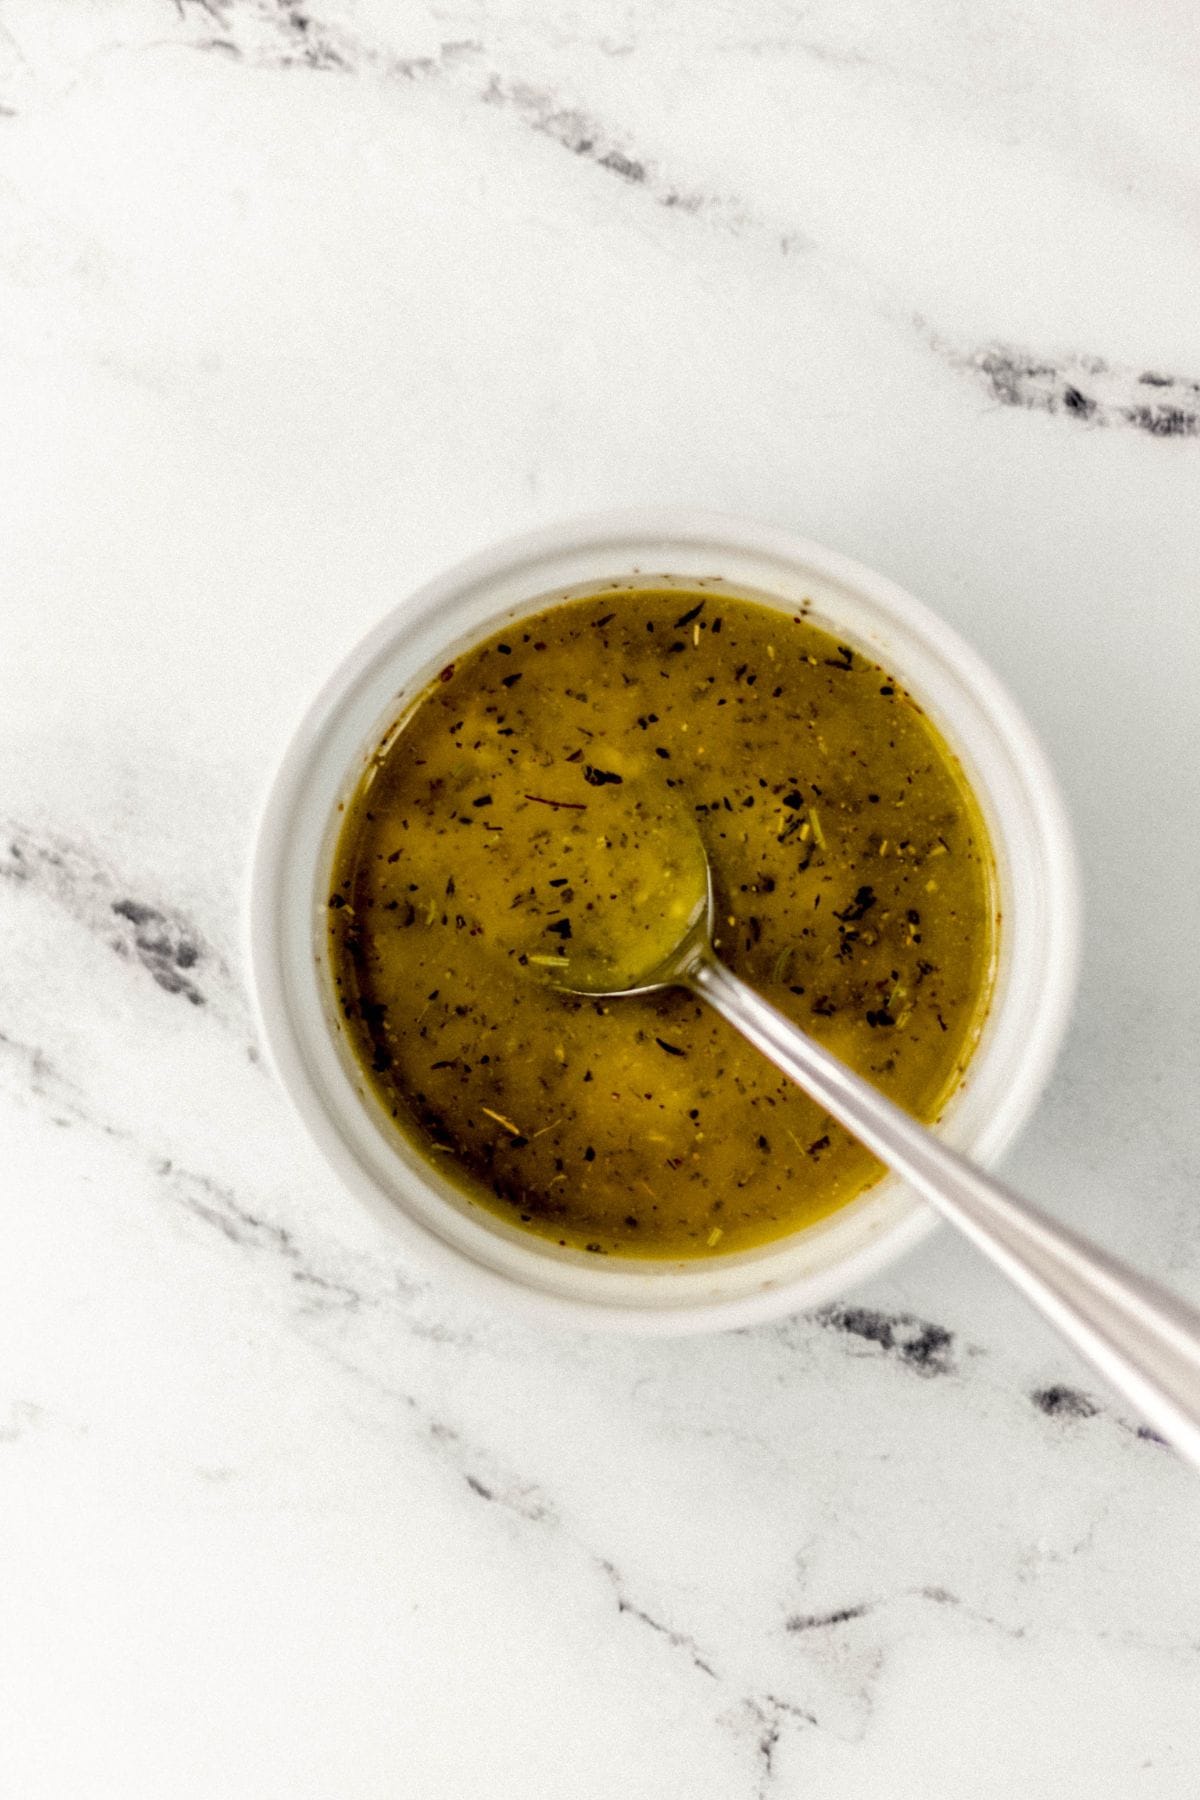
- Butter and Garlic form the foundation of what makes this recipe special. The melted butter combined with finely minced garlic creates a savory spread that soaks into the bread before it toasts. Fresh garlic gives the best flavor, but pre-minced garlic from a jar works in a pinch.
- Olive Oil and Parmesan Cheese round out the butter spread. The olive oil helps the mixture spread evenly, and the Parmesan adds a salty, nutty depth. Use finely grated Parmesan, either pre-grated or freshly grated from a block.
- Italian Seasoning ties the herb butter together. You can also add a pinch of crushed red pepper flakes if your family likes a little heat hiding underneath the mummy.
- Marinara Sauce goes on after the bread is toasted. Any store-bought pizza sauce or marinara you like will work here, there's no wrong choice.
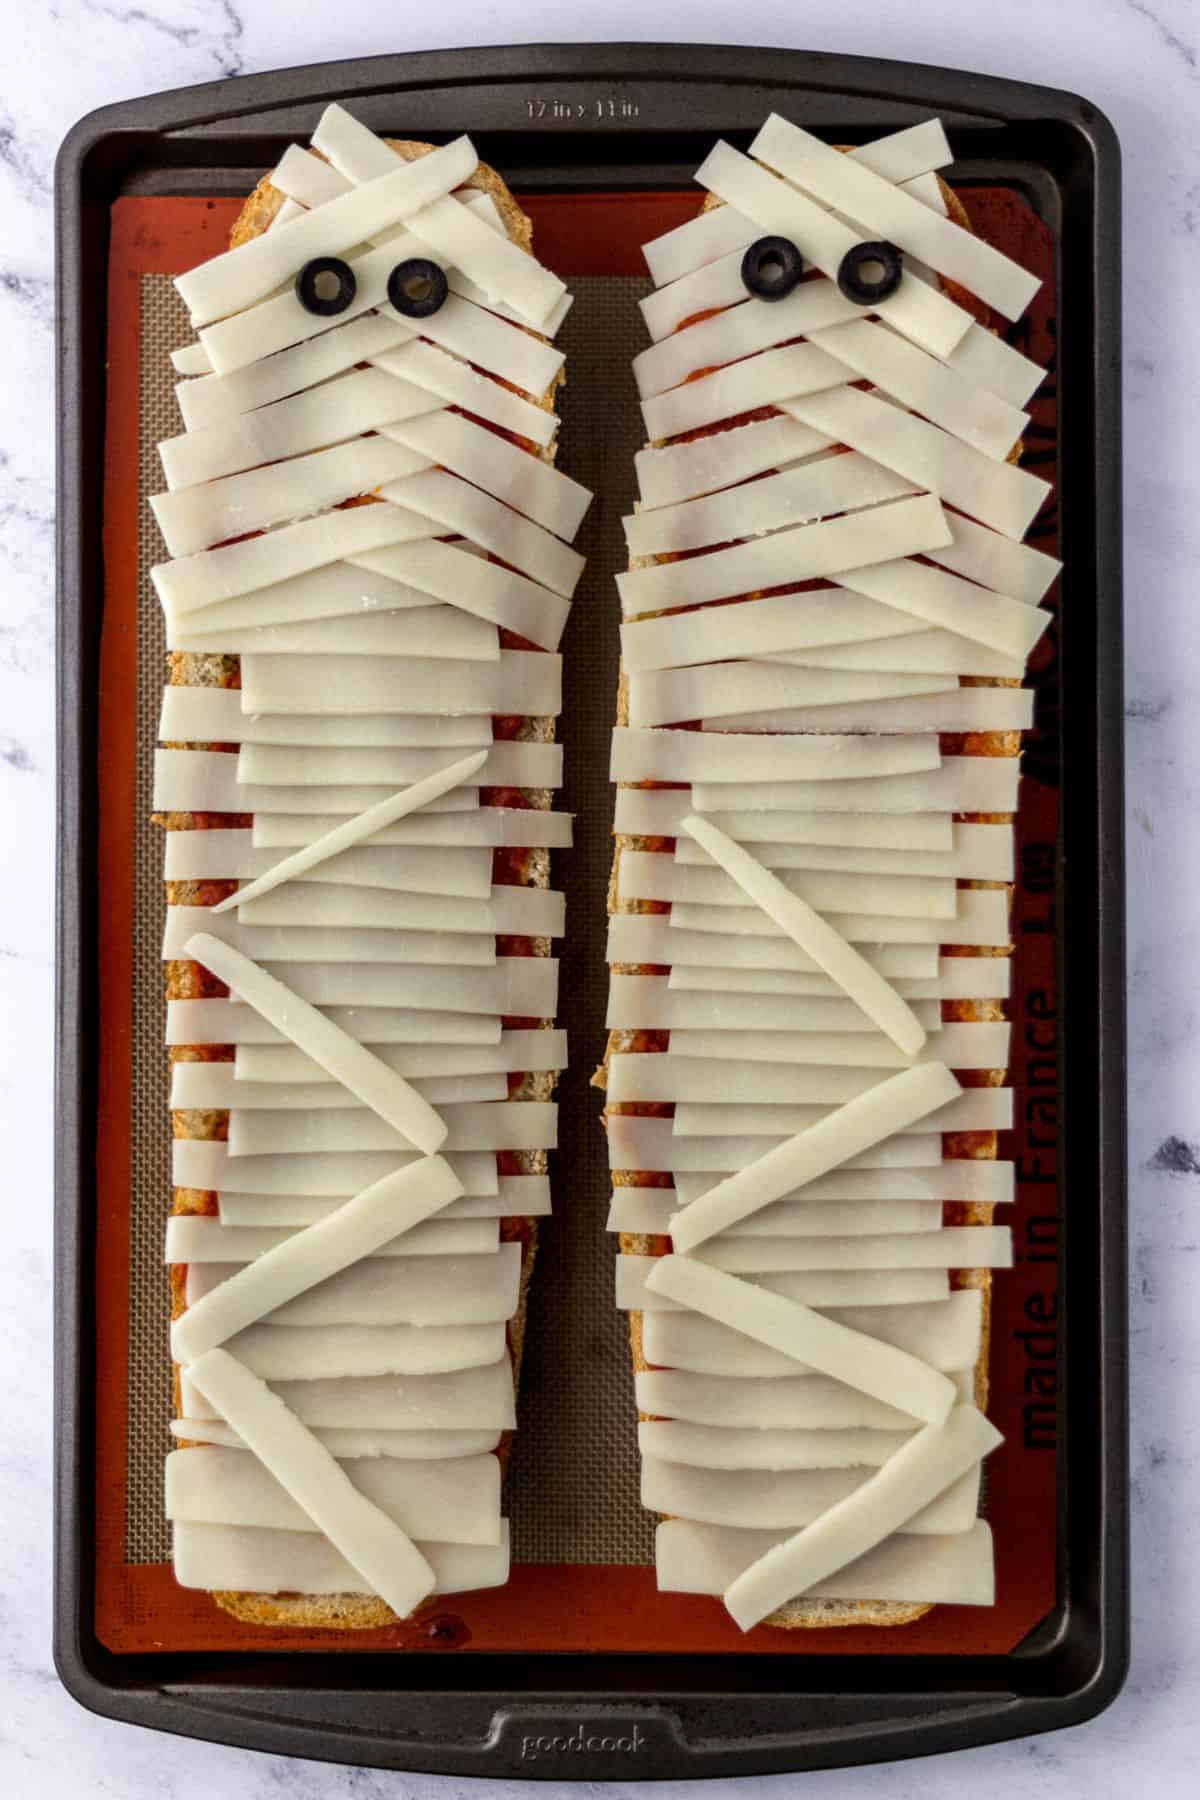
- Mozzarella Cheese Slices create the mummy's bandages, which is the whole fun of this recipe. You need thin, flexible slices. Either buy pre-sliced deli mozzarella or slice a block yourself. String cheese pulled into strips also works great for kids to arrange.
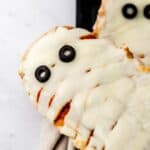
- Black Olives are the finishing touch. Two slices per mummy create those beady little eyes peeking through the cheese bandages. Canned sliced black olives are exactly what you need.
👉🏾 See the recipe card below for exact quantities and full instructions.
How to Make Mummy Pizza
Step 1: Press and Prep the Bread
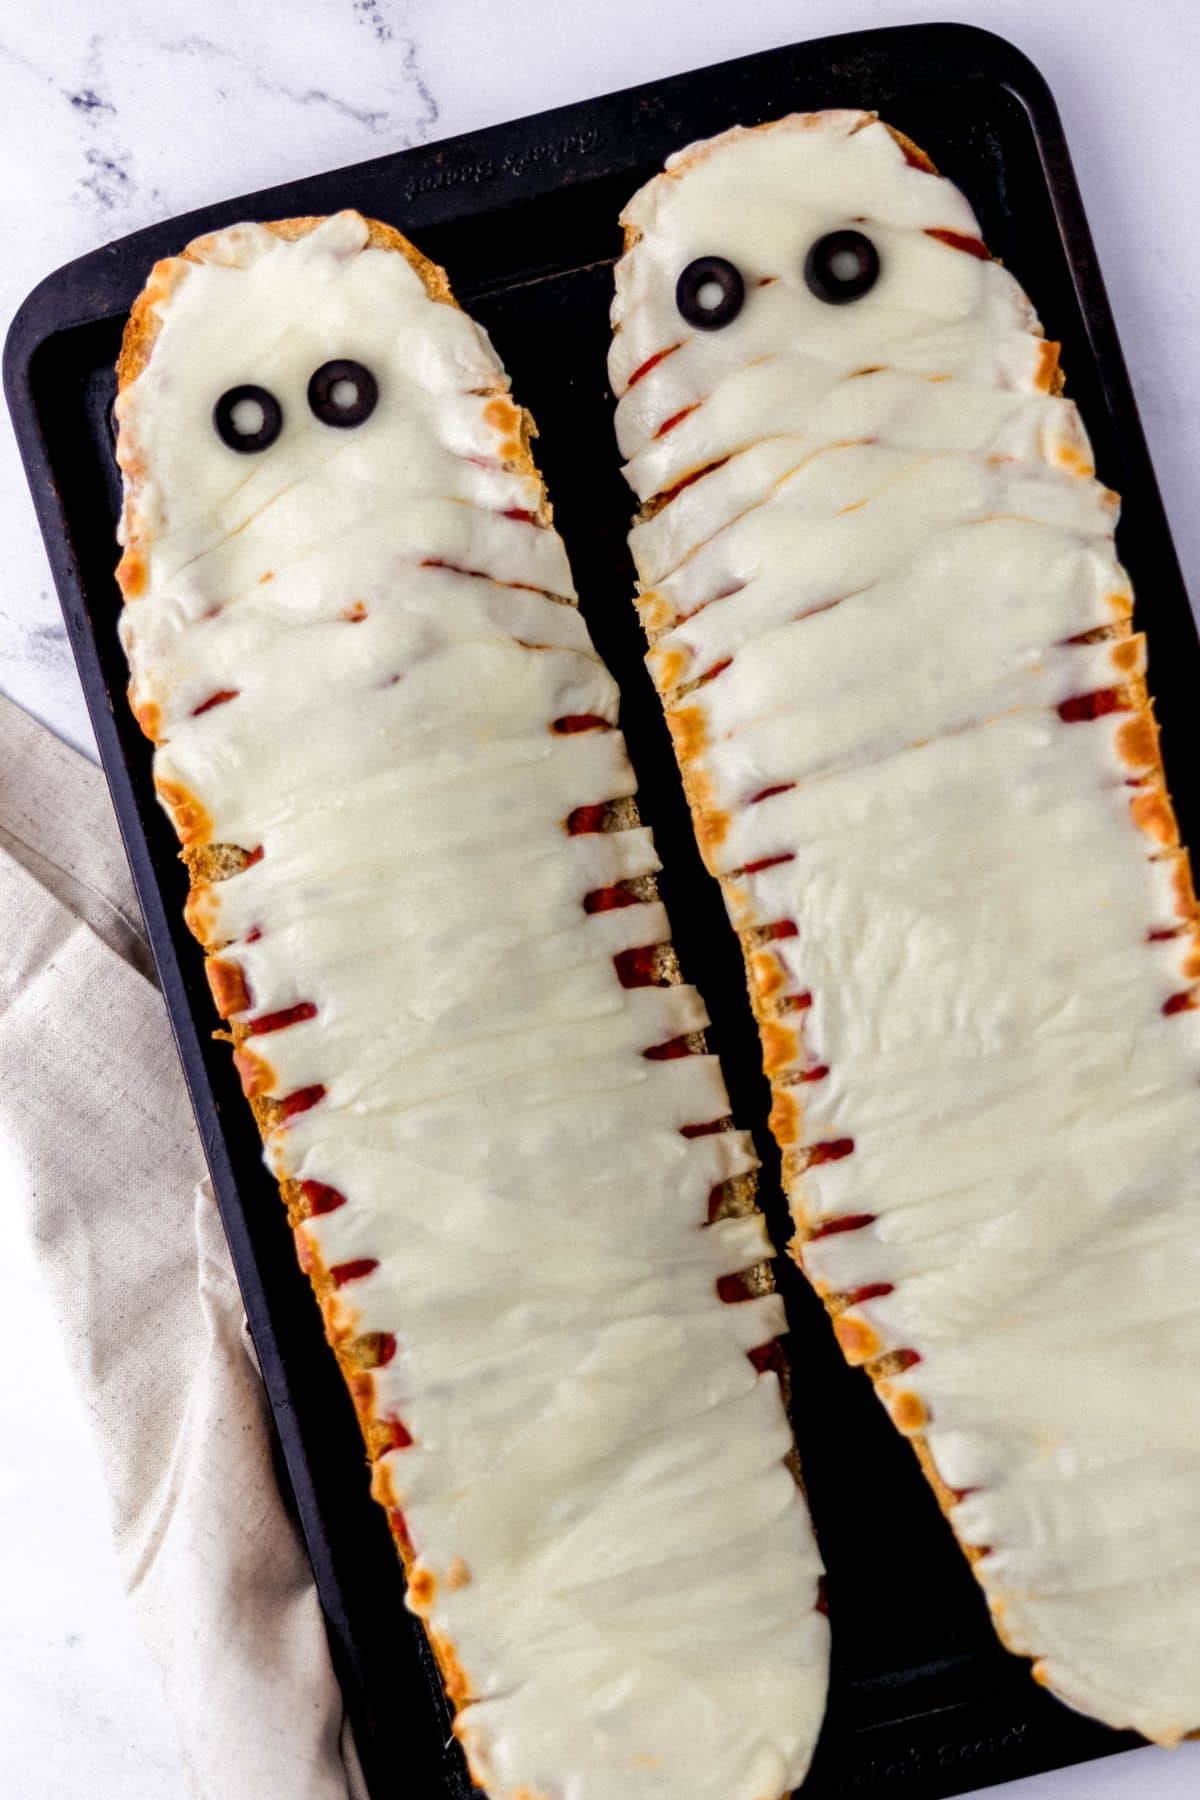
Slice your French bread loaf down the middle lengthwise to create two halves. Then flatten the center of each piece firmly with your palms. This creates a flatter surface for the sauce and toppings and prevents the cheese from sliding off when it melts. Place both halves cut-side up on a parchment-lined baking sheet.
Step 2: Make and Spread the Garlic Butter
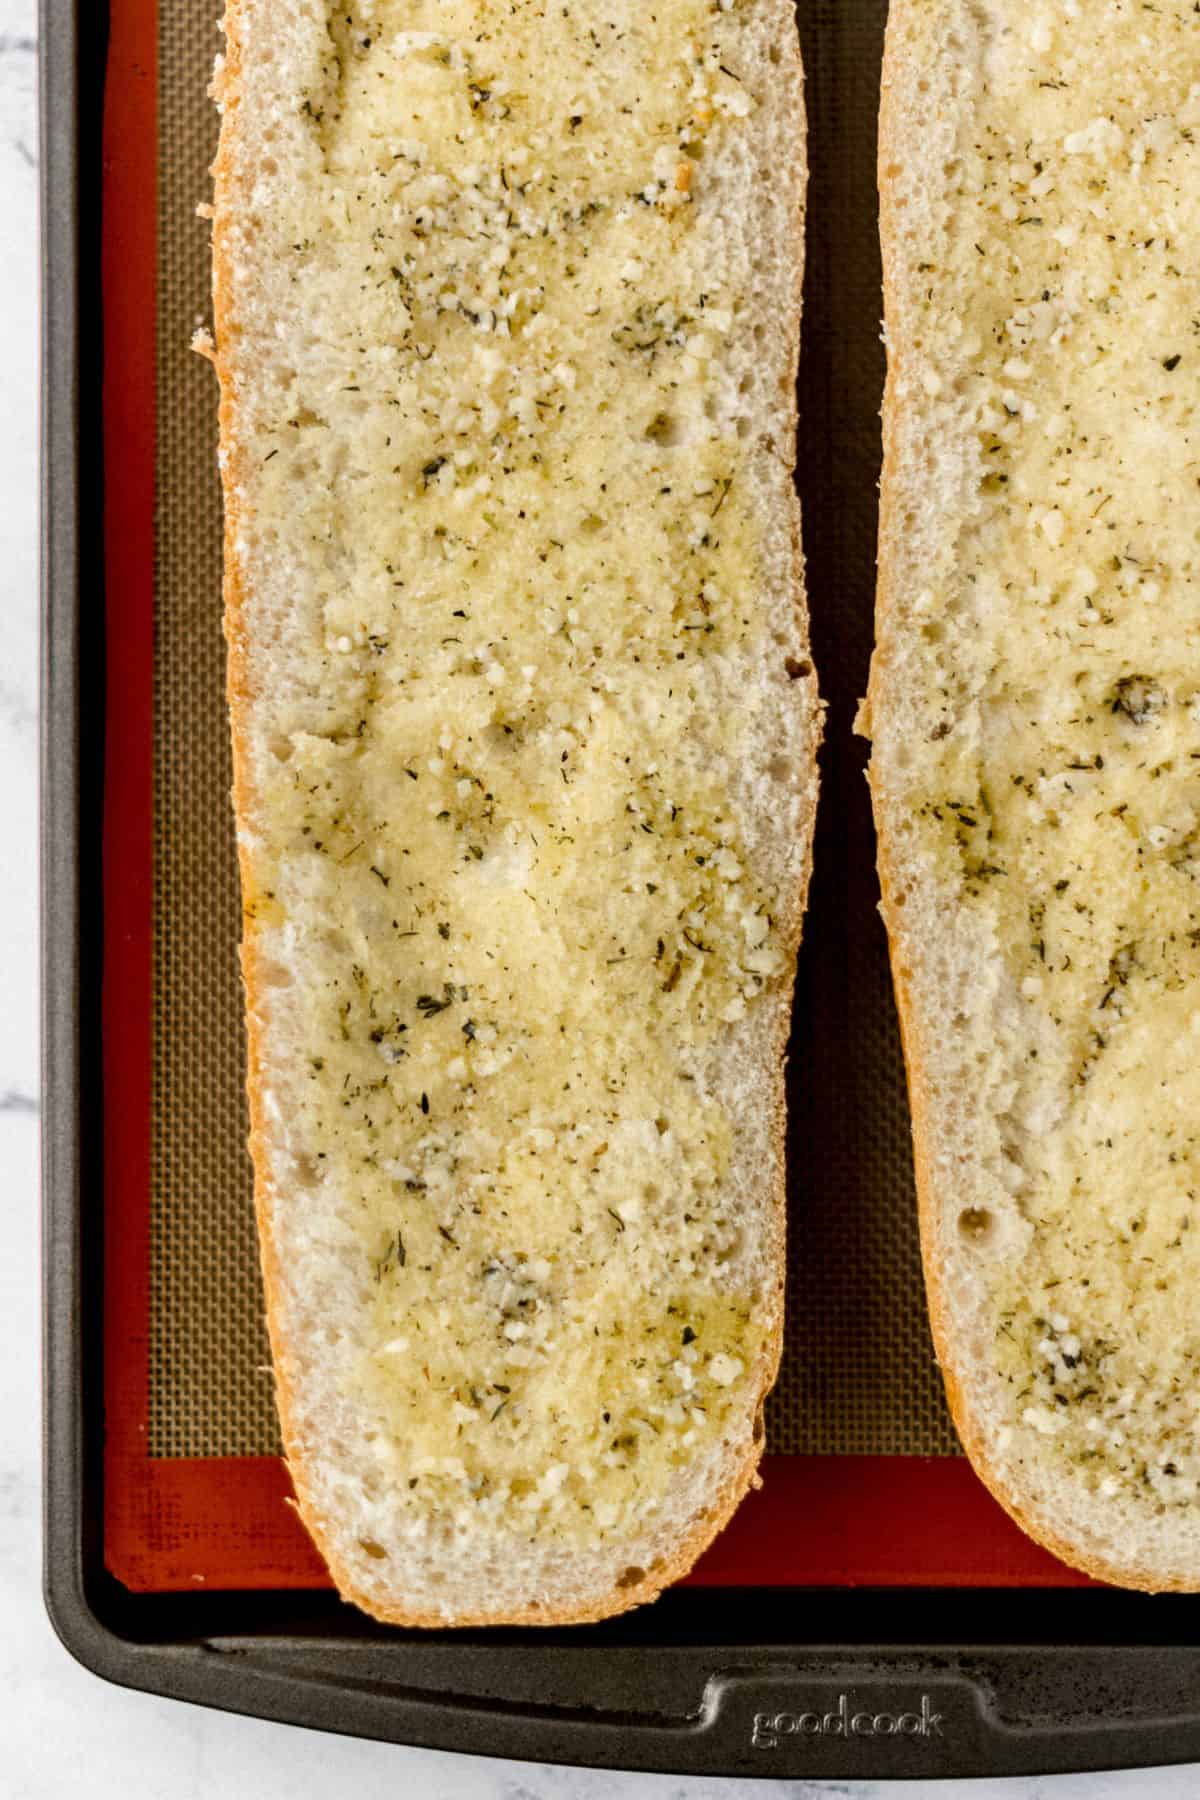
In a small bowl, mix together the melted butter, minced garlic, olive oil, Italian seasoning, and Parmesan. Spread this mixture evenly across the entire surface of each bread half, all the way to the edges. Don't skip the edges, that's where you get the crispiest, most flavorful bites.
Step 3: Toast the Bread
Bake the buttered bread in a 400°F oven for 6 to 10 minutes until it's lightly golden and toasted. You want it to feel slightly firm when you press it. This step is what creates that crunch layer under the toppings that sets this pizza apart. Watch it carefully after 6 minutes, oven temperatures vary.
Step 4: Add Sauce and Assemble the Mummies
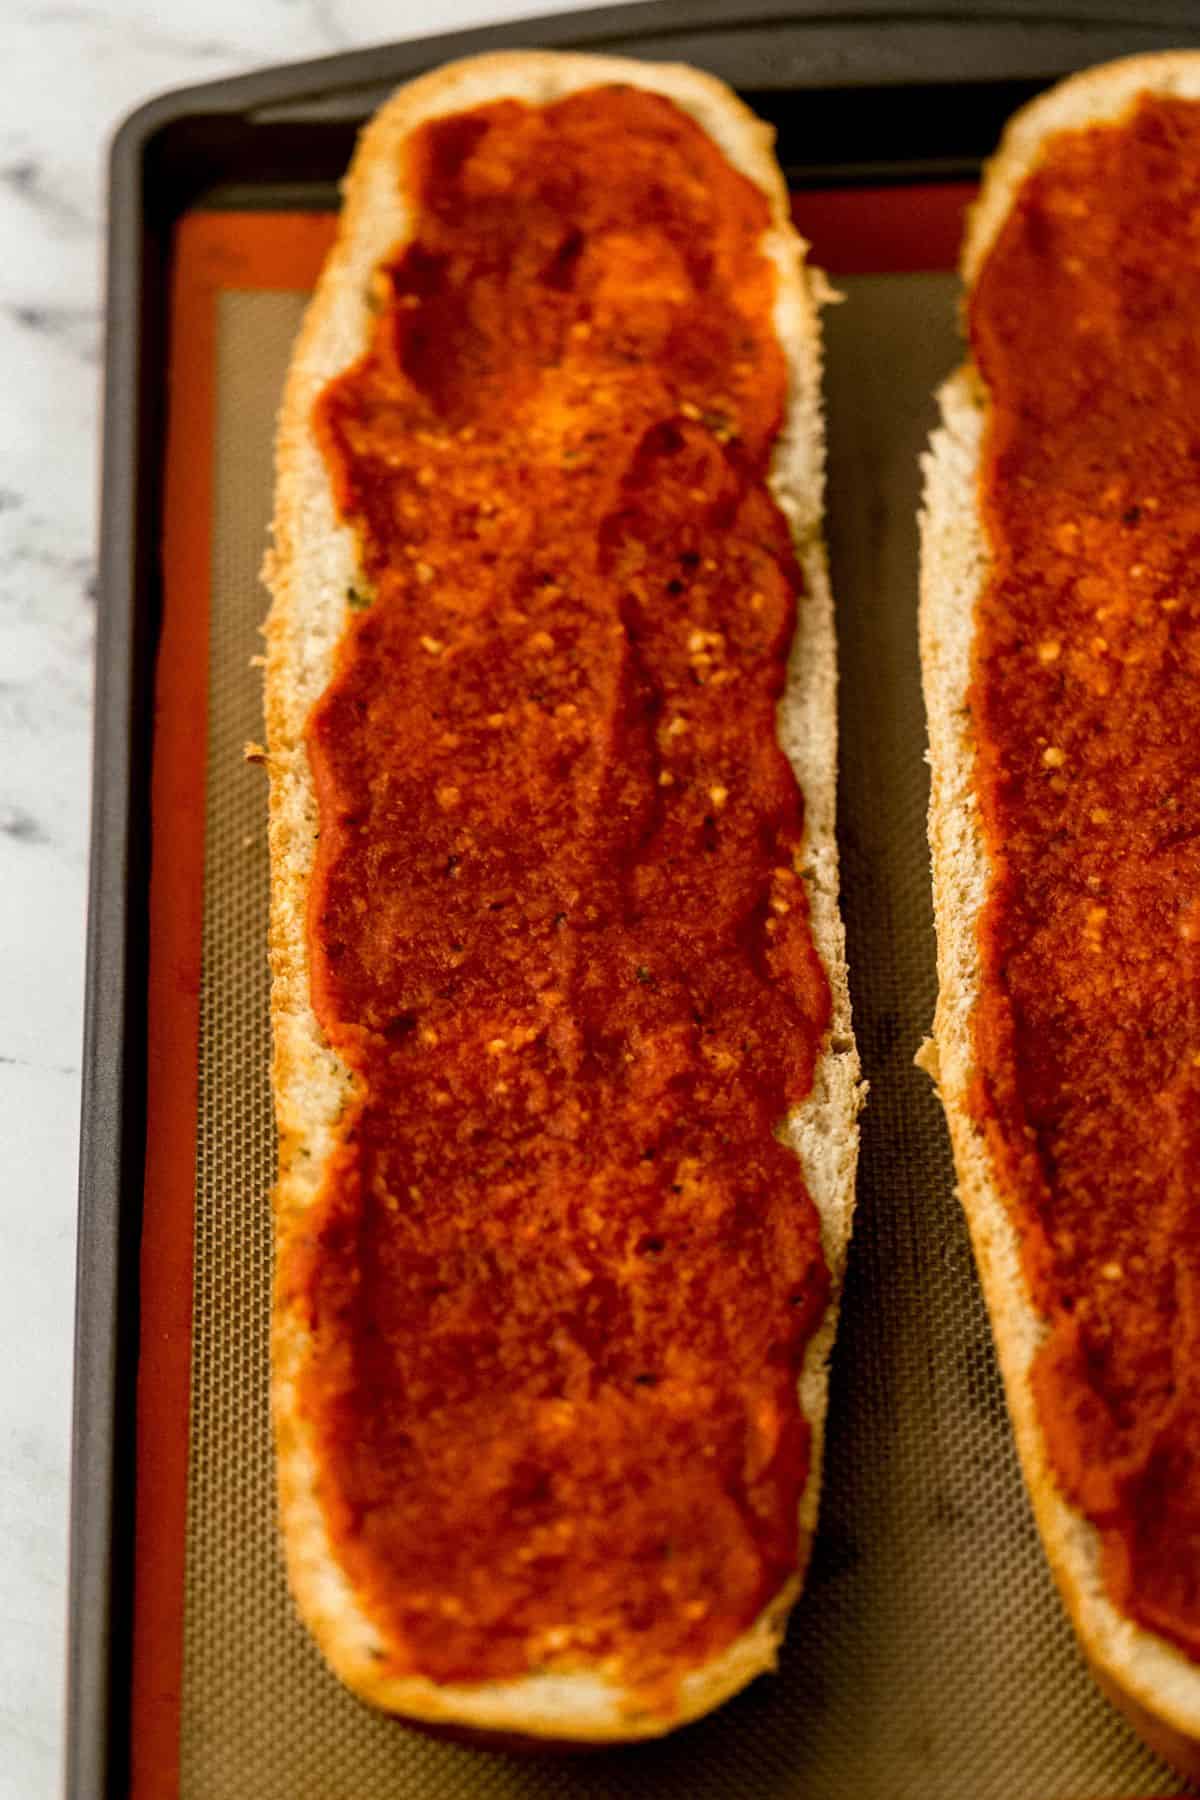
Remove the toasted bread from the oven and spread marinara sauce over each half. If you're adding any toppings like mini pepperoni or thinly sliced veggies, add them now before the cheese. Then lay your mozzarella slices in overlapping diagonal strips across the bread to create the bandaged mummy wrap. Leave small gaps so the sauce peeks through. Press two black olive slices near the top for the eyes.
Step 5: Broil and Serve
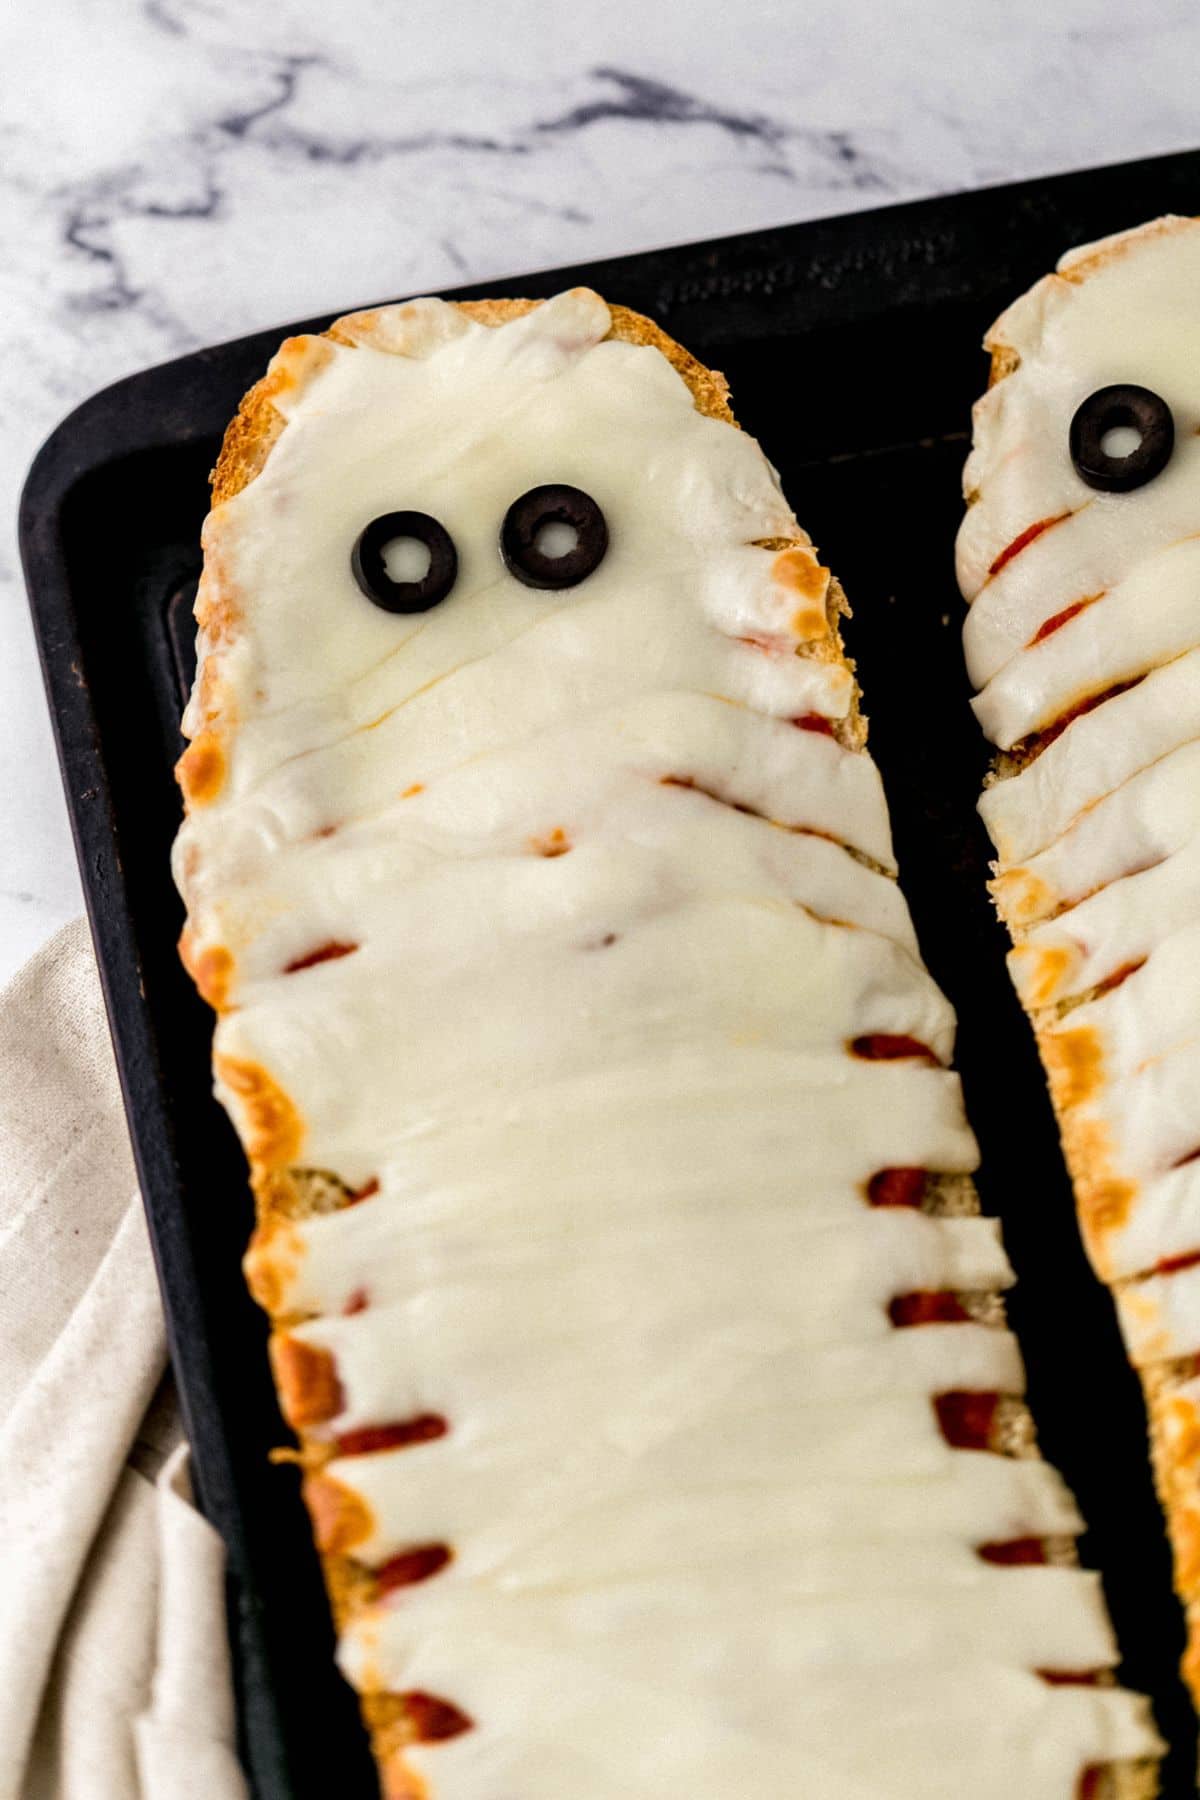
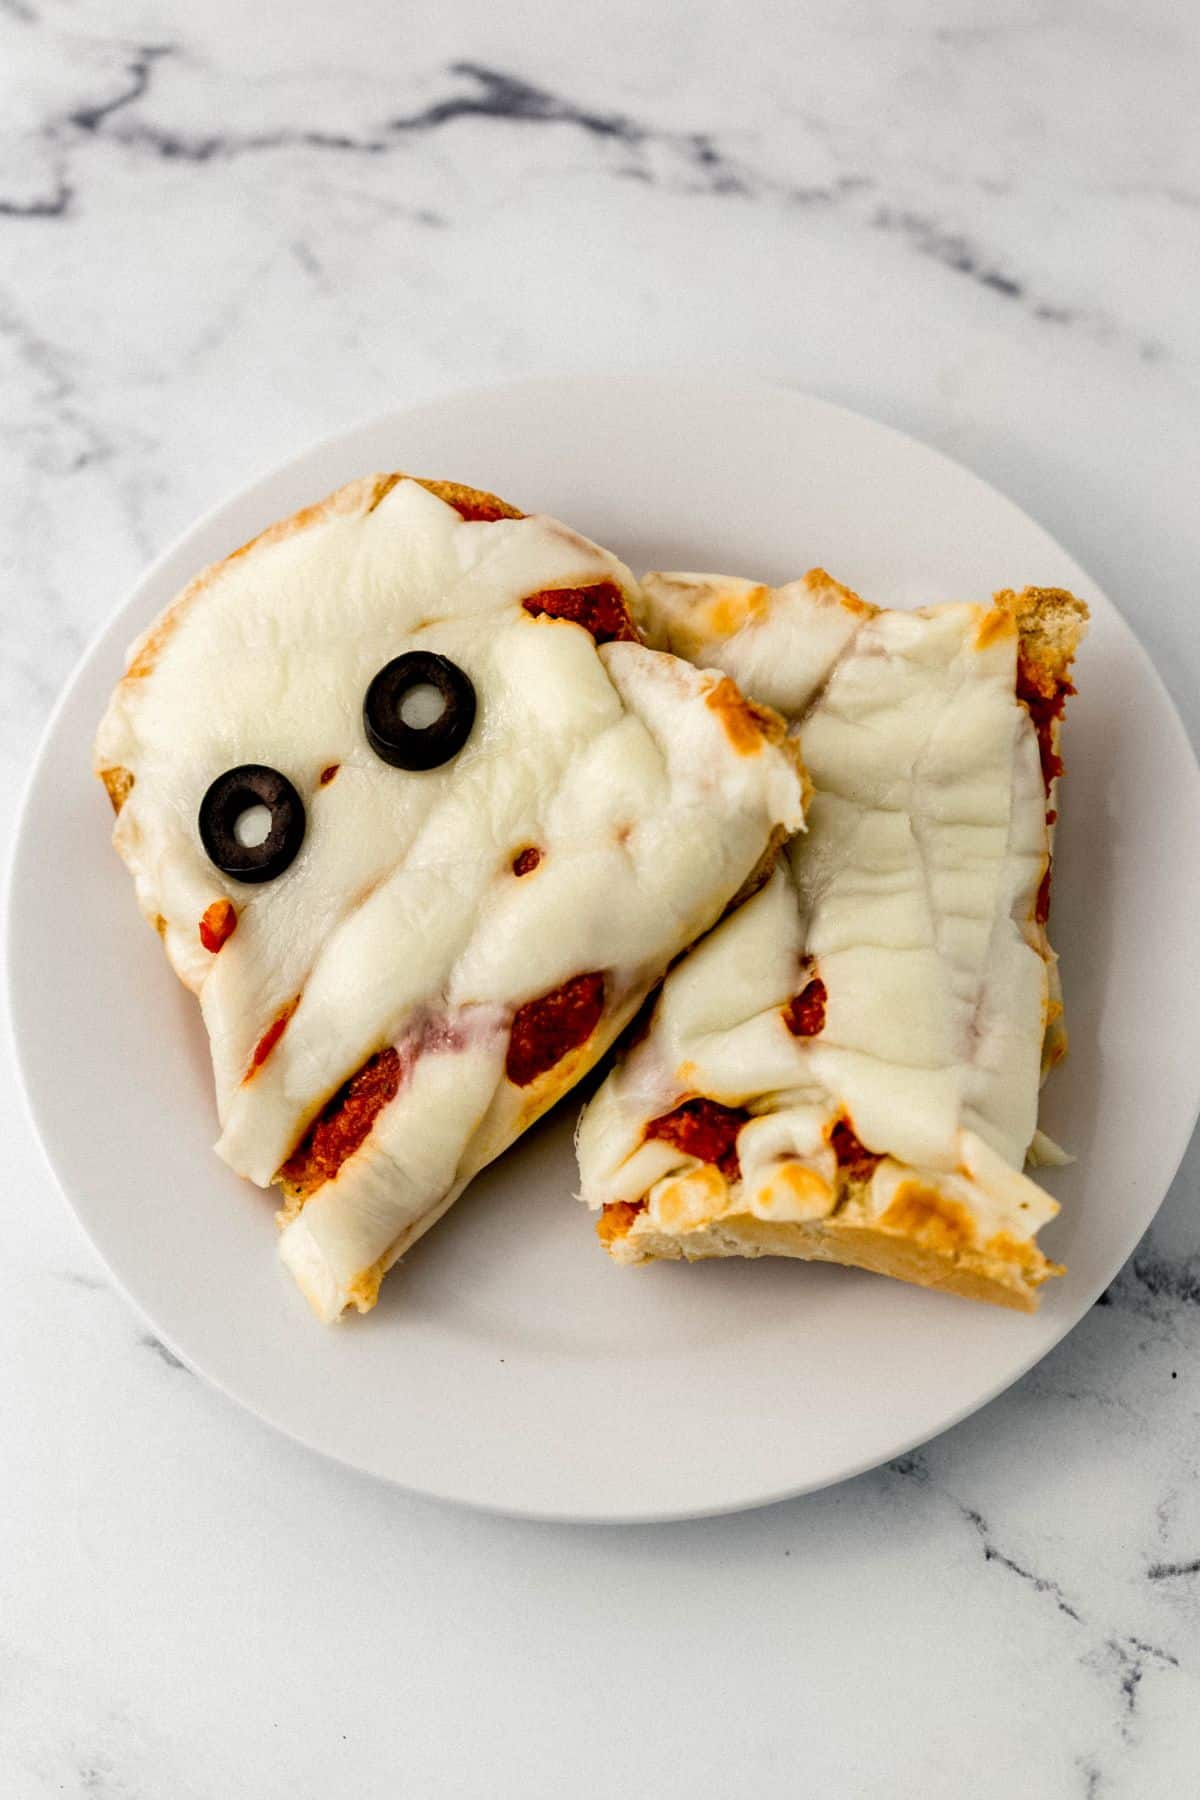
Place the assembled pizzas under the broiler on low heat until the mozzarella is fully melted and just starting to bubble, about 3 to 5 minutes. Keep the oven door cracked and watch them closely. Broilers vary and the cheese can go from perfect to overdone quickly. Remove carefully, slice with a pizza cutter, and serve immediately while warm.
LaKita's Expert Tips
- Press the bread firmly before toasting. This single step prevents the classic French bread pizza problem where all the toppings slide to the center. A flatter surface means better cheese coverage and easier slicing.
- Don't skimp on the garlic butter spread. This is what separates this recipe from basic French bread pizza. Get it all the way to the edges so every bite has that savory, toasted base.
- Toast first, top second. Always toast the buttered bread before adding any sauce. Adding sauce to raw bread produces a soggy bottom that doesn't hold toppings well.
- Use a broiler, not a full oven bake, for the final step. After the initial toast, broiling melts the cheese quickly without drying out the bread. Watch it, 3 minutes under the broiler is usually plenty.
- Thin mozzarella slices work best for the "bandages." Thicker slices melt into a blob. Thinner ones hold their shape just enough to look like actual bandages. If buying a block, slice it as thin as your knife allows.
- Let kids do the decoration. The mummy assembly is the perfect kitchen task for little helpers. There's no wrong way to arrange cheese bandages and olive eyes, and they'll be so proud of what they made.
- Make four smaller mummies instead of two large ones. Cut each bread half in half crosswise before topping for individual servings, easier for kids to handle, and great for parties.
Want To Save This Recipe?
Variations & Substitutions
- English Muffin Mummies - Split English muffins are perfect for individual portions or school lunches. They bake faster (about 8 minutes), and kids can decorate their own.
- White pizza mummies - Skip the marinara and use a drizzle of extra garlic butter in its place for an all-white pizza. Use provolone or white cheddar strips alongside the mozzarella.
- Loaded Halloween pizza - Before placing the cheese bandages, add mini pepperoni, Canadian bacon, or thinly sliced bell peppers for a heartier dinner version.
- String cheese shortcut - Pull string cheese into thin strips instead of slicing mozzarella. They hold their bandage shape beautifully, and kids can pull them apart themselves.
- Extra spooky details - Use additional olive slices to create a nose and a jagged, spooky mouth below the eyes for extra Halloween drama.
- Gluten-free option - Use a gluten-free baguette or GF ciabatta rolls as the base. The garlic butter and assembly process stay exactly the same.
Make-Ahead & Storage
Make-Ahead
The garlic butter spread can be made up to 3 days in advance and stored in the refrigerator in a covered bowl. You can also toast the buttered bread up to an hour before serving. Just let it cool, then add sauce and toppings right before you're ready to broil. Full assembly (sauce + cheese + olives) can be done up to 2 hours ahead. Cover loosely with plastic wrap and refrigerate, then broil right before serving. This is perfect for Halloween parties where you want to prep early and just pop things in the oven when guests arrive.
Storage & Reheating
Store leftover mummy pizzas in an airtight container in the refrigerator for up to 3 days. For reheating, the oven is your best option. Place on a baking sheet and warm at 350°F for 8 to 10 minutes until the bread is crispy again and the cheese is re-melted. A toaster oven works even better for single servings. The microwave reheats quickly but softens the bread. If that's your only option, 45 seconds on medium power is better than full power. Freezing is not recommended for assembled pizzas, as the bread becomes soggy after thawing.
What to Serve with Mummy Pizza
- For a Halloween dessert - Follow up with Candy Corn Rice Krispie Treats for a sweet finish that keeps the holiday theme going.
- For a full spooky spread - Add Halloween Pumpkin Rice Krispie Treats to the table for a fun centerpiece.
- For more Halloween fun - Sip on a candy-filled Frozen Yogurt Freakshake alongside the pizza for an over-the-top Halloween night.
- For a bigger pizza night - If the family wants more variety, Easy Pizza Bowls make a great quick companion dish.
- For French bread pizza fans - Year-round, this same garlic butter base is incredible on BBQ French Bread Pizza.
Frequently Asked Questions
A standard French bread loaf from the bakery section of your grocery store works best because it's long enough to create the mummy shape and firm enough to hold toppings without getting soggy. Ciabatta rolls, English muffins, and baguette halves are all great alternatives for smaller individual portions.
Yes! You can prep the garlic butter up to 3 days ahead, toast the bread up to an hour early, and even fully assemble the pizzas up to 2 hours before serving. Store assembled, unbaked pizzas covered in the refrigerator and broil right before you're ready to eat.
Toasting the buttered bread first creates a crispy base layer that keeps the pizza from getting soggy under the sauce. It also lets the garlic butter soak in and caramelize slightly, which gives every bite that rich, savory depth that plain French bread pizza doesn't have.
Absolutely, this is one of the best recipes to make with kids. They can help press the bread, spread the butter mixture, arrange the mozzarella bandages, and place the olive eyes. The mummy decoration is playful, and there's no wrong way to do it, which makes it stress-free for little helpers.
Mini pepperoni slices are the most popular add-in. Place them under the cheese so the bandages still show on top. Canadian bacon, thinly sliced bell peppers, sautéed mushrooms, and black olive slices all work beautifully without disrupting the mummy look.
Thinly sliced fresh mozzarella from the deli section works best because the slices hold their shape while melting. A block of mozzarella sliced thin works just as well. String cheese pulled into strips is the easiest kid-friendly option and holds its bandage shape even better.
You can, but the magic of this recipe is the speed and the garlic butter base on the crusty bread. French bread gives you that crispy exterior and chewy interior that pizza dough can't replicate. If you want homemade dough, try it as a flatbread or use a pre-baked focaccia base instead.
Two things help: slice the mozzarella thin (thicker slices melt and spread more), and use the broiler on low rather than a hot oven. The broiler melts the cheese quickly from above without overcooking from below. Keep the oven door slightly cracked and watch it, 3 to 4 minutes is usually the sweet spot.
Yes, substitute a gluten-free baguette or GF ciabatta rolls for the French bread. The garlic butter spread and toppings are naturally gluten-free. Everything else stays the same, including the baking time.
Stored in an airtight container in the refrigerator, they'll keep well for up to 3 days. Reheat in the oven at 350°F for 8 to 10 minutes to bring back the crispiness, or use a toaster oven for single servings. Freezing assembled pizza is not recommended as the bread gets soggy after thawing.
📖 Recipe

Mummy Pizza Recipe
Equipment
- 1 Large Sheet Pan
Ingredients
- 1 loaf French bread
- 4 tablespoons butter, melted
- 2 cloves garlic, finely minced
- ½ tablespoon extra virgin olive oil
- ½ teaspoon Italian ( or pizza) seasoning
- 1 tablespoon grated parmesan cheese
- 1 cup marinara sauce
- your favorite pizza toppings (optional)
- 9 ounces sliced thinly mozzarella cheese
- 4 sliced black olives
Instructions
- Begin the recipe by preheating the oven to 400 degrees F. and slice a loaf of French bread evenly down the middle to create two halves.
- Flatten out the middle of each piece by pressing it down firmly with your hands. Place onto a baking sheet/sheet pan and set aside.
- In a small bowl, stir together the 4 tablespoons butter, 2 cloves of minced garlic, ½ tablespoon olive oil, ½ teaspoon Italian seasoning, and 1 tablespoon grated Parmesan cheese.
- Next, spread this mixture evenly onto the center of each loaf of French bread. With the bread still on the baking sheet, place it into the oven to bake for 6 to 10 minutes, until lightly toasted.
- Carefully remove from the oven and spread the 1 cup marinara sauce on the toasted French bread, top with your favorite toppings (optional), and then place your 9 ounces sliced mozzarella cheese on top and along with the two sliced black olives for the eyes.
- Place under the broiler on low until the cheese is melted and heated throughout. Keep an eye on it while it is in the oven. Carefully remove from the pizza oven. Slice and serve while still warm. Enjoy!
- Store any leftovers in an airtight container in the refrigerator for up to 3 days. Reheat before serving.
Did You Make This Recipe?
If you give this mummy pizza recipe a try, I'd love to know what you think! Leave a comment below, share a photo on Instagram and tag @SimplyLaKita, or save it on Pinterest for later. And if the kids helped make theirs, I especially want to see those mummy creations, no two are ever the same!


Cassie says
So fun! These pizzas were perfect for Friday night dinner and the kids were so excited. The garlicky herb butter made them extra flavorful and they were so easy to put together.
LaKita says
Thank you Cassie! So happy to hear that you and your family enjoyed the Mummy Pizzas!
Felicita says
Seriously, the cutest idea ever! We don't have a party to go to this year but we will have some friends over Halloween night for group trick or treating and I think these would be perfect for the kids!
Kenya Rae says
These are so cute and I am all about simple stuff! We don't celebrate Halloween in the traditional sense but we do activities and stuff so they don't feel completely left out. These may be a good dinner idea for Halloween day.
LaKita says
Thank you! This is a good recipe to try Halloween day 🙂
Akaleistar says
Who knew pizza could be so cute? 🙂
admin says
I know right!!