


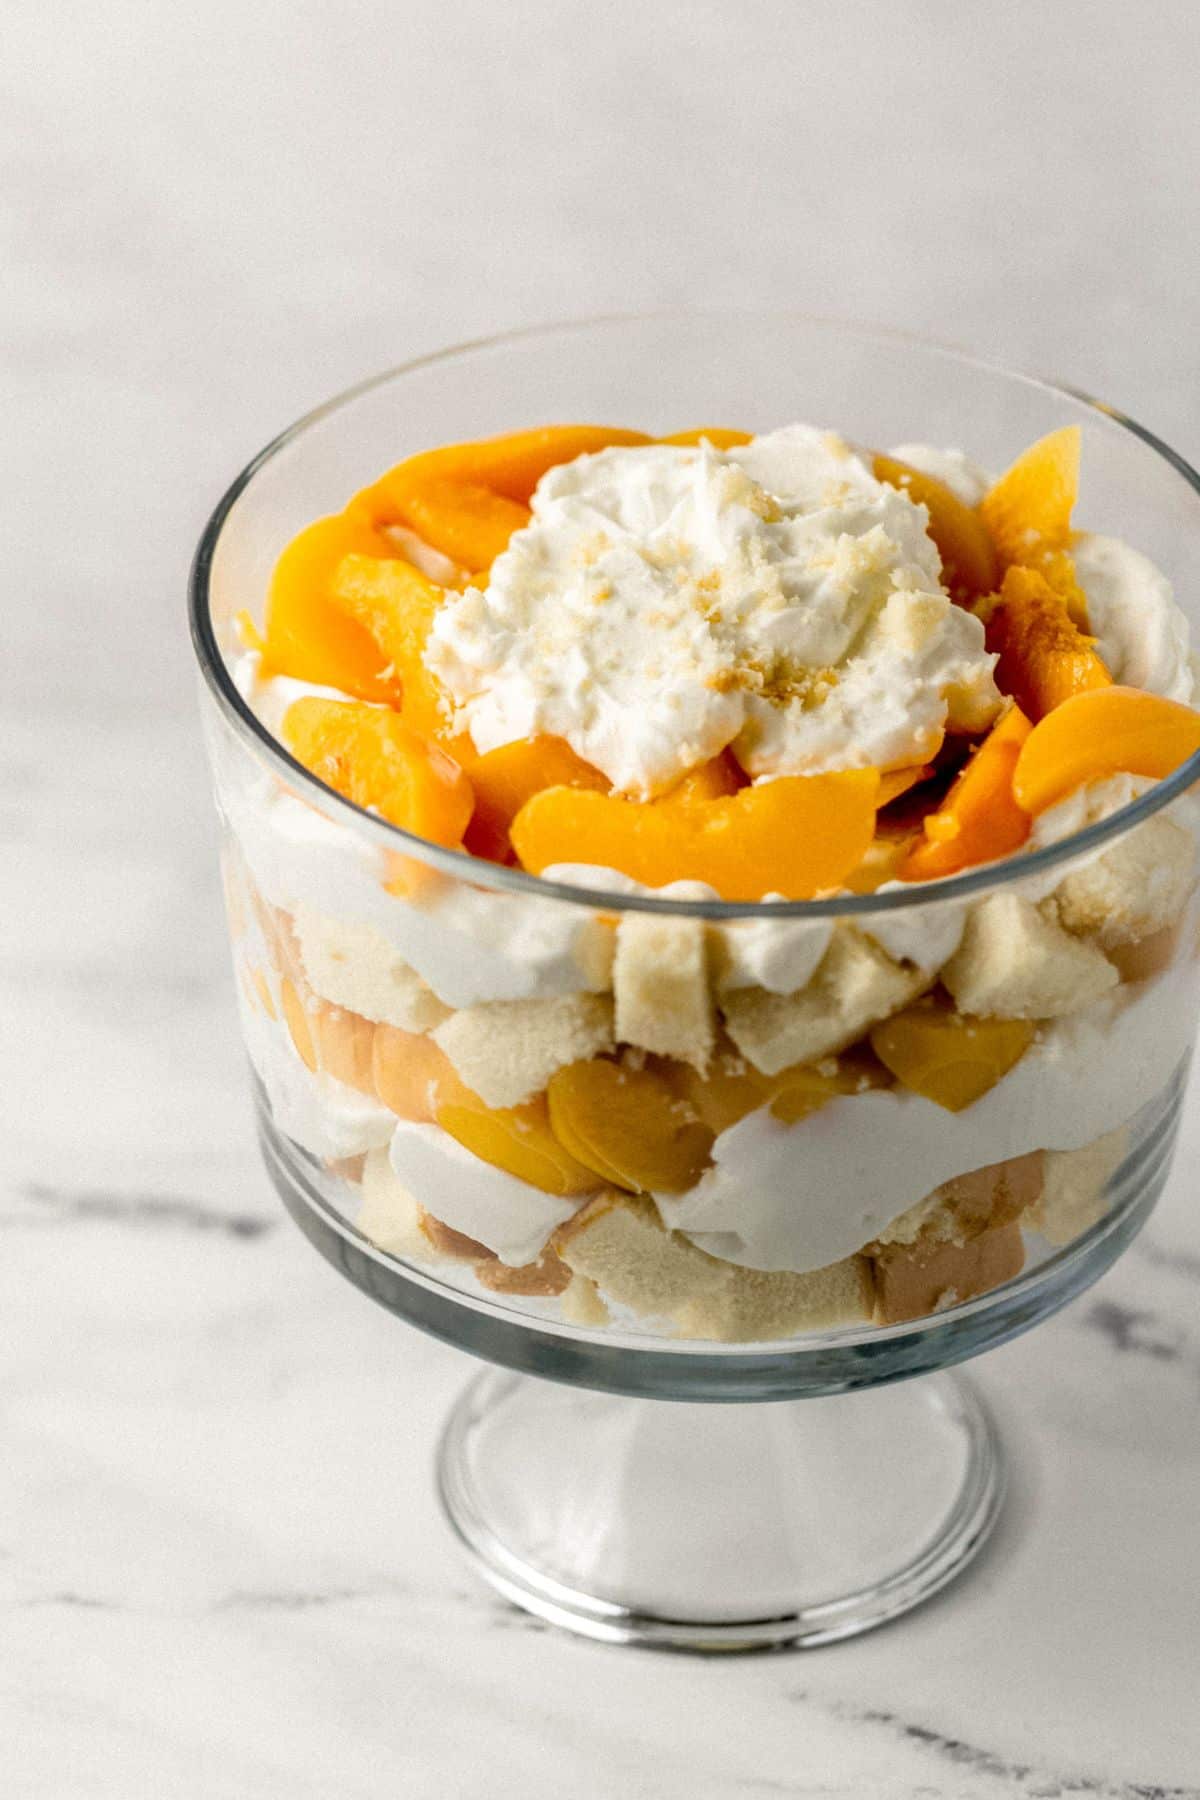
This Peach Trifle with canned peaches is an easy no-bake dessert made with pound cake, peaches, and sweet creamy layers for a simple treat that comes together fast. Light, delicious, and perfect for gatherings, it's a great make-ahead dessert for any occasion.
Updated April 2026: I've refreshed this post with expanded tips, a full FAQ section, make-ahead guidance, and all the variations you've been asking about. Originally posted on May 24, 2022, and photos updated August 31, 2023.
There is something about a trifle sitting in the center of a table that makes people stop what they're doing and say, "Oh, what is that?" My grandmother used to say that the secret to a good potluck dish was making something that looked like you spent all day on it when you actually didn't, and this peach trifle is exactly that. I've been making a version of this dessert for years, and the cream cheese whipped cream layer is the detail that makes people ask me for the recipe every single time.
I'll be honest with you, I've tried the versions made with instant pudding mix and Cool Whip, and there's nothing wrong with those. But when I developed this recipe, I wanted something that tasted a little more homemade, something with real body and richness, so I swapped in cream cheese and heavy whipping cream instead. That combination gives you a cream layer that's thick, slightly tangy, and holds its shape beautifully in each slice. You can taste the difference, and once you make it this way, you won't want to go back.
The best part? This entire dessert comes together in about 15 minutes with just six ingredients, and you can make it ahead of time. Whether you're feeding a crowd at a family gathering, bringing something to a church potluck, or just looking for a no-bake summer dessert that feels a little special, this is the one. Let's get started!
Why You'll Love This Peach Trifle Recipe
- Ready in 15 minutes - No baking, no complicated steps, and no special skills required. Just layer, chill, and serve.
- Real cream cheese whipped cream - Instead of pudding mix or Cool Whip, this recipe uses a homemade cream that's thicker, richer, and genuinely impressive.
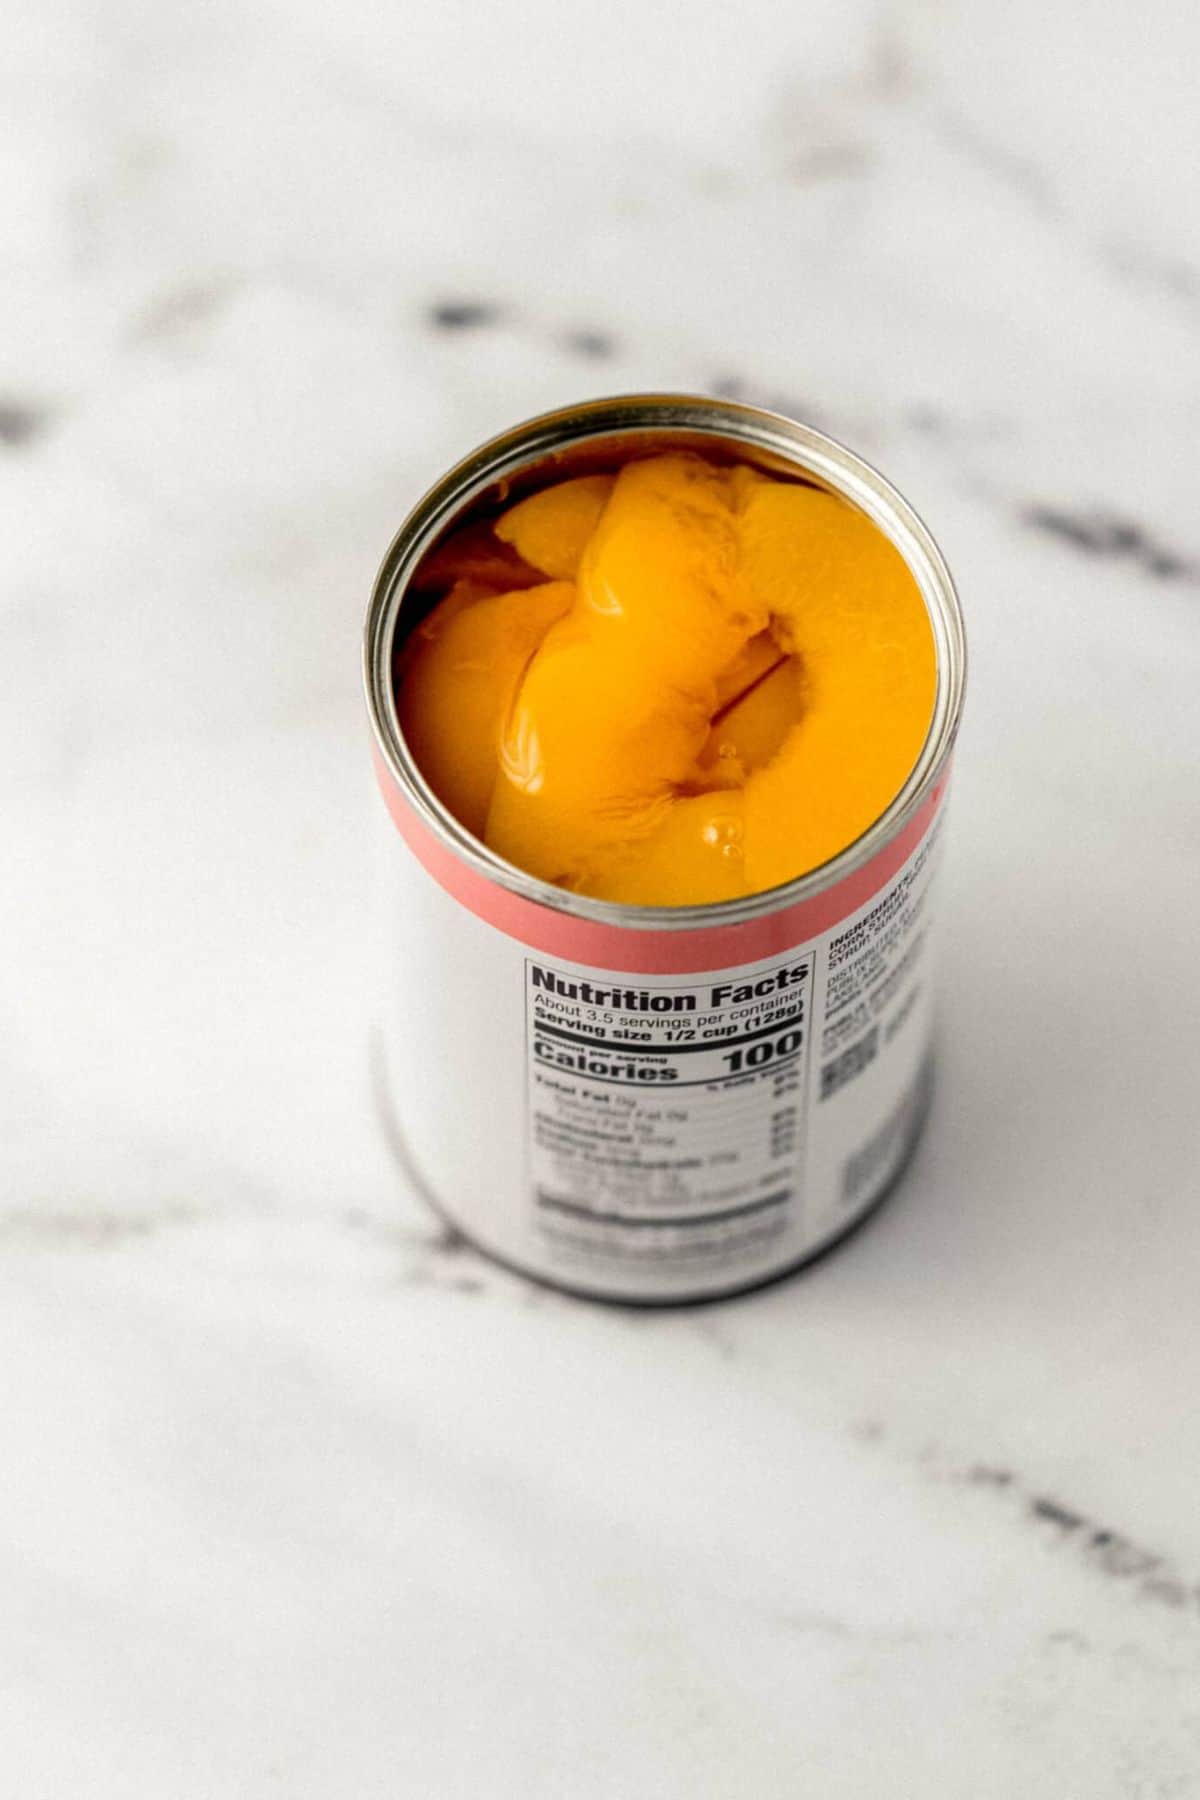
- Canned peaches work perfectly all year - You don't have to wait for peach season. Canned peaches are picked and packed at peak ripeness, so this dessert is just as delicious in January as it is in July.
- Made to feed a crowd - This recipe yields about 16 servings in a standard trifle bowl, making it the perfect dish for gatherings, holidays, and potlucks.
Ingredients You'll Need
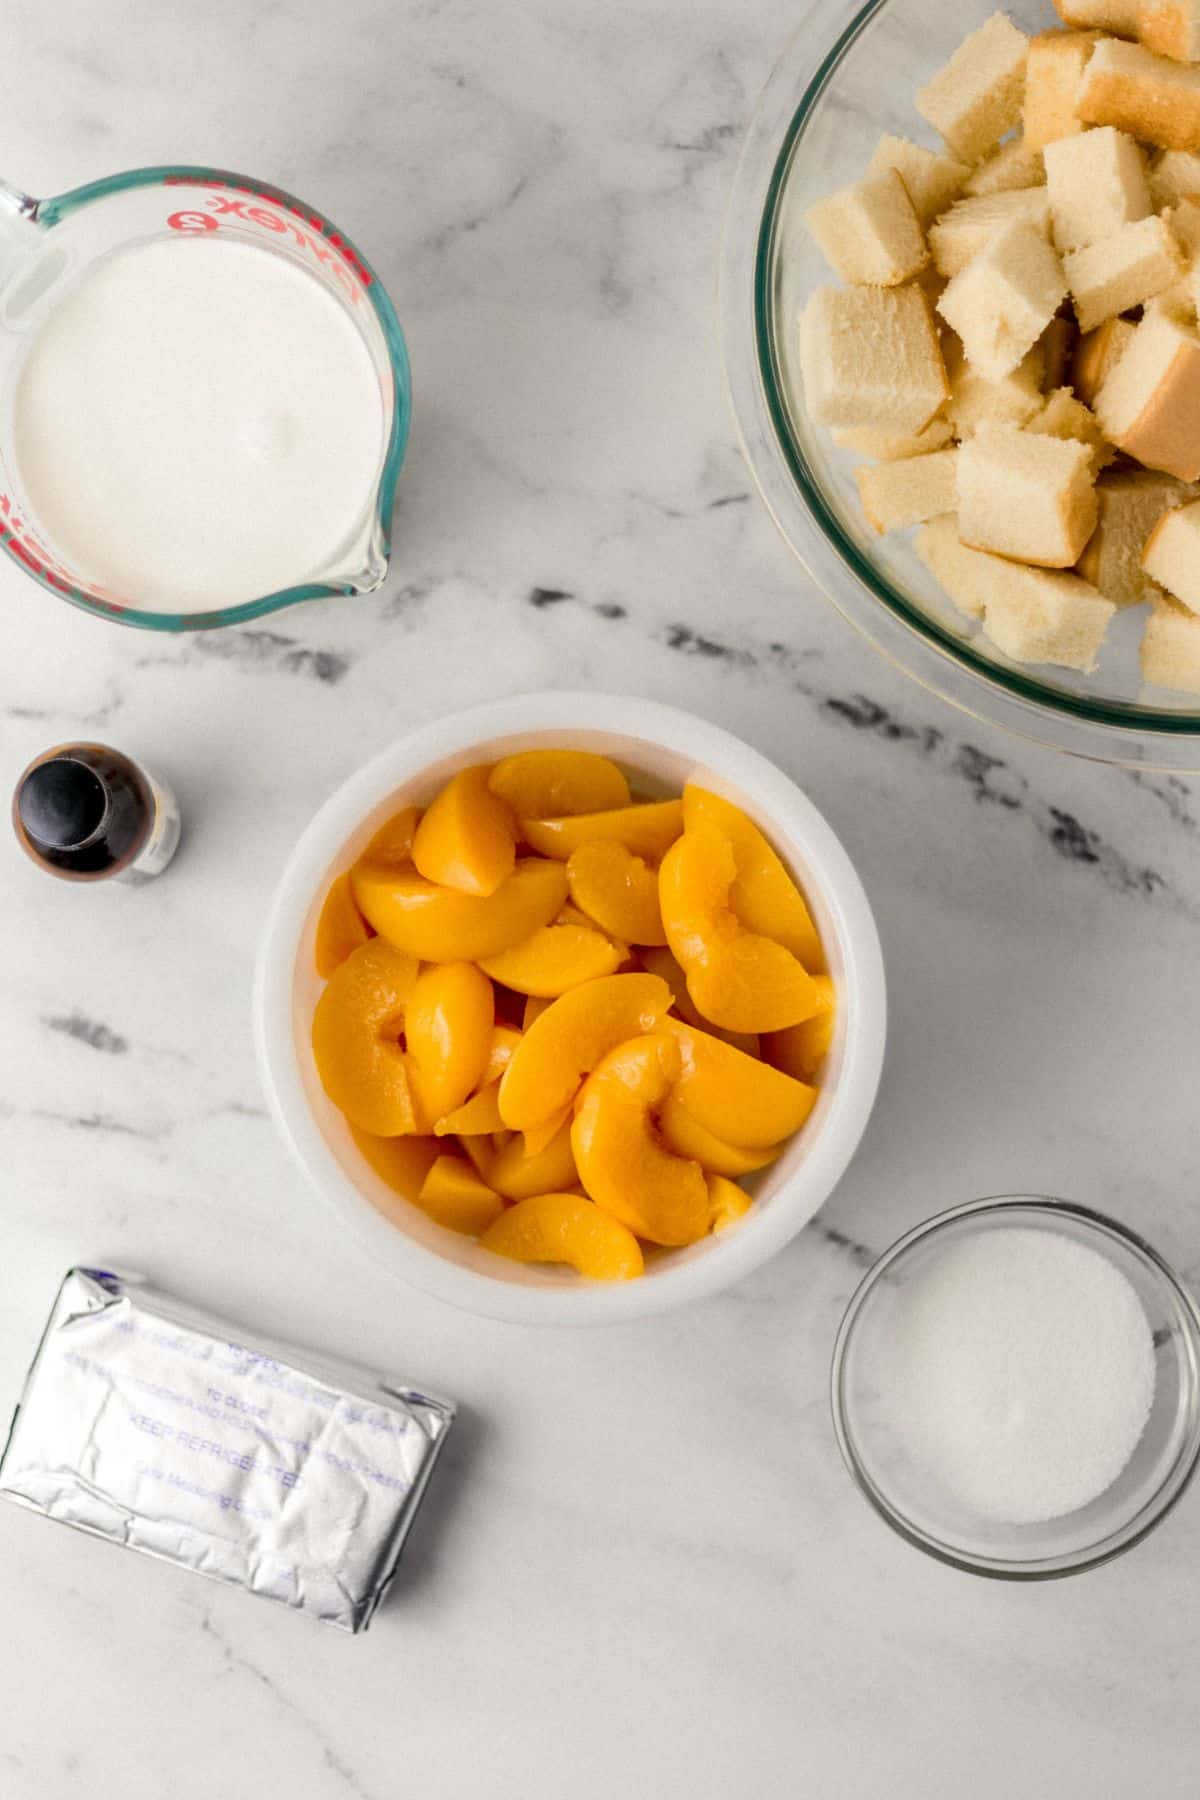
- Canned sliced peaches are the foundation of the fruit layer here. I use three 15-ounce cans for a full trifle bowl with good peach coverage in every layer. Look for peaches in juice rather than heavy syrup. The lighter option lets the natural peach flavor come through without making the dessert overly sweet. Drain them well through a fine-mesh strainer before you start assembling.
- Butter pound cake gives this trifle its structure. The buttery, dense crumb holds up against the cream layer without turning to mush, which is exactly what you want in a layered dessert. I keep it simple by using a store-bought frozen pound cake; just let it thaw completely before cutting into cubes. A bakery-made pound cake works great too. If you want to use angel food cake or sponge cake, see the Variations section below.
- Cream cheese is what separates this trifle from the typical Cool Whip version. Use full-fat cream cheese softened to room temperature for the smoothest result. It gives the cream layer structure, a subtle tang, and a richness that instant pudding can't match.
- Heavy whipping cream combined with the cream cheese creates a thick, spoonable cream that holds its shape in the trifle bowl and slices cleanly when serving. Do not substitute half-and-half or light cream here, you need the fat content for proper structure.
- Granulated sugar sweetens the cream layer just enough. A quarter cup balances the tang of the cream cheese without making the dessert overly sweet, especially since the canned peaches are already sweet on their own.
- Pure vanilla extract rounds out the cream layer with a warm, familiar flavor. Use pure extract rather than imitation for the best result.
👉🏾 See the recipe card below for exact quantities and full instructions.
How to Make This Peach Trifle Recipe
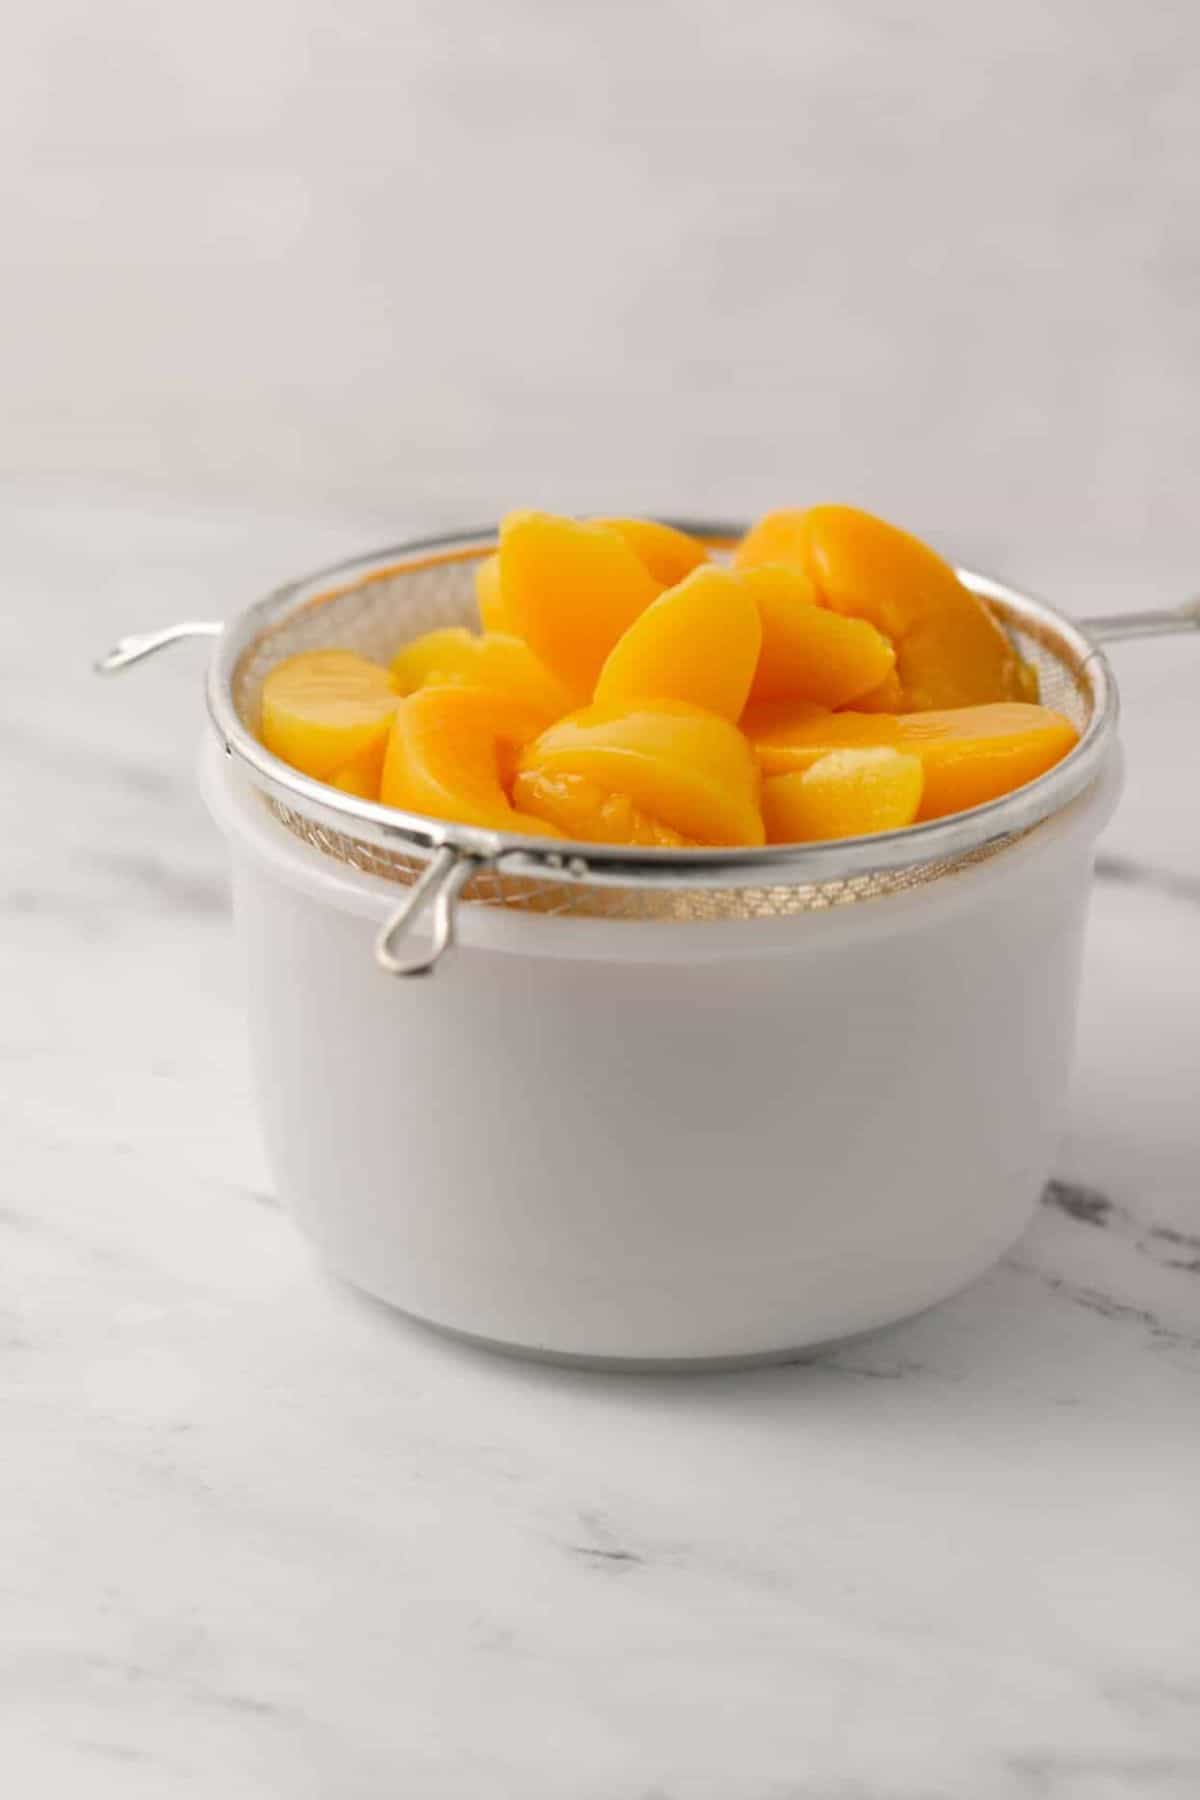
Step 1: Drain Your Peaches Thoroughly
Open all three cans of sliced peaches and pour them into a fine-mesh strainer set over a bowl. Let them drain for at least 5-10 minutes, gently shaking the strainer a time or two. This step matters more than it sounds, excess liquid from the cans will make the cream layer watery and cause the cake to get soggy faster than it should. Do not skip it.
Step 2: Cut and Prep the Pound Cake
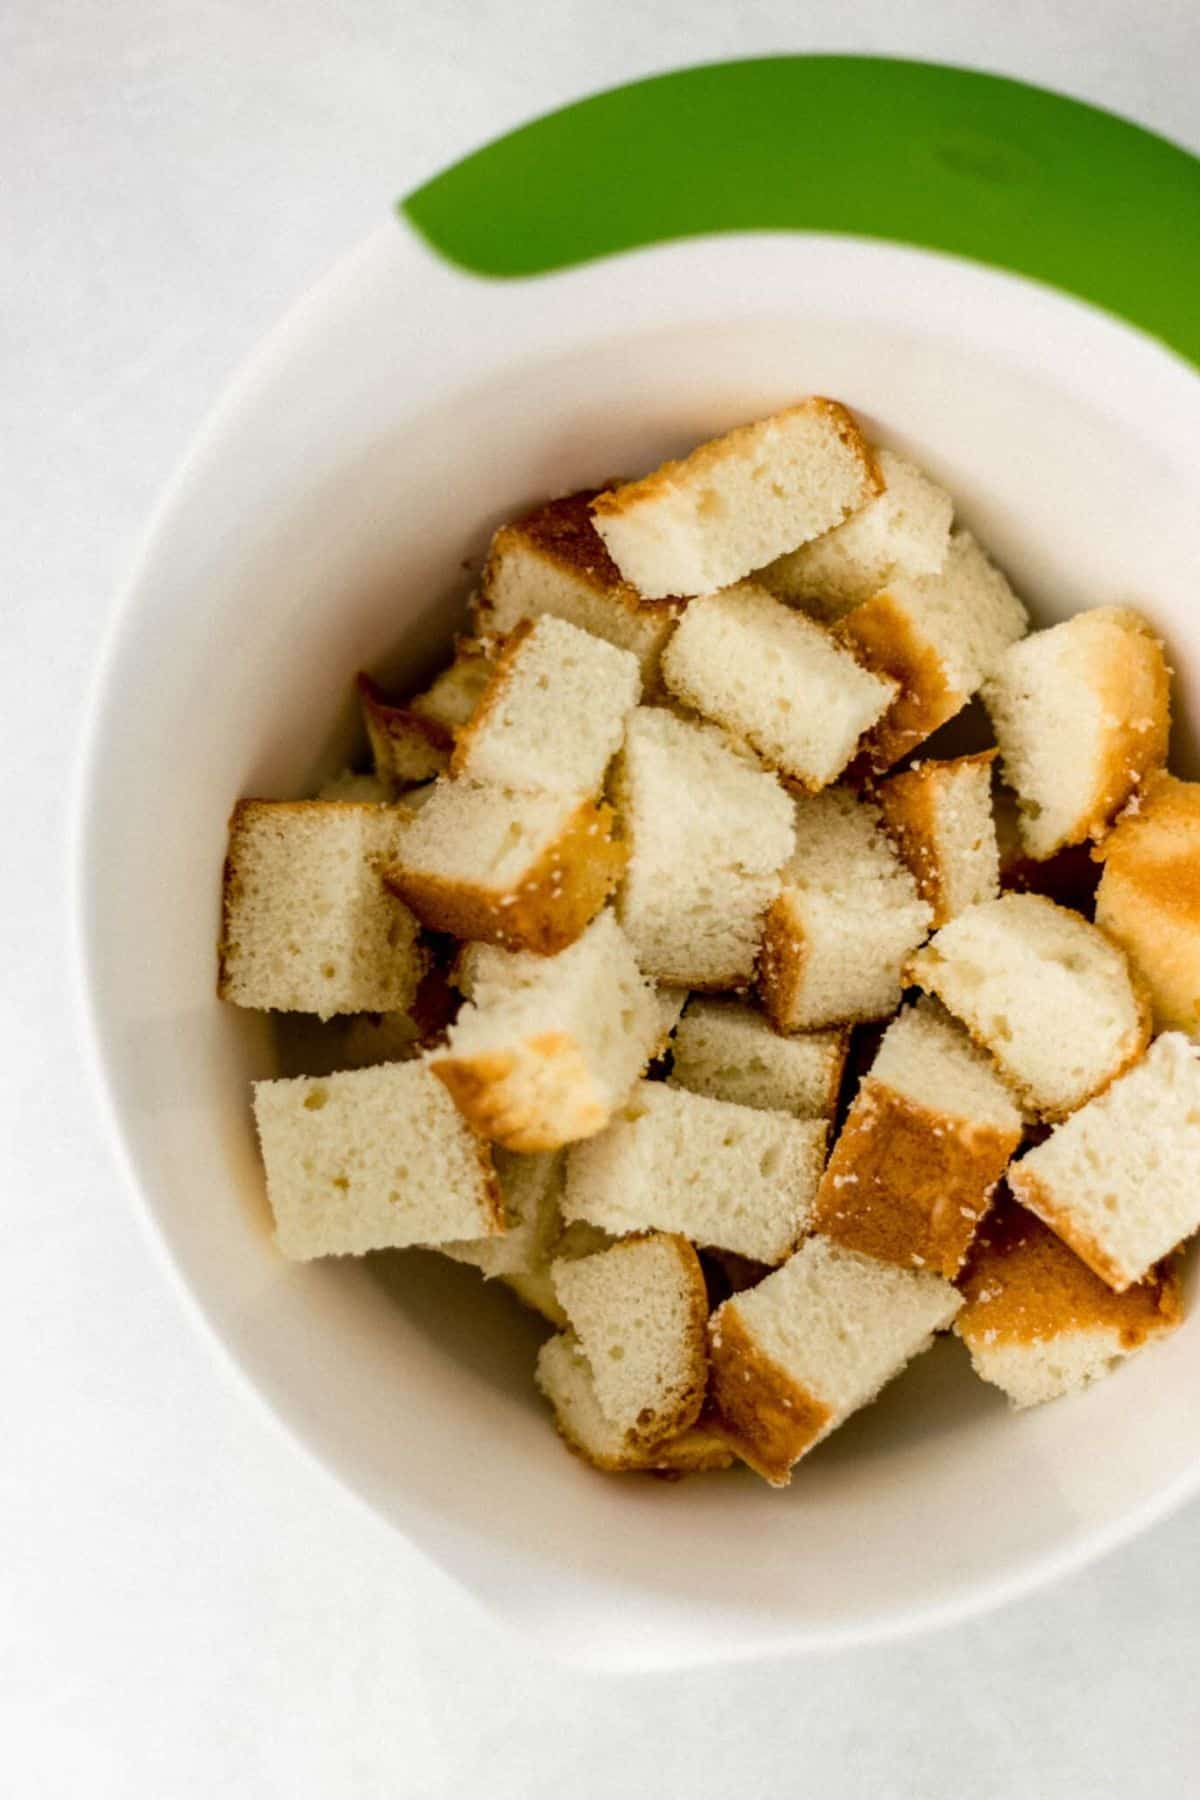
If you're using a frozen pound cake, make sure it's fully thawed before you cut it. A partially frozen cake will tear and crumble unevenly. Cut it into roughly 1-inch cubes. They don't have to be perfect; rustic chunks actually layer nicely. Set aside in a bowl while you make the cream.
Step 3: Make the Cream Cheese Whipped Cream
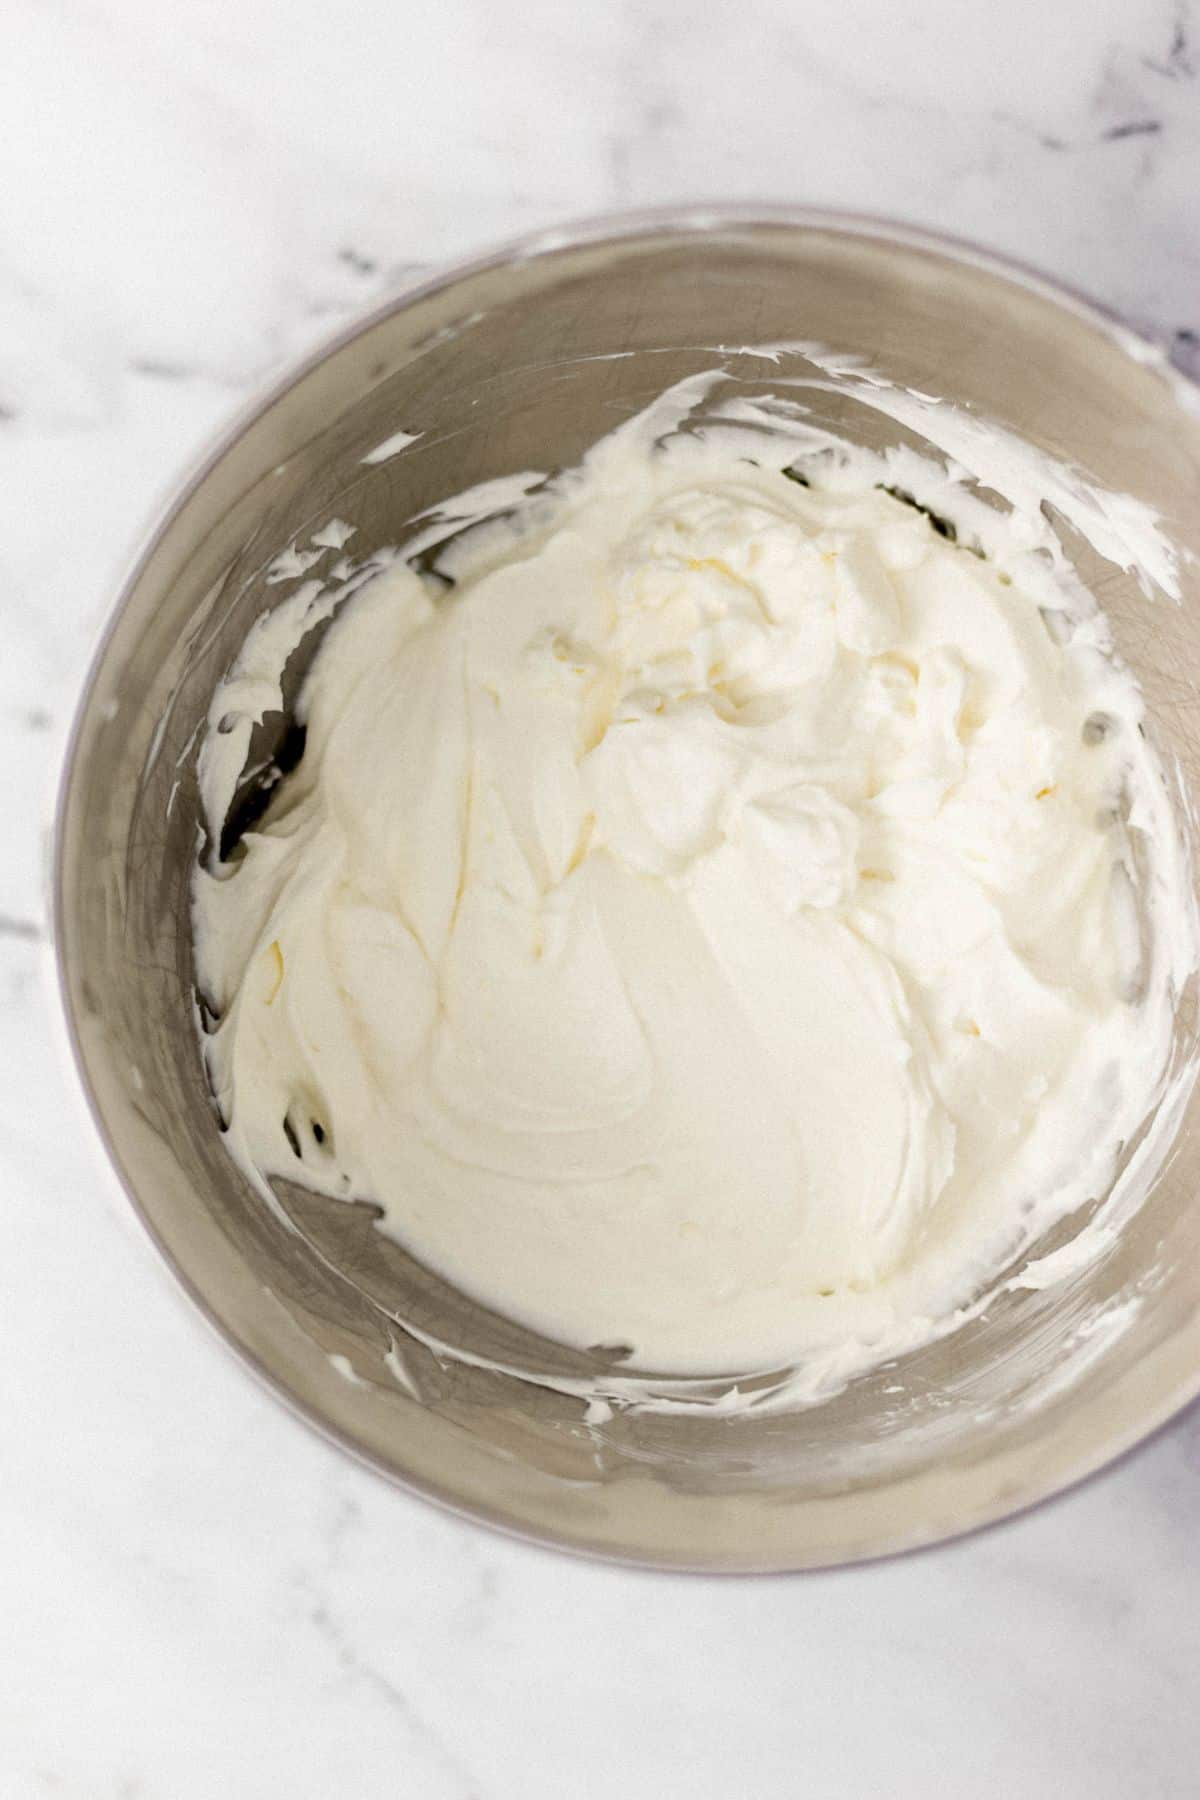
This is the step that makes this trifle special. Using a stand mixer with the paddle attachment (or a hand mixer), beat the softened cream cheese on medium-high speed until completely smooth, no lumps. Scrape down the sides of the bowl as you go. Once smooth, slowly stream in the heavy cream and continue mixing until soft peaks form. Add the sugar and vanilla and mix just until combined. The cream should be thick and spoonable but not stiff. Refrigerate it while you get your trifle bowl ready.
Step 4: Layer in the Trifle Bowl
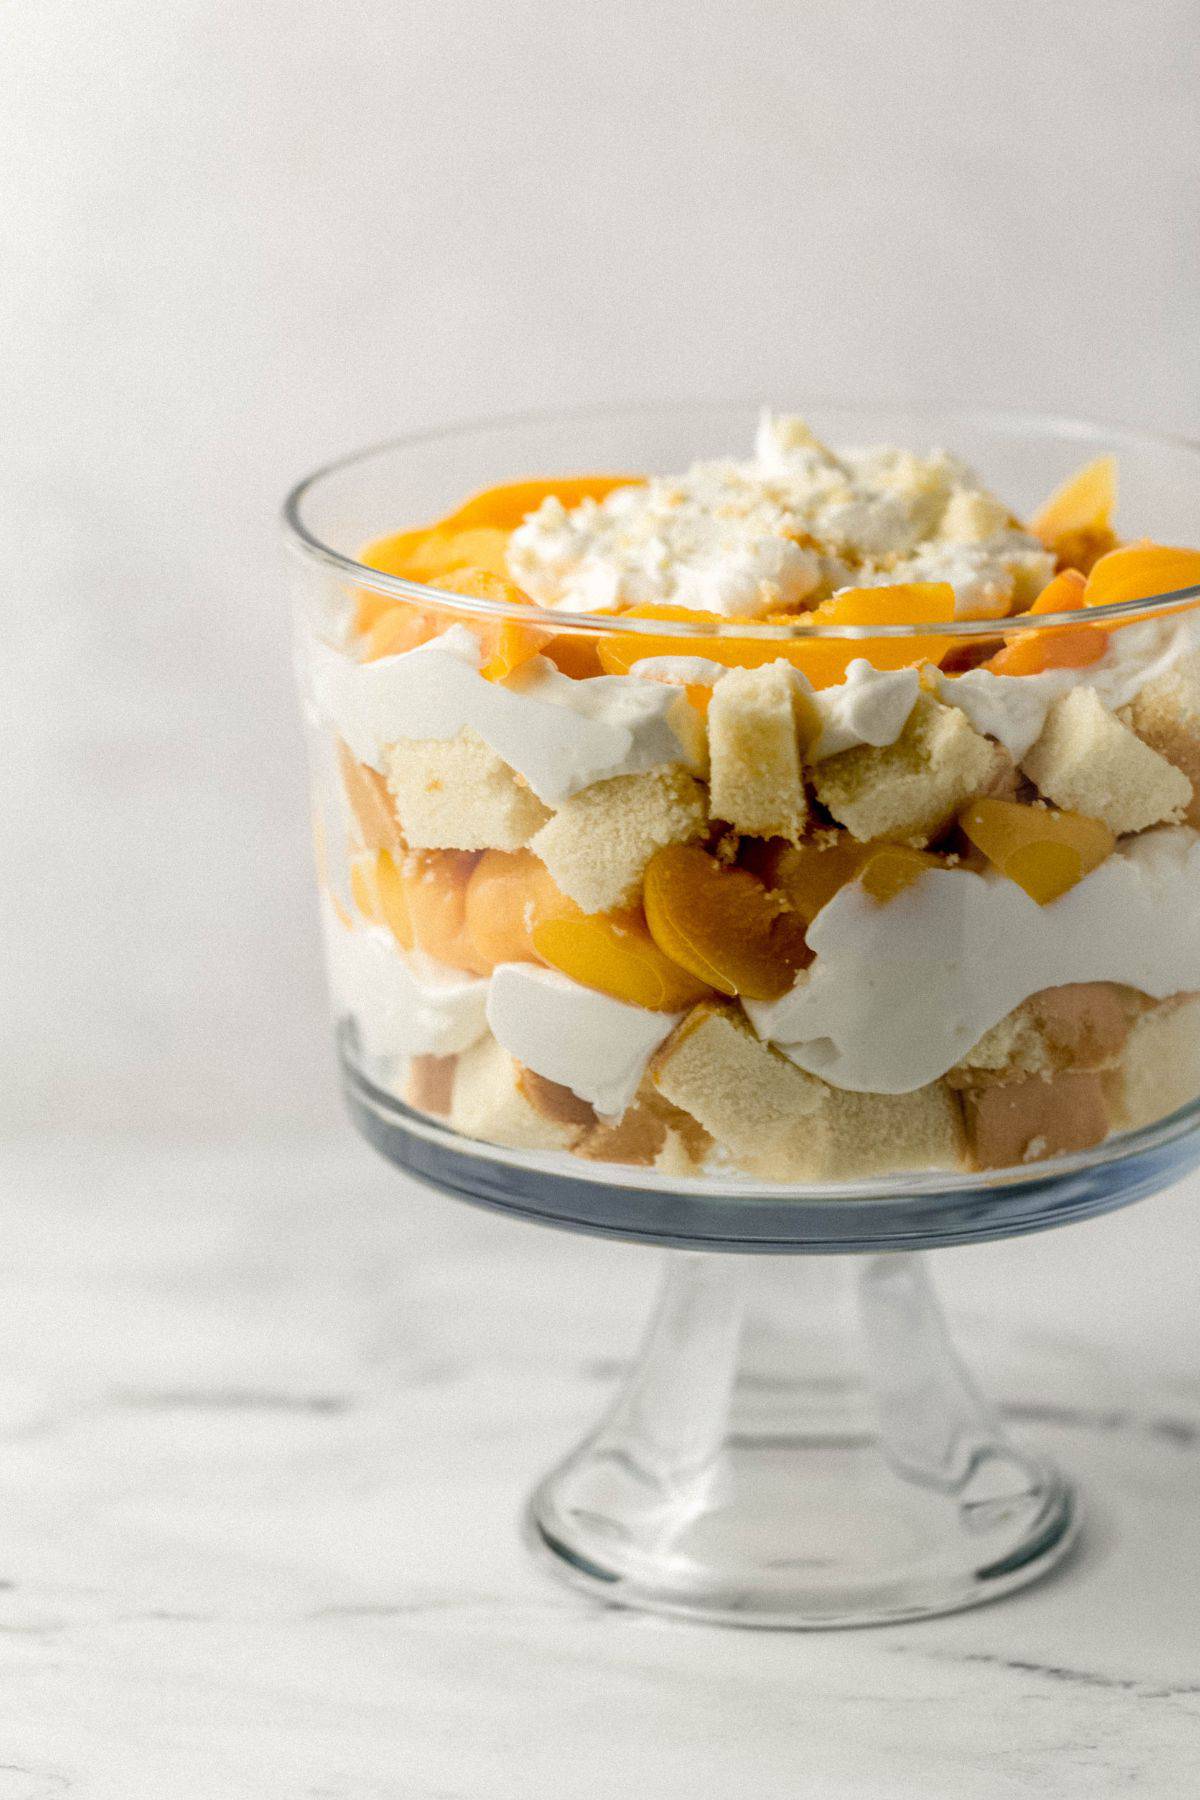
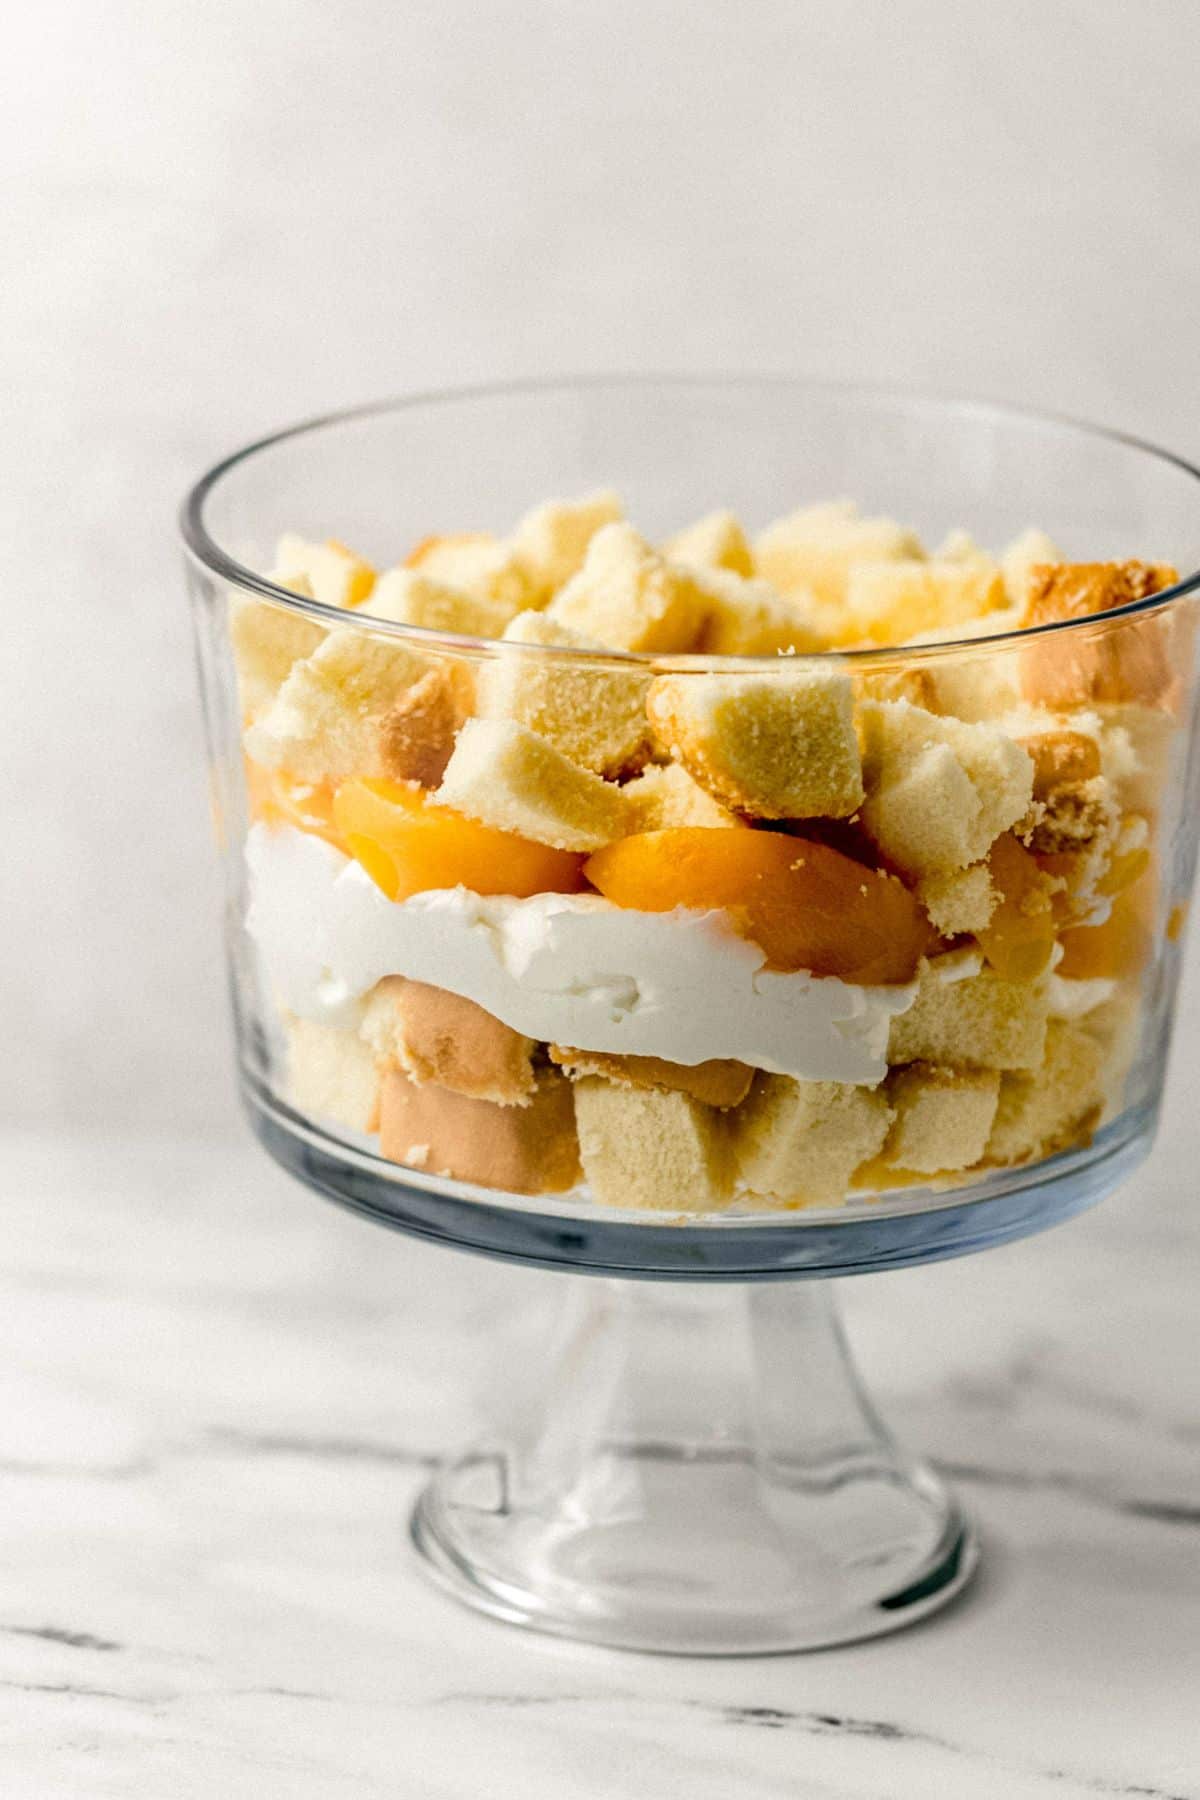
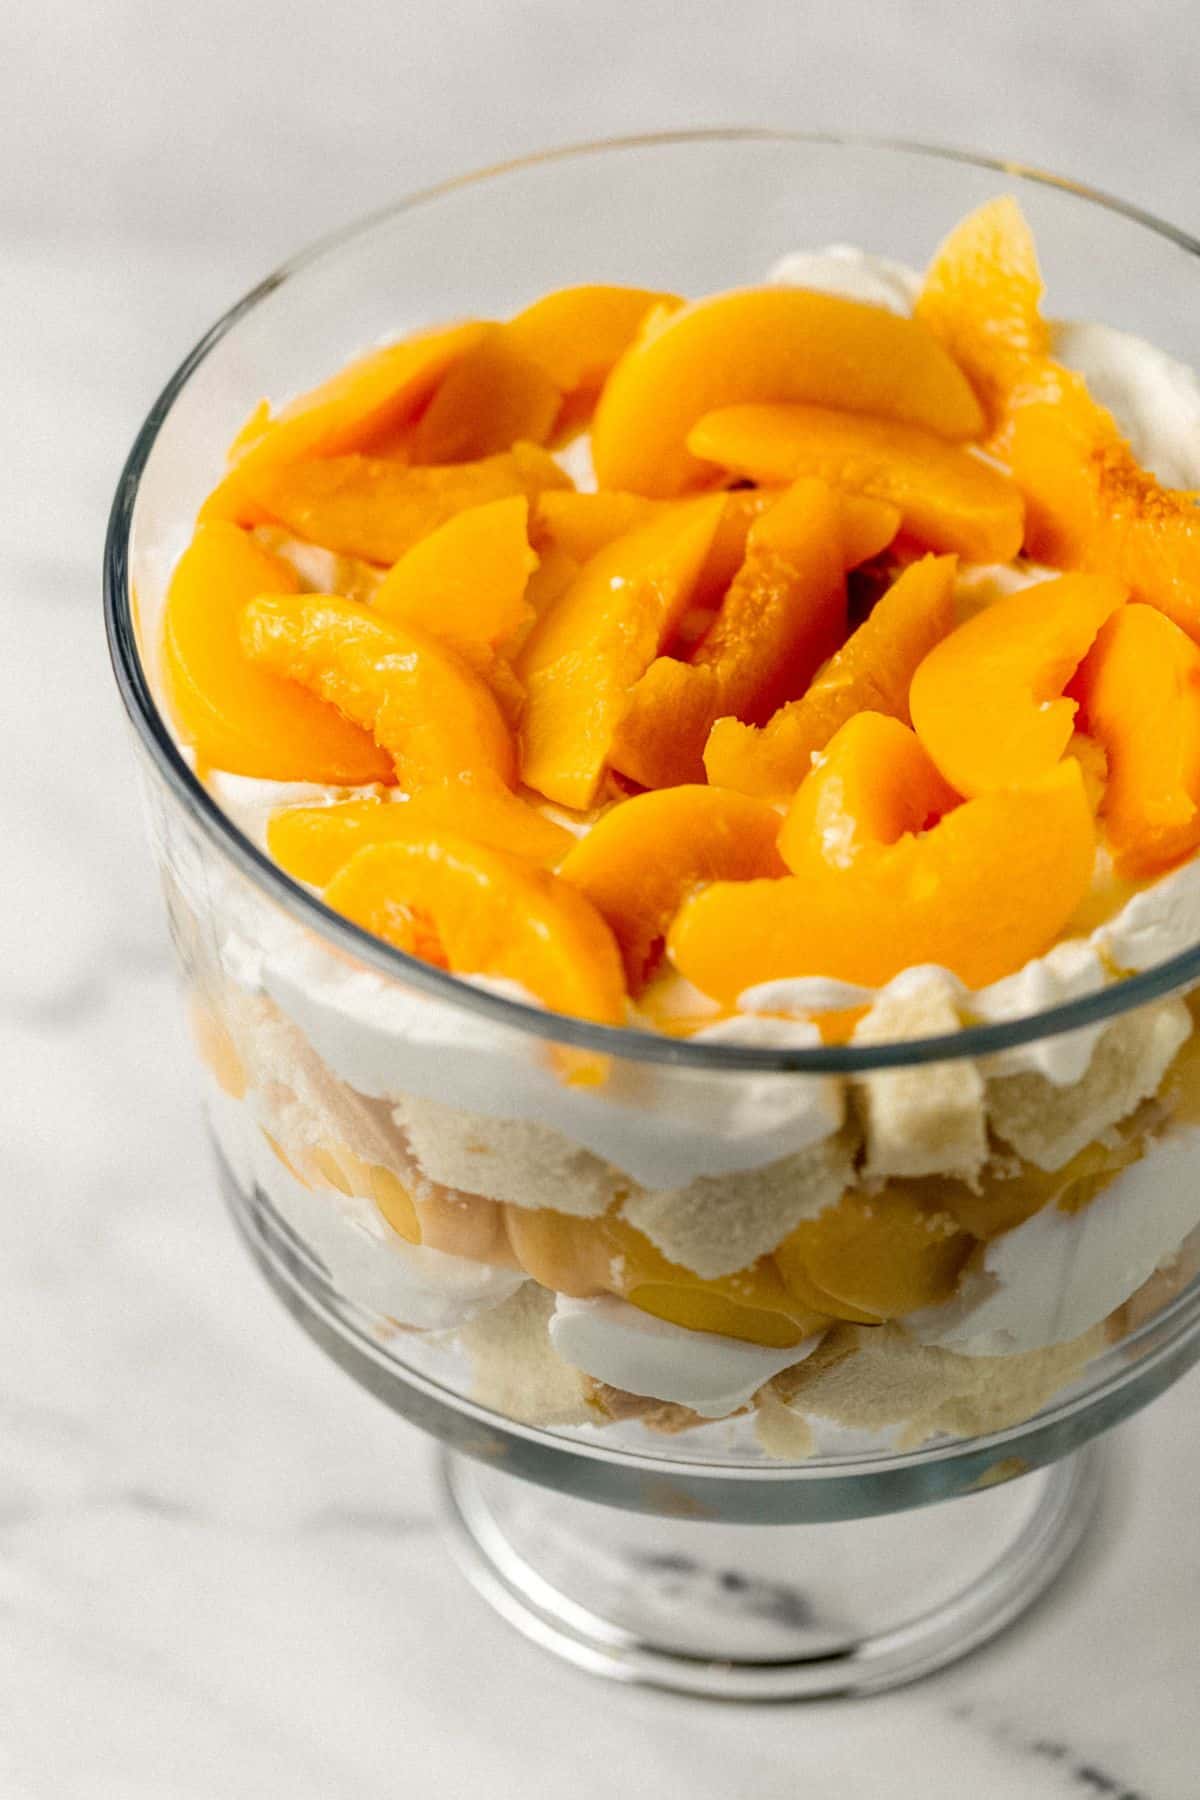
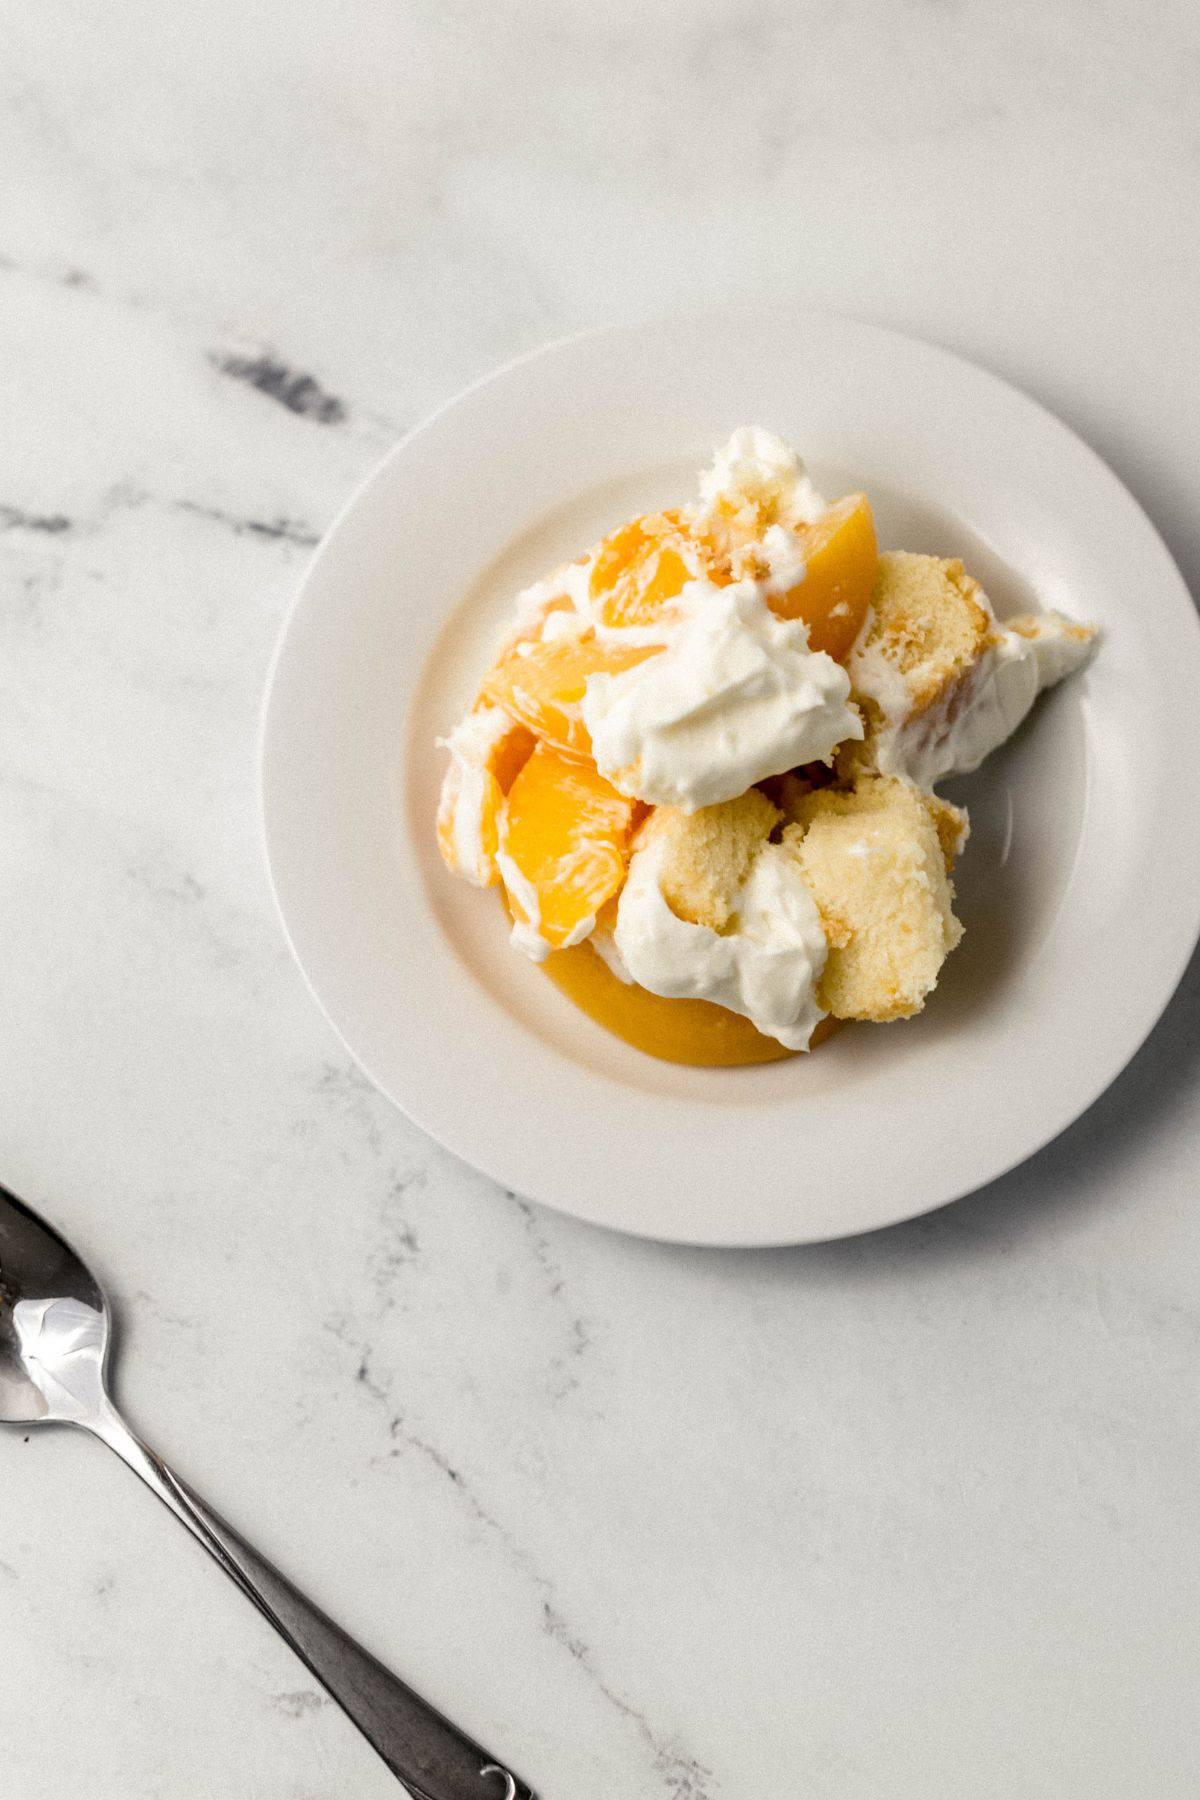
Start with half of the pound cake cubes as your base layer, spreading them to cover the bottom of the bowl. Spoon half of the cream cheese mixture over the cake and smooth it gently with the back of a spoon. Arrange half of the drained peach slices over the cream in an even layer. Then repeat: remaining cake, remaining cream, remaining peaches. Finish with a final layer of cream on top and a few peach slices arranged decoratively. Serve immediately or refrigerate until ready.
LaKita's Expert Tips
- Use a glass trifle bowl or large glass serving bowl. The whole point of a trifle is the visible layers, and you lose that effect in an opaque dish. A standard 3-4 quart glass trifle bowl works perfectly for this recipe.
- Soften your cream cheese fully before mixing. Cold cream cheese will leave you with lumps in the cream no matter how long you mix it. Pull it out of the refrigerator at least 30 minutes before you start, or unwrap it and microwave it for 15-20 seconds.
- Don't rush the draining step on the peaches. The difference between a watery trifle and a clean, sliceable one is how thoroughly you drain the fruit. Give it a full 10 minutes over the strainer.
- Chill the bowl and beaters for the fluffiest cream. If your kitchen runs warm, place your mixing bowl and beaters in the freezer for 5-10 minutes before whipping. Cold equipment helps the cream whip faster and hold better.
- Make it the night before for the best flavor. The cake absorbs some of the cream overnight, creating a softer, more unified texture throughout. It's delicious fresh, but even better the next day.
- Decorate the top layer strategically. Reserve a few of your prettiest peach slices for the top. Arrange them in a fan pattern or a simple circle for a finished, elegant look that requires zero extra effort.
- If your cream layer feels too thick to spread, let it sit at room temperature for 2-3 minutes before spreading. It loosens slightly and becomes easier to work with without losing its structure.
Want To Save This Recipe?
Variations & Substitutions
- Angel food cake instead of pound cake - Angel food cake gives you a lighter, airier trifle that's lower in fat. It soaks up the cream beautifully and has a slightly more delicate texture in each layer. This is a great swap if you want a less rich version.
- Peach cobbler trifle - Bake a simple peach cobbler (or use leftover cobbler), break it into chunks, and use it as your base layer instead of plain pound cake. The cobbler spice and crumble topping add a warm, Southern twist to every layer.
- Fresh or frozen peaches - If it's peak peach season, fresh sliced peaches are wonderful here. Peel and slice them, then toss with a teaspoon of lemon juice to slow browning. Frozen sliced peaches work too, just thaw completely and drain very well before using.
- Add a pudding layer - For an even richer dessert, prepare one box of instant vanilla or cheesecake pudding according to package directions, let it set, then add it as an additional layer between the cream and the peaches.
- Mini individual trifles - Layer all the same components into mason jars or clear plastic cups for individual servings. Perfect for parties where you don't want to serve from a shared bowl. Refrigerate until ready to serve.
- Strawberry peach trifle - Add a layer of fresh sliced strawberries between the peach layer and the cream for a beautiful red, cream, and peach color combination that's stunning for summer entertaining.
Make-Ahead & Storage
Make-Ahead
This peach trifle is an ideal make-ahead dessert. You can assemble the full trifle up to 24 hours in advance and store it covered in the refrigerator. The flavors actually improve overnight as the cake absorbs the cream and the layers meld together. If making more than 24 hours ahead, I'd recommend holding off on the final top layer of cream and adding it a few hours before serving so it looks fresh.
You can also prep the components separately: make the cream cheese mixture up to 2 days ahead and store covered in the refrigerator. Drain and refrigerate the peaches up to a day ahead. Cut the pound cake the morning of and cover loosely with plastic wrap until you're ready to assemble.
Storage & Reheating
Store the assembled trifle covered with plastic wrap or a fitted lid in the refrigerator for up to 2 days. After 2 days, the cake becomes quite soft and the cream layer begins to weep liquid, so it's best enjoyed within that window. This dessert does not freeze well. The cream layer separates and the texture of the cake becomes unpleasant after thawing. Serve cold, straight from the refrigerator. No reheating needed or recommended.
What to Serve with Peach Trifle
- As the dessert finale to a Southern summer dinner - Pair it after a meal of Hibachi Vegetables, grilled chicken, or a big pot of Easy White Chicken Chili for a full spread that satisfies everyone.
- Alongside other peach desserts for a peach-themed party - Set it next to a warm Easy Peach Cobbler or some Brown Sugar Baked Peaches for a seasonal dessert table that celebrates peak peach season.
- With sweet iced tea or lemonade - The cream and peach combination is light enough that it pairs beautifully with a cold drink on a warm afternoon.
- At a church potluck or family reunion - Transport it in the trifle bowl with plastic wrap secured over the top. It travels well and looks impressive without any plating required.
- As a base for a dessert bar - Set out the assembled trifle alongside bowls of extra peach slices, crushed graham crackers, or toasted pecans so guests can customize their serving.
Frequently Asked Questions
Absolutely, in fact, this recipe is specifically designed for canned peaches. Canned peaches are picked and packed at peak ripeness, available year-round, and already sliced, which makes this a truly quick dessert to put together. Just be sure to drain them well before layering so the excess liquid doesn't water down your cream. Look for peaches in juice rather than heavy syrup for a less sweet, more balanced result.
A glass trifle bowl is the traditional choice and the best option because the visible layers are half the appeal of a trifle. A standard 3-4 quart glass trifle bowl works perfectly for this recipe. If you don't have one, a large glass mixing bowl, a glass punch bowl, or even a large glass serving dish works. You can also make individual portions in mason jars or clear plastic cups for a party.
Yes, and I actually recommend it. Assembling the trifle the night before gives the cake time to absorb the cream slightly, which creates a more unified, richer texture in every bite. Assemble up to 24 hours ahead and keep covered in the refrigerator. Hold off on the decorative top layer of cream until a few hours before serving if you want it to look its freshest.
The trifle keeps well covered in the refrigerator for up to 2 days. After that, the cake softens significantly and the cream layer begins to release liquid, which affects both the texture and appearance. It's best enjoyed within 1-2 days of assembly, and it should not be frozen.
Yes! Angel food cake is a popular substitute that gives you a lighter, airier trifle. It absorbs the cream layer beautifully and has a slightly more delicate texture. The trade-off is that it softens faster than pound cake, so if you use angel food cake, I'd recommend assembling the trifle no more than a few hours ahead of serving rather than overnight.
The cream cheese is what gives this trifle its distinctive thick, tangy cream layer. If you need to avoid it, you can substitute mascarpone cheese for a richer, milder flavor, or simply use stabilized whipped cream (heavy cream whipped to stiff peaks with a tablespoon of powdered sugar). Keep in mind the cream layer will be lighter and less structured without the cream cheese.
You can, though the cream layer will be lighter and sweeter. If substituting, skip the cream cheese entirely and fold a softened 8-ounce brick of cream cheese into the Cool Whip for a hybrid version, or just use the Cool Whip on its own as a simpler topping. The homemade cream cheese version in this recipe holds its shape better and has a more satisfying, rich flavor.
Start with the sturdiest ingredient at the bottom, that's your cake cubes. Follow with the cream layer, then the fruit. Repeat for a second full set of layers, then finish the top with a generous layer of cream and your prettiest peach slices for presentation. The key is making sure each layer is spread evenly to the edges of the bowl so the layers are visible from the side.
Yes! Adding a layer of prepared instant vanilla or cheesecake pudding is a popular variation that makes the trifle even richer. Prepare the pudding per package directions, let it set in the fridge, then add it as a fourth layer between the cream and the fruit. You'd be adding an extra layer to each cycle, so you may need a larger bowl or slightly less of each component.
Definitely. Layer the same ingredients in mason jars, clear plastic cups, or individual dessert glasses. Individual trifles are perfect for parties and showers where you want portion control and easy serving. They also refrigerate well. Make them up to a day ahead, cover with plastic wrap, and refrigerate until serving.
📖 Recipe

Peach Trifle Recipe with Canned Peaches
Equipment
- 1 Glass Trifle Bowl
- 1 Stand mixer with hook attachement
Ingredients
- 3 cans (15 ounces) sliced canned peaches, drained
- 16 ounces butter pound cake
- 8 ounces cream cheese, softened
- 1 ¾ cups heavy whipping cream
- ¼ cup granulated sugar
- ¼ teaspoon pure vanilla extract
Instructions
- Begin the delicious peach trifle recipe by opening the three 15-ounces cans of sliced peaches and allowing them to drain completely of the liquid. To do this, simply use a fine-mesh strainer over a medium-size bowl. Set aside.
- Allow the 16 ounces of butter pound cake to thaw completely if using frozen and cut into small cubed pieces and set aside.
- Next, use a stand mixer with the paddle attachment on medium-high speed. Add the 8 ounces cream cheese and mix until creamy and smooth. Be sure to scrape down the sides of the bowl during the process as needed.
- Slowly add the 1 ¾ cups heavy cream and continue mixing until soft peaks form. Add the ¼ cup granulated sugar and ¼ teaspoon vanilla extract and mix until smooth. Remove and refrigerate until ready to assemble the peach trifle.
- Begin assembling the peach trifle in a glass trifle bowl or large glass bowl. Start the first layer with half of the cut-up cake, followed by the second layer by topping with an even layer of cream using a spoon. Then add an even layer of peaches.
- Repeat the three layers again with the other half of the cake, cream, and peaches.
- Finish the top with a layer of the prepared whipped cream. Serve immediately or place into the refrigerator until ready to serve and enjoy!
- Store any leftovers in the refrigerator for 1 to 2 days.
Did You Make This Recipe?
If you give this peach trifle a try, I'd love to know what you think! It's one of those recipes that looks so impressive but is genuinely one of the easiest things I make, and I hope it becomes a go-to for you too. Leave a star rating and a comment below, share a photo on Instagram and tag @SimplyLaKita, or save it to your desserts board on Pinterest for the next time you need a no-fuss crowd-pleaser.

Leave a Reply