


Quick Pineapple Tart is an easy puff pastry dessert made with pineapple rings and a few simple ingredients for a sweet, flaky, and delicious treat. Perfect for brunch, dessert, or sharing, they come together in minutes.
Updated April 2026: I've refreshed this post with new tips, an expanded FAQ, make-ahead guidance, and storage instructions based on your questions and feedback. Originally posted on May 4, 2016, and the photos were updated on August 30, 2023.
I still remember the night I stumbled across this pineapple tart recipe. I was settled in on the couch, half-watching a cooking show, when I saw a quick flash of golden puff pastry topped with pineapple coming out of the oven. Those two ingredients, puff pastry and canned pineapple rings, were already sitting in my kitchen, and I knew I had to make my own version immediately.
What I love about this recipe is that it goes so far beyond what you'd expect from such a short ingredient list. The secret is the double pineapple technique: you blend most of the pineapple rings into a smooth, ginger-spiced filling that gets spread inside the pastry, then you crown each tart with a whole pineapple ring on top. That layering of flavor is what makes every single bite taste like something from a bakery, not a Tuesday night in your kitchen. I've been making these for years, and they never disappoint.
Whether you need a quick dessert for company, something special for a weekend treat, or just a reason to finally use that box of puff pastry sitting in your freezer, these tarts are the answer. Let's get started!
Jump to:
Why You'll Love This Pineapple Tart Recipe
- Ready in 30 minutes - From oven-preheat to golden tarts on the table, this entire recipe comes together in about half an hour. Impressive results with minimal effort.
- Double pineapple flavor - A smooth, ginger-spiced pineapple filling inside and a whole caramelized pineapple ring on top means every bite is layered with tropical flavor.
- Pantry-friendly ingredients - Canned pineapple, frozen puff pastry, and a handful of everyday staples are all you need. No special trips to the grocery store.
- Elegant enough for guests - That golden, flaky pastry makes these look like they came from a bakery, and nobody has to know they took less than 30 minutes.
Ingredients You'll Need
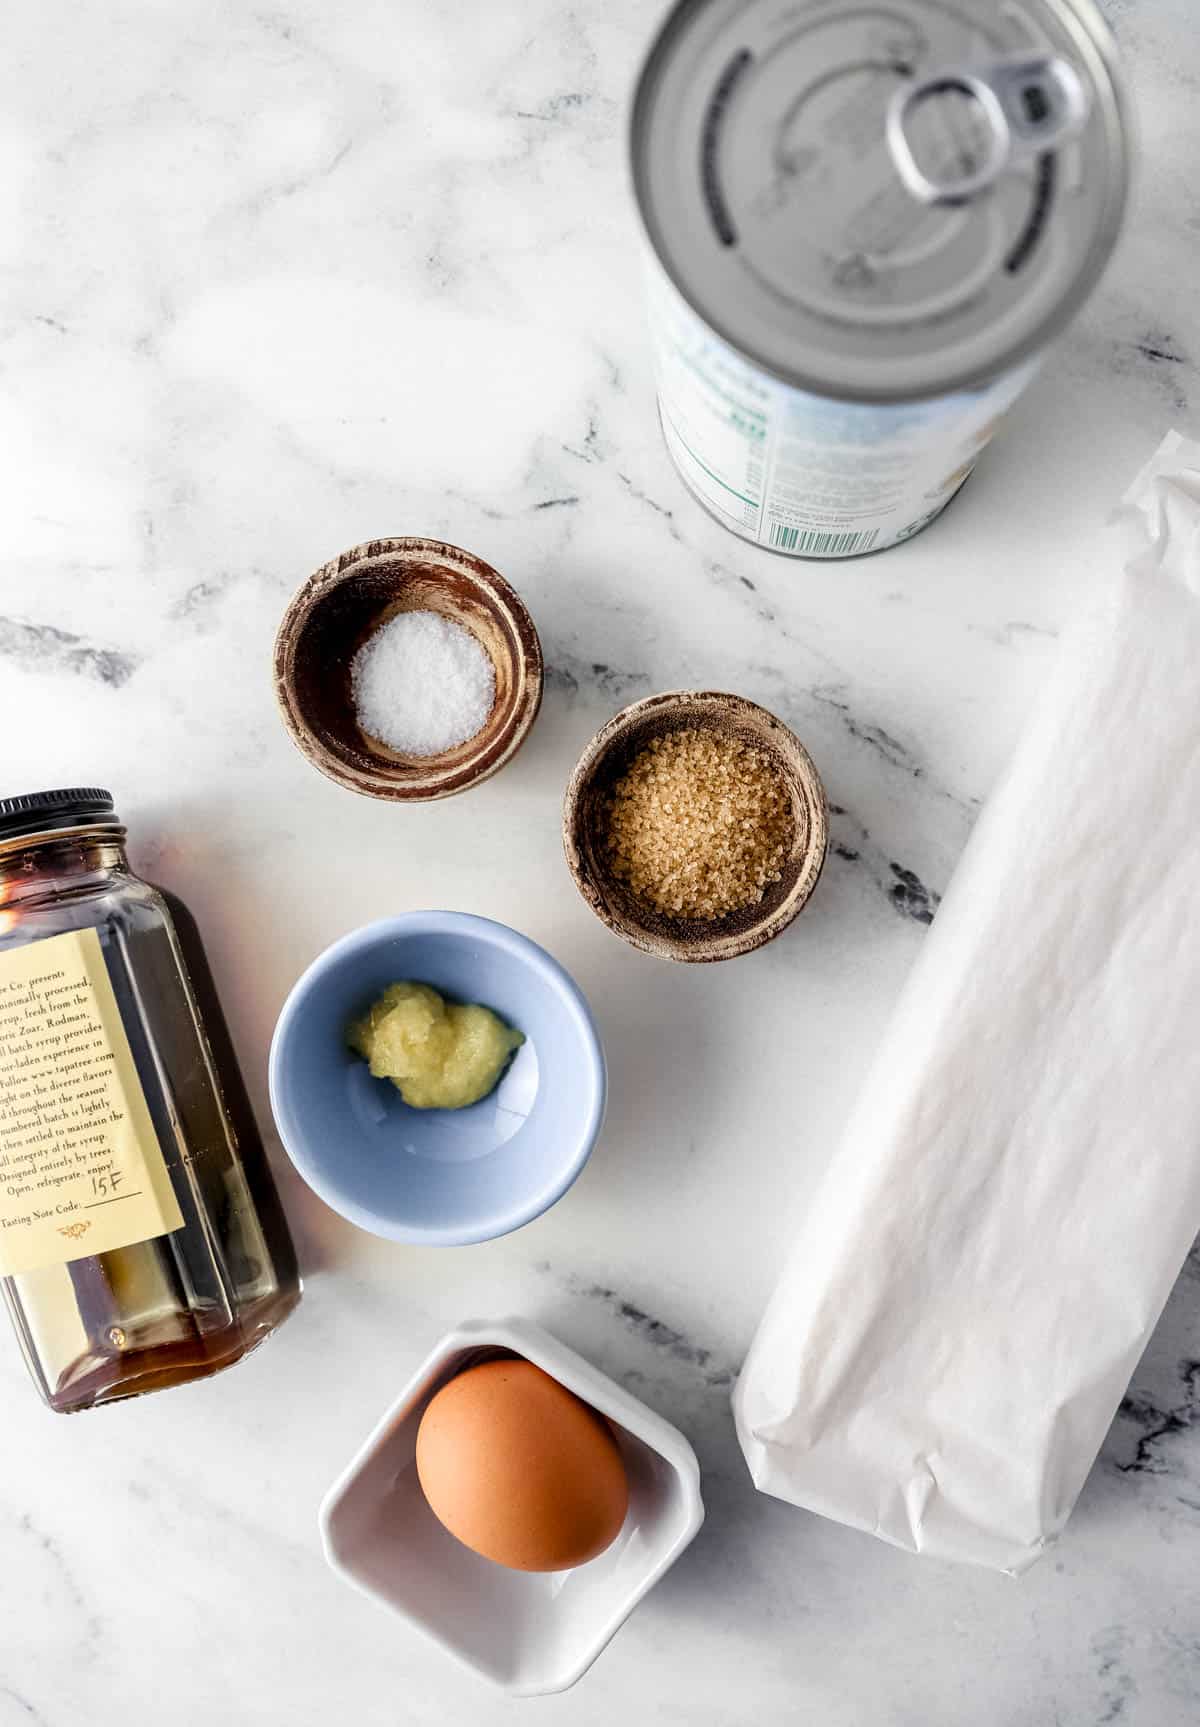
- Puff pastry is the foundation of these tarts and it does the heavy lifting in terms of texture. Store-bought frozen puff pastry is exactly what you want here. It bakes up beautifully flaky and golden without any extra effort. Look for pastry sheets, not pastry shells or cups. This recipe uses two full sheets, which is typically one full box. Pepperidge Farm is easy to find in most grocery stores and works wonderfully. Dufour is a step up in quality if you can locate it.
- Canned pineapple rings are used two ways in this recipe: most of them get blended into the filling, and a few are reserved to sit on top of each tart during baking. You'll drain the liquid from the can before using it. Fresh pineapple can be substituted for the filling, but frozen pineapple is not recommended, as it releases too much water.
- Fresh ginger adds a bright, slightly spicy warmth to the pineapple filling that you simply cannot get from ground ginger. Mince it very finely so it blends smoothly into the filling.
- Maple syrup sweetens the filling and gives it a slightly sticky consistency that holds together beautifully inside the pastry. Honey or agave nectar work as substitutes with a slightly different flavor profile.
- An egg is beaten into an egg wash and brushed over the assembled tarts before baking. This is what gives you that gorgeous golden-brown color and lightly crisp top layer.
- Coarse sugar sprinkled over the top before baking caramelizes in the oven and creates a crackly, slightly sweet crust. Brown sugar, raw sugar, or turbinado sugar all work beautifully here and add a little extra richness to the finished tart.
👉🏾 See the recipe card below for exact quantities and full instructions.
How to Make Pineapple Tarts
Step 1: Make the Pineapple Filling
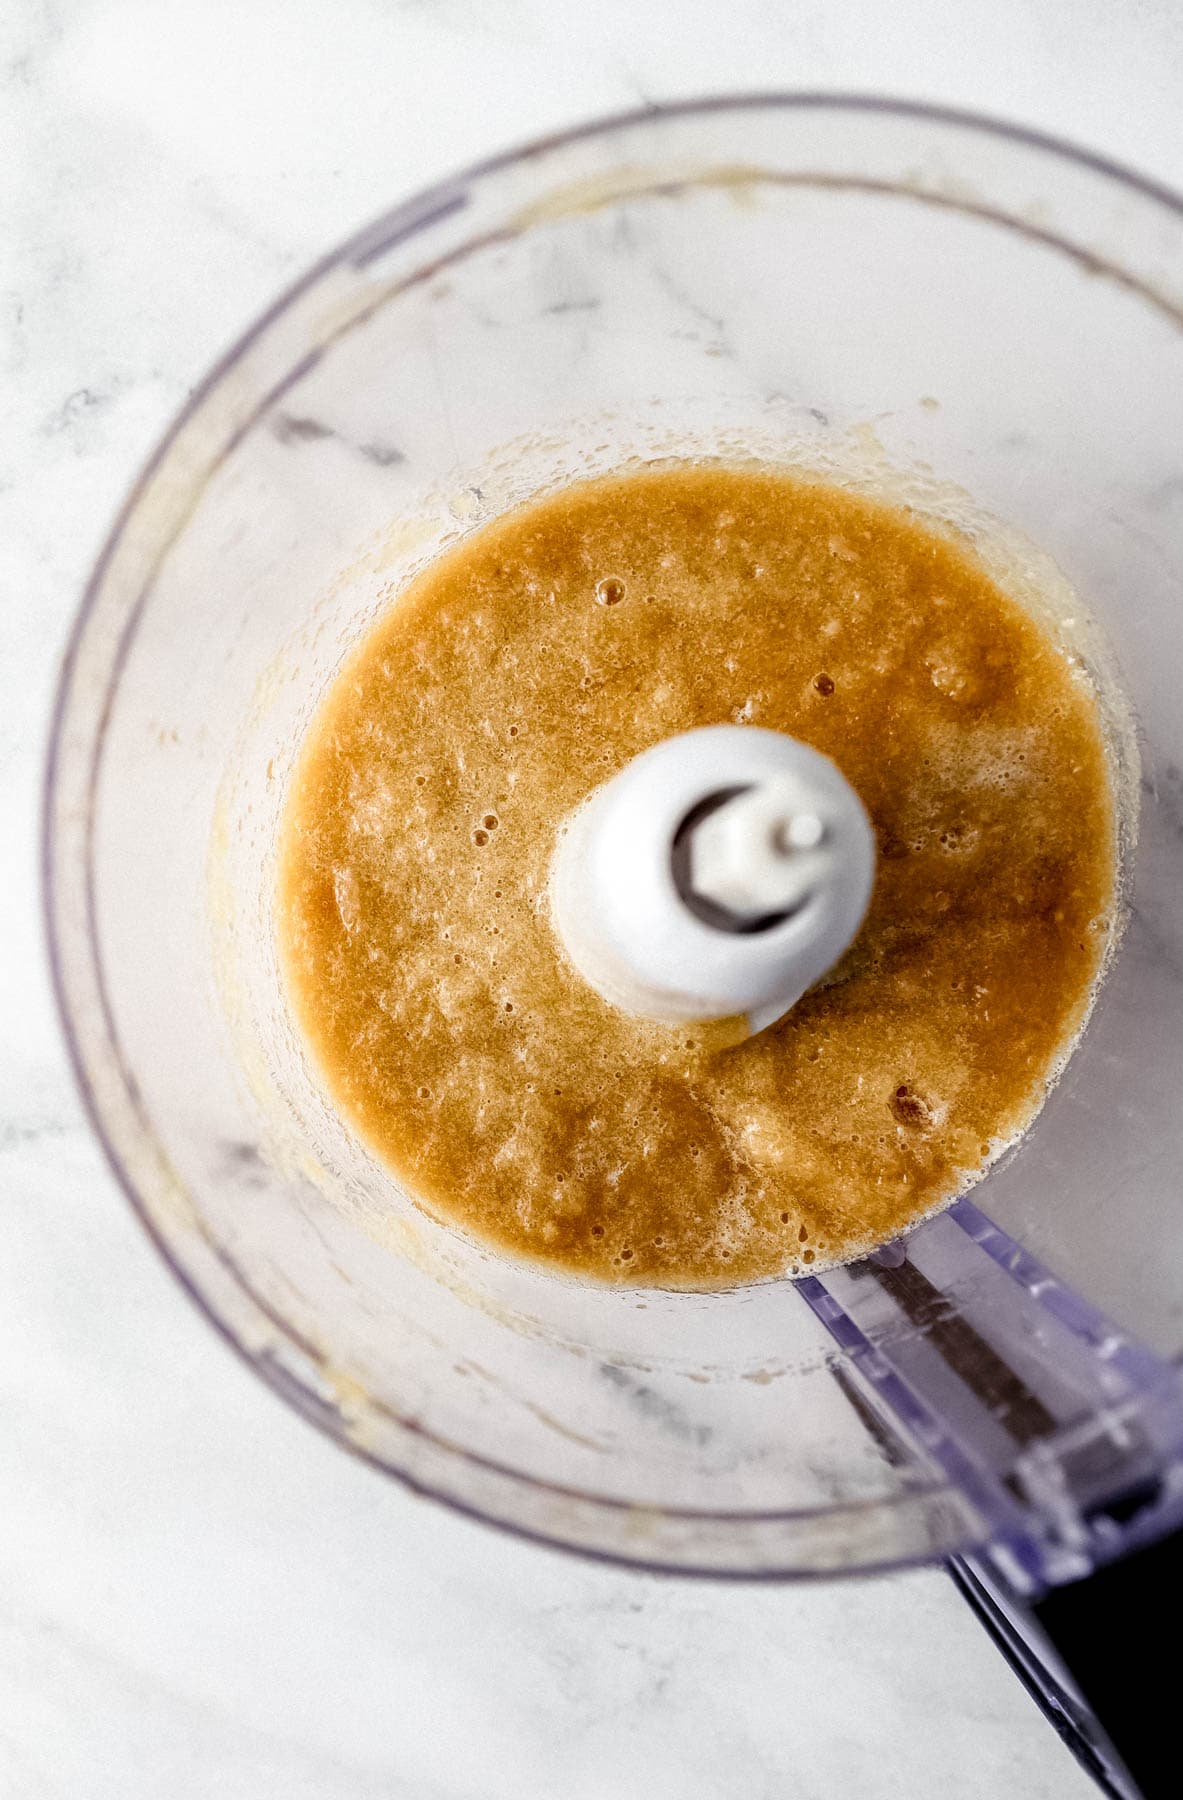
Drain your canned pineapple rings completely and set four rings aside, those go on top later. Add the remaining pineapple to a food processor along with the fresh ginger, maple syrup, and salt. Process until smooth and well combined. You're looking for a thick, spreadable filling, not chunky, but not completely liquefied either. If it seems very wet, a quick 30-second blitz more will help tighten it up.
Step 2: Prep the Pastry
Preheat your oven to 400°F and line a large baking sheet with parchment paper. Remove both puff pastry sheets from the freezer and allow them to thaw just enough to unfold without cracking, they should still feel cold and firm. Cut each sheet into four equal squares, giving you eight squares total. Four of these are your bases, and four become the tops.
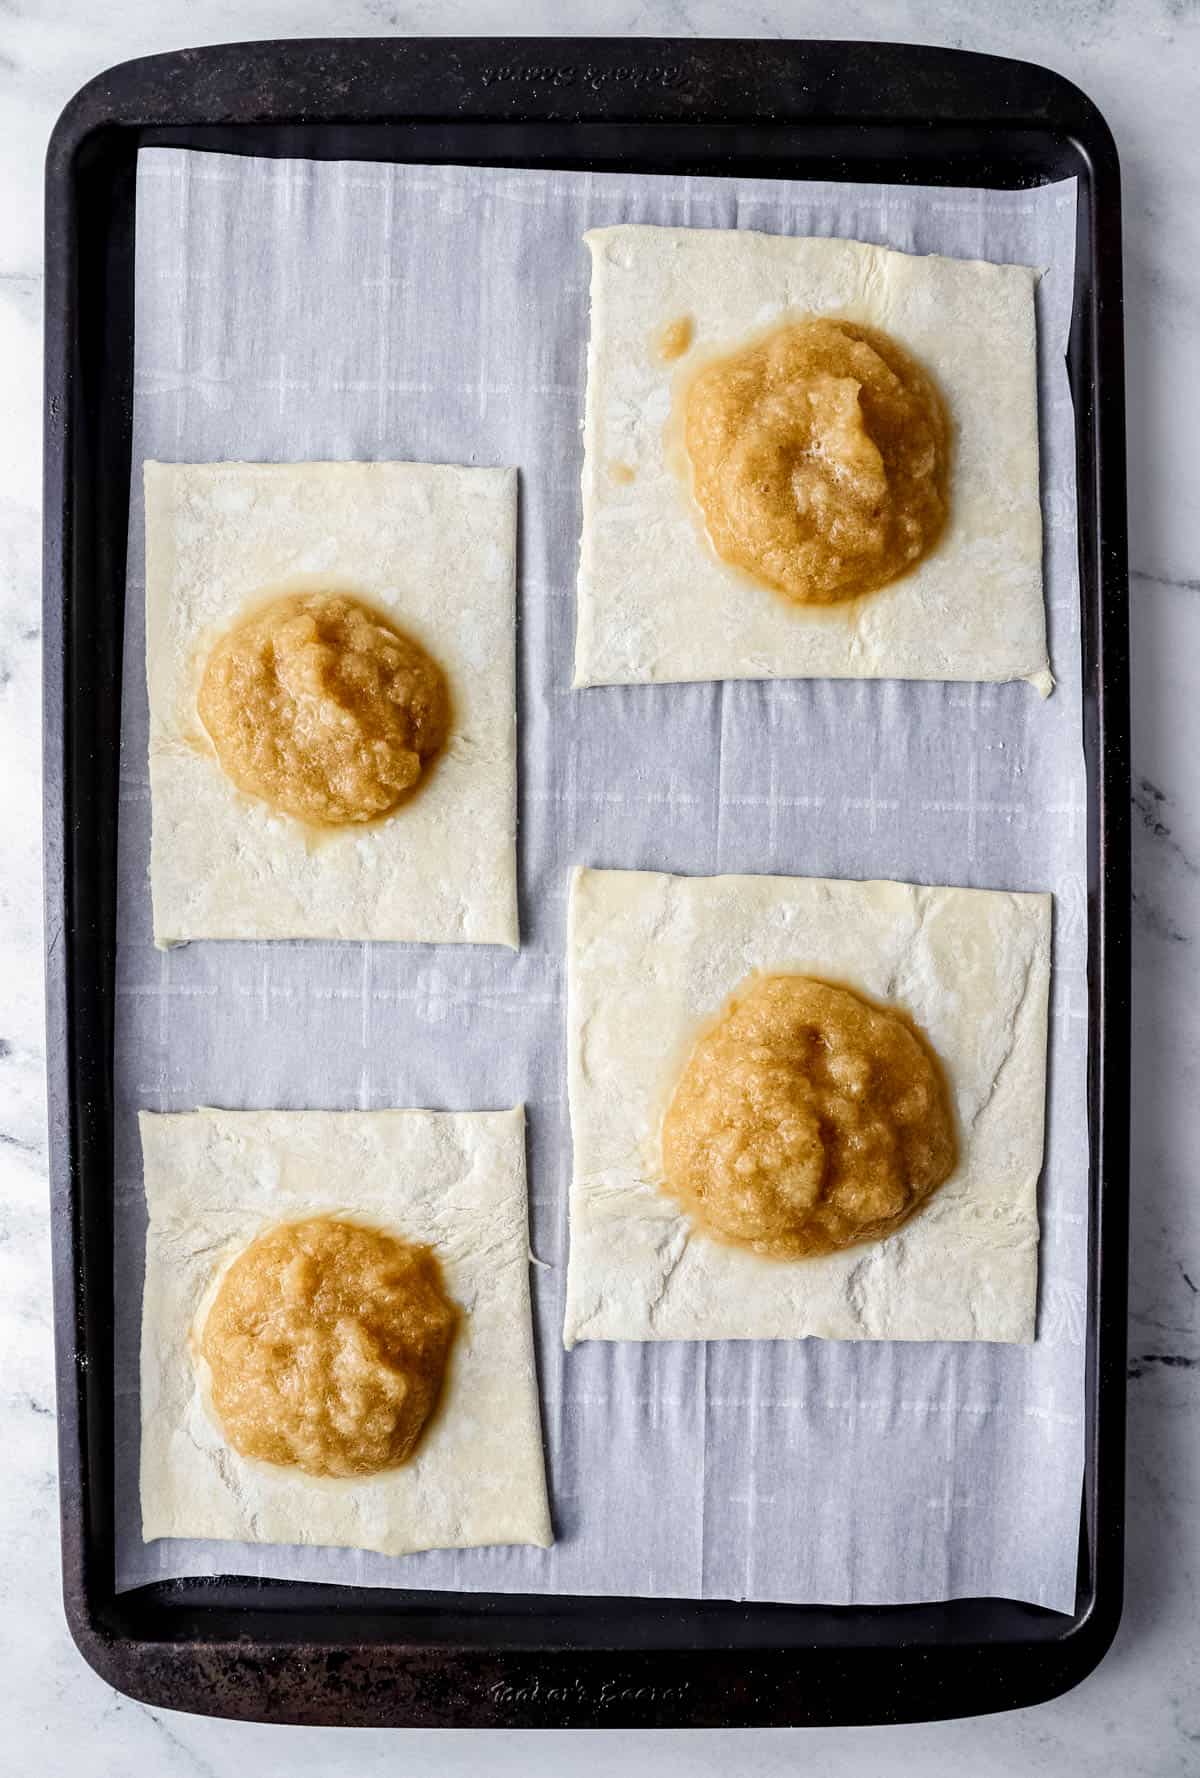
Step 3: Assemble the Tarts
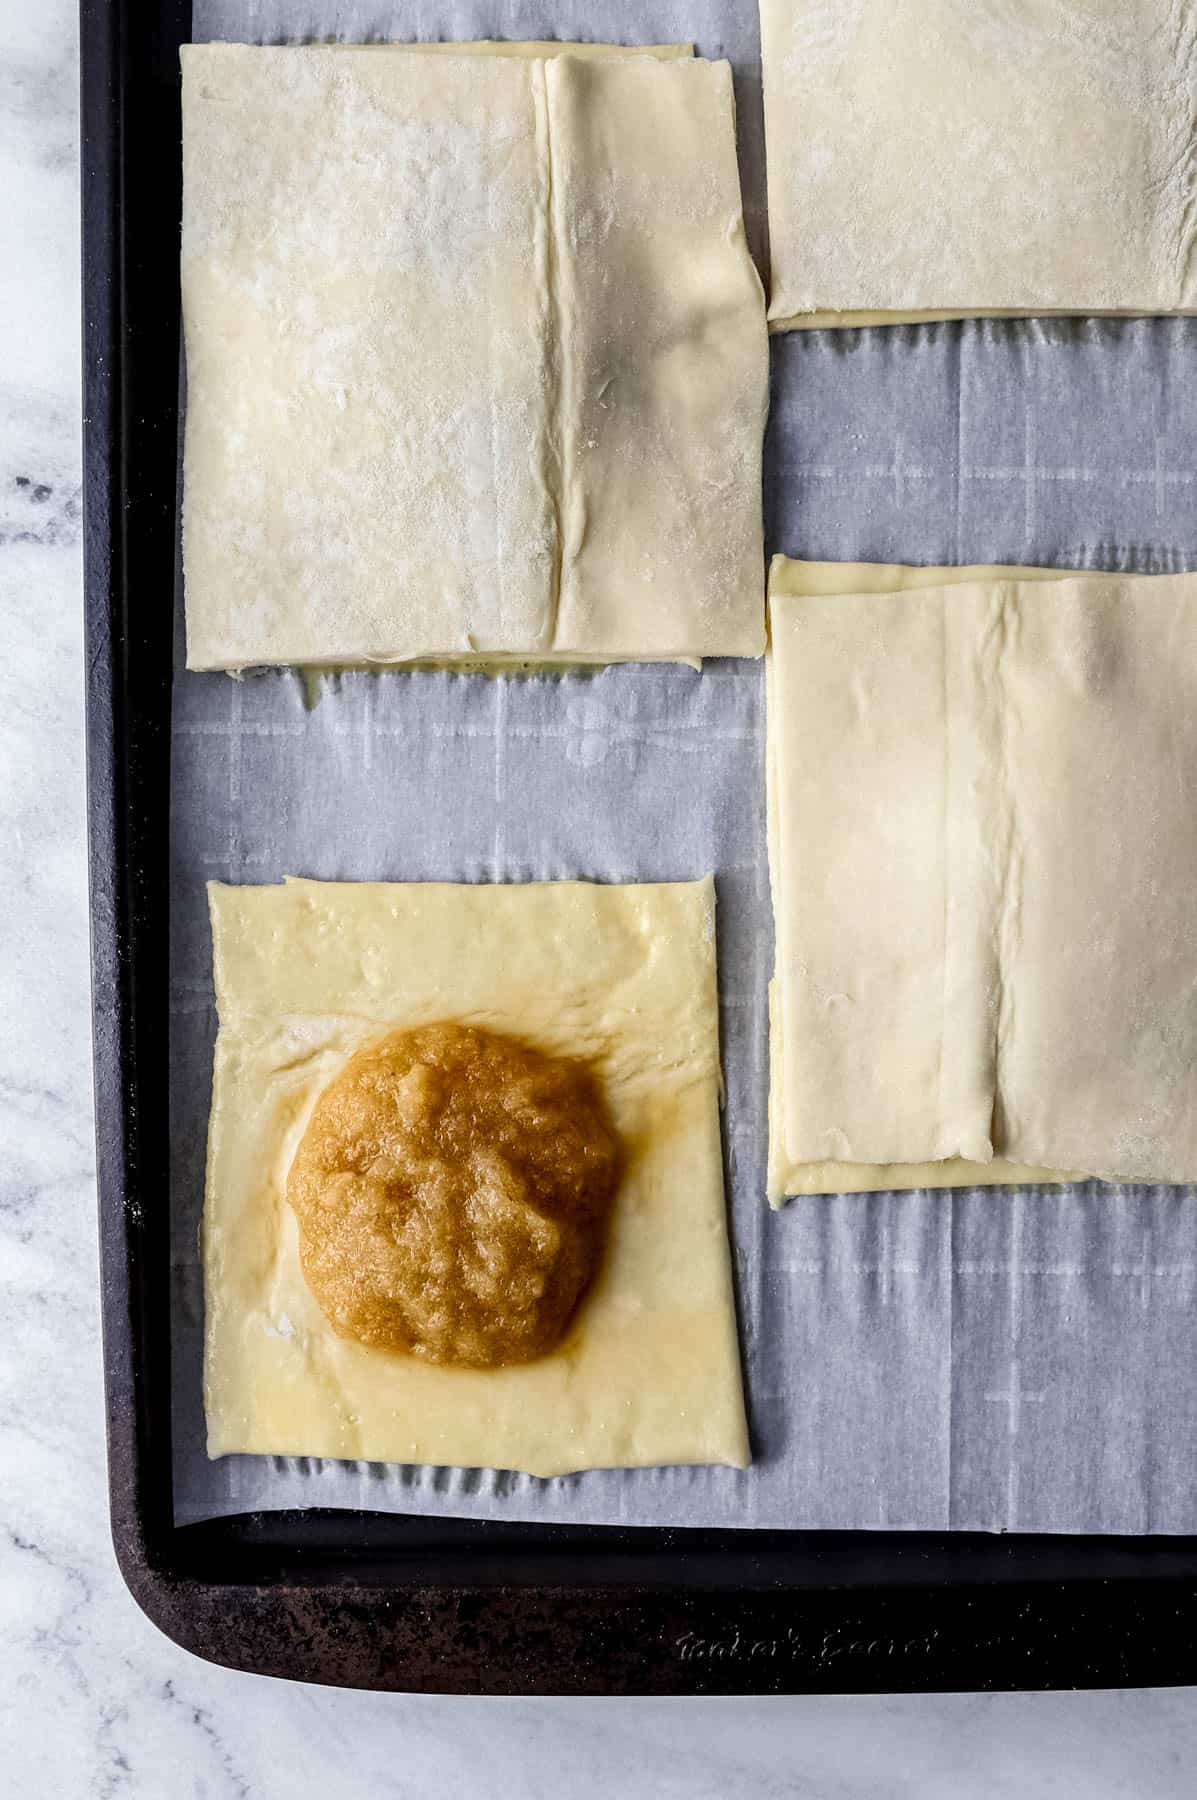
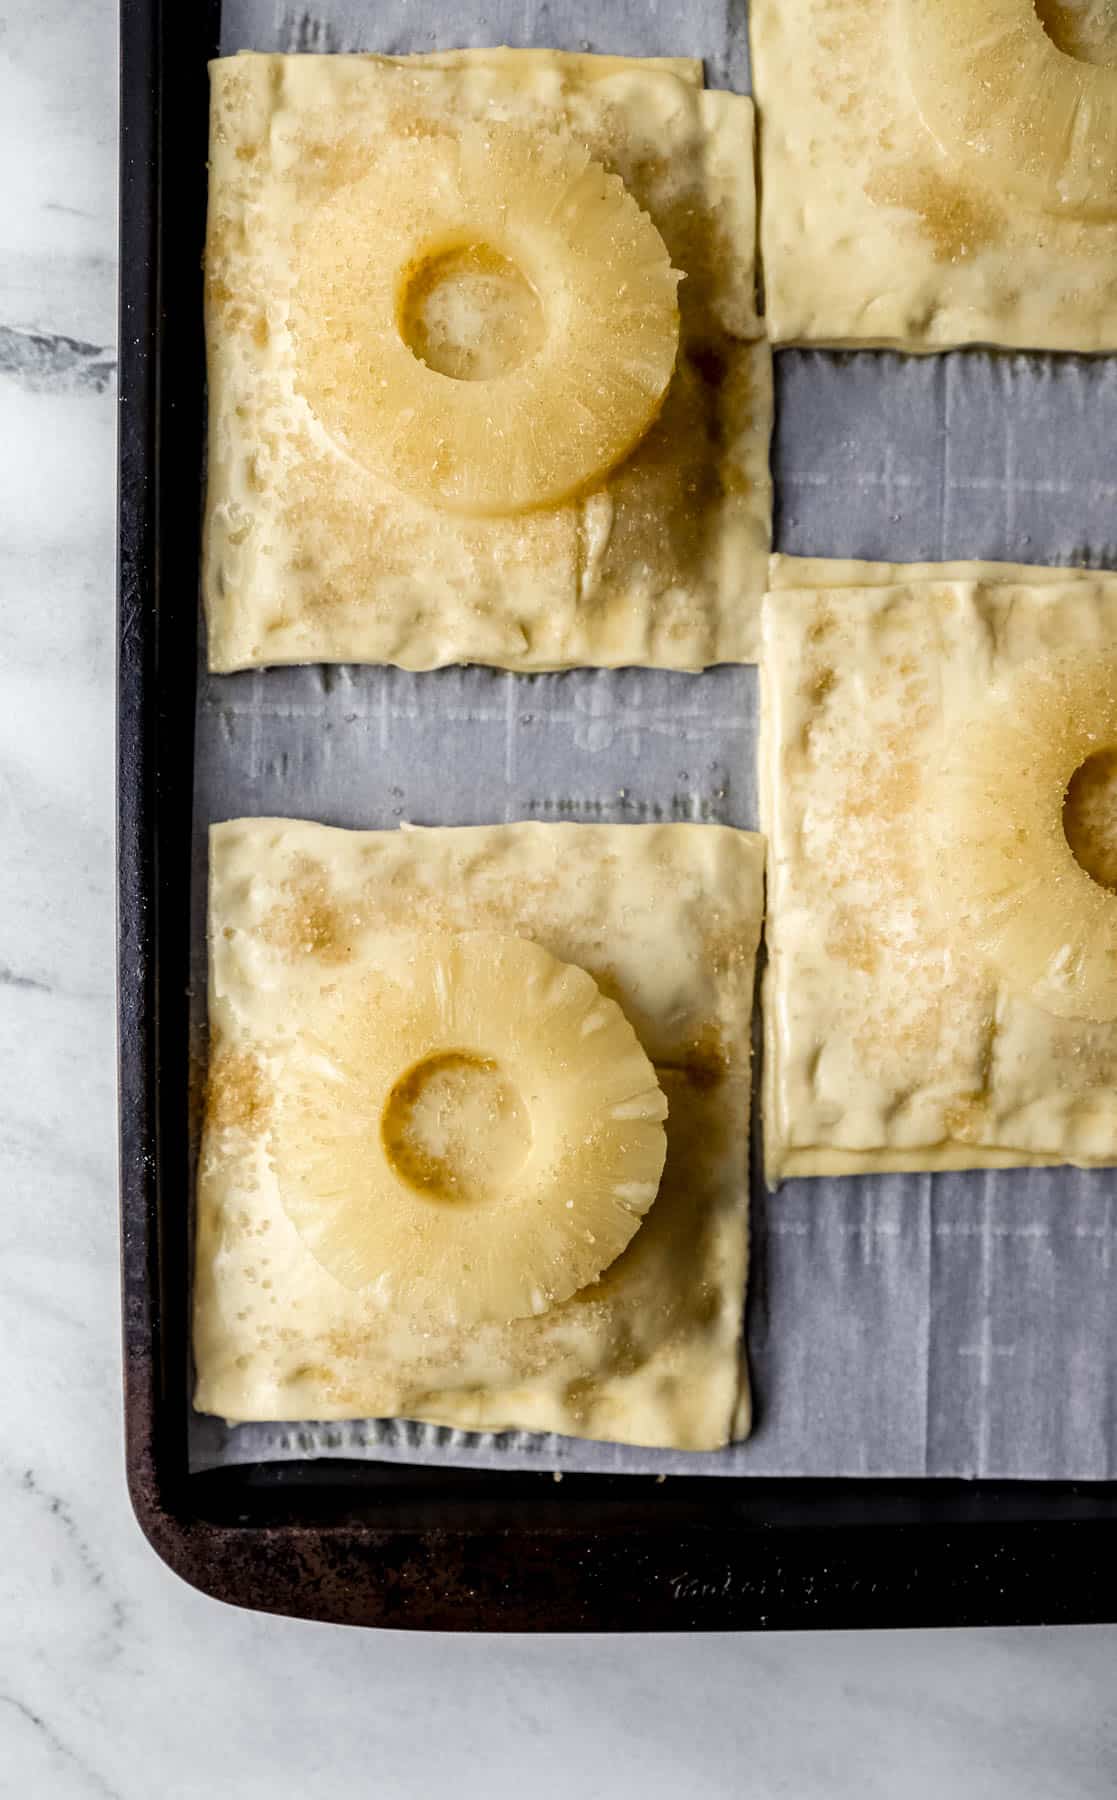
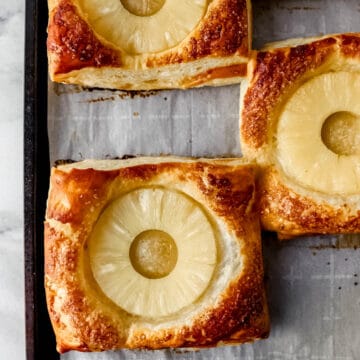
Spread a heaping tablespoon of pineapple filling into the center of each base square, leaving about a half-inch border around the edges. Brush those edges with egg wash, then lay a second pastry square directly on top and press the edges firmly to seal. Brush the top of each assembled tart all over with egg wash, then gently press a whole pineapple ring into the center of each one. Finish with a generous sprinkle of coarse sugar.
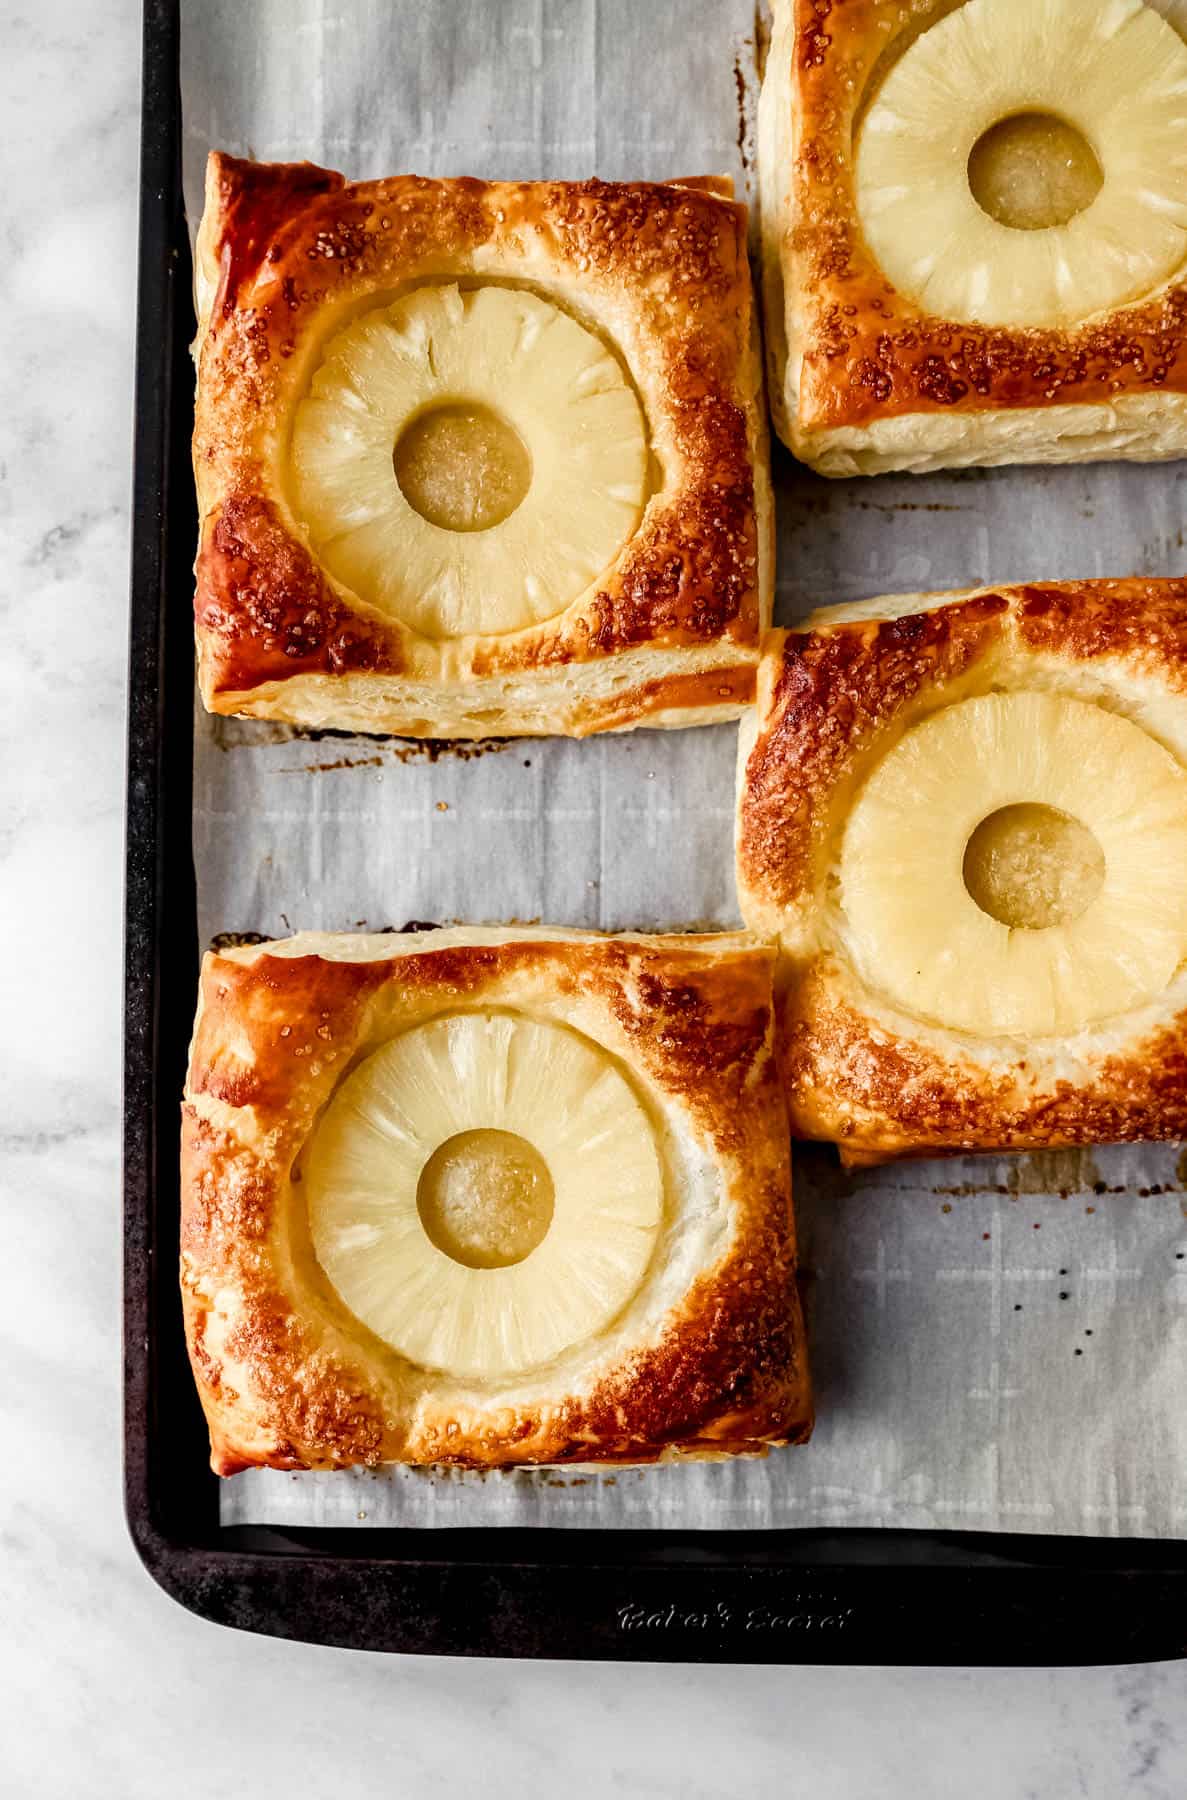
Step 4: Bake Until Golden
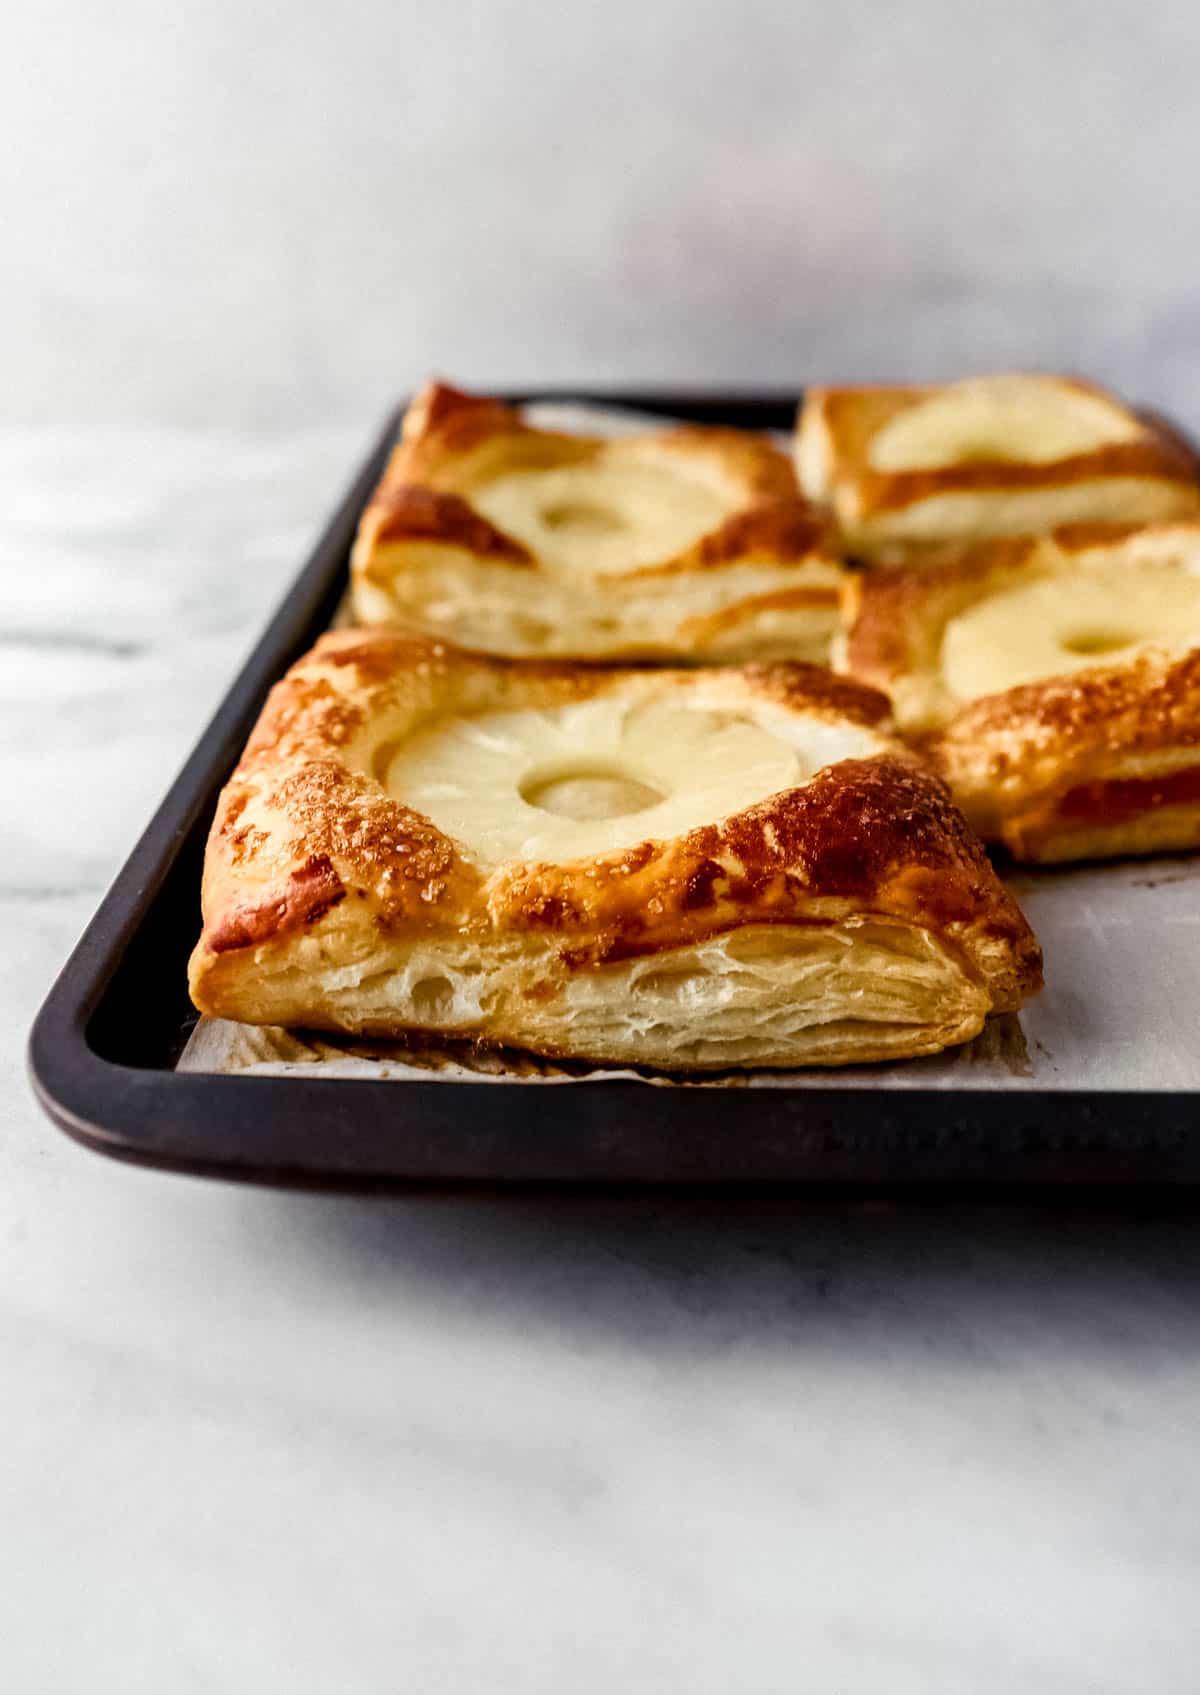
Bake at 400°F for 20 to 25 minutes, until the pastry is puffed up tall and deeply golden brown. Every oven runs slightly differently, so start checking at the 20-minute mark. The pineapple ring on top should look caramelized, and the sugar should be slightly crunchy. Let the tarts cool on the baking sheet for at least 5 minutes before serving, the filling is very hot straight from the oven.
LaKita's Expert Tips
- Keep the pastry cold. Puff pastry rises best when it goes into the oven cold. If your kitchen is warm and the dough starts to feel soft or sticky while you're assembling, pop the baking sheet in the refrigerator for 10 minutes before baking.
- Don't overfill. A heaping tablespoon of filling per tart is plenty. Too much filling will cause the sides to burst open during baking, and the filling can spill out onto the baking sheet and burn.
- Press the edges firmly. When you place the top pastry square over the filling, press around the entire border with your fingertips to get a good seal. You can also crimp the edges with a fork for an extra secure closure and a decorative look.
- The egg wash is non-negotiable. Don't skip it or use just water, the egg wash is what gives these tarts their bakery-worthy golden color. Brush it all the way to the edges for even browning.
- Watch your oven at the 20-minute mark. Puff pastry can go from golden to over-browned quickly. Start checking at 20 minutes and pull the tarts when they're a deep, even golden color.
- Use parchment paper, not foil. Parchment prevents sticking and allows the bottom of the tart to crisp up properly. Foil can cause the bottom to steam rather than bake.
- Let them rest before eating. I know it's hard to wait, but the filling needs a few minutes to settle after coming out of the oven. Five minutes make a big difference.
Want To Save This Recipe?
Variations & Substitutions
- Fresh pineapple filling: Use fresh pineapple chunks instead of canned for a slightly brighter, less sweet filling. Reduce to about 1 cup of chunks and blend with the ginger and maple syrup as directed.
- Add a cream cheese layer: Spread a thin layer of softened cream cheese on the pastry base before adding the pineapple filling for a richer, slightly tangy tart reminiscent of a Danish pastry.
- Swap the spice: If you're not a ginger fan, substitute a pinch of cinnamon and a tiny bit of cardamom. It gives the filling a warm, cozy flavor that's still wonderful with pineapple.
- Try a coconut sugar topping: Coconut sugar in place of coarse granulated sugar adds a deeper, more caramel-like flavor and pairs beautifully with the tropical pineapple.
- Mini tartlets: Cut the puff pastry into smaller squares (about 3 inches) for bite-sized tartlets, perfect for a dessert spread or party tray. Reduce baking time by 4-5 minutes and watch closely.
- Drizzle finish: After baking, drizzle the warm tarts with a little honey or a simple caramel sauce for an extra-impressive presentation with almost no extra effort.

Make-Ahead & Storage
Make-Ahead
These pineapple tarts are best fresh from the oven, but you can get a head start. The pineapple filling can be made up to 3 days ahead and stored in an airtight container in the refrigerator. When you're ready to bake, let the filling sit at room temperature for 10 minutes to loosen before spreading. You can also assemble the tarts fully (without the egg wash) and refrigerate them on the baking sheet for up to 4 hours before baking, just add the egg wash and sugar right before they go in the oven.
Storage & Reheating
Store leftover baked tarts in an airtight container at room temperature for up to 1 day, or in the refrigerator for up to 3 days. The pastry will soften slightly as they sit, which is expected. To reheat, place the tarts on a baking sheet in a 350°F oven for 8-10 minutes until warmed through and re-crisped. Avoid the microwave, it steams the pastry and turns it soft. These tarts can also be frozen after baking for up to 2 months; thaw overnight in the refrigerator and reheat in the oven as described.

What to Serve with Pineapple Tarts
- With a scoop of vanilla ice cream - The contrast of warm, flaky pastry and cold, creamy ice cream is absolutely irresistible. This is my favorite way to serve these when I have company.
- With whipped cream - A simple dollop of freshly whipped cream lets the pineapple flavor shine without competing with it.
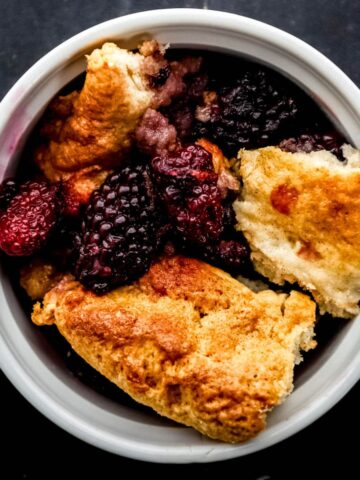
- As part of a dessert spread - Pair these alongside Brown Sugar Baked Peaches and Yum Yum Cake for a Southern-inspired dessert table that will have everyone going back for seconds.
- After a tropical-themed dinner - Serve these to finish off a meal that includes Pineapple Salsa somewhere in the lineup, the pineapple theme runs beautifully throughout.
- For brunch - These are sweet but not heavy, which makes them a lovely addition to a weekend brunch spread alongside eggs and savory dishes.
Frequently Asked Questions
Yes, fresh pineapple works well for the filling portion of this recipe. Use about 1 cup of fresh pineapple chunks and blend with the ginger and maple syrup as directed. For the pineapple ring that goes on top, fresh pineapple rings are a beautiful option, just know they may release slightly more liquid during baking, so the top will look more caramelized than the canned version.
You have two good options. The filling can be made up to 3 days ahead and refrigerated. Alternatively, you can assemble the tarts completely (without the egg wash and sugar) up to 4 hours ahead, keep them refrigerated on the baking sheet, and then apply the egg wash and sugar right before baking. Fully baked tarts are best eaten the same day, though they keep in the refrigerator for up to 3 days.
Store them in an airtight container. At room temperature they stay good for about 1 day, in the refrigerator they'll last up to 3 days. The pastry will soften slightly over time, but a quick trip through the oven at 350°F for 8-10 minutes brings back most of the crispness.
Yes! Bake them fully, let them cool completely, then wrap individually and freeze for up to 2 months. To serve, thaw overnight in the refrigerator and reheat in a 350°F oven for about 10 minutes. They won't be quite as flaky as fresh-baked, but they're still delicious.
Any store-bought frozen puff pastry sheets will work, just make sure you're buying sheets, not shells or cups. Pepperidge Farm is widely available and reliably good. Dufour is a higher-quality option if you can find it. Store brands are also perfectly fine. This recipe needs two full sheets, which is typically one full box.
The most common culprits are too much filling or edges that weren't sealed tightly enough. Stick to a heaping tablespoon of filling per tart and press the edges firmly all the way around before baking. You can also use a fork to crimp the edges for an extra secure seal.
Absolutely. Honey and agave nectar are both great substitutes in equal amounts. Honey gives a slightly floral sweetness; agave is a bit more neutral. Even a tablespoon of brown sugar dissolved into the filling works in a pinch.
The most common reason is that the pastry got too warm before baking. Puff pastry needs to be cold when it goes into a hot oven, that temperature contrast is what creates the steam that makes it puff. If your kitchen is warm or you've been working with the pastry for a while, refrigerate the assembled tarts for 10-15 minutes before baking.
Yes! Cut the puff pastry into smaller squares about 3 inches for mini tartlets. You won't be able to fit a full pineapple ring on top, so use a smaller piece of pineapple or a chunk of crushed pineapple as the topper. Reduce the baking time by 4-5 minutes and keep a close eye on them.
These tarts love a drizzle of honey or caramel sauce after baking. A sprinkle of toasted coconut on top of the pineapple ring before it goes in the oven is a great tropical twist. If you want a more indulgent dessert, a small spoonful of softened cream cheese under the pineapple filling adds richness that pairs beautifully with the fruit.
📖 Recipe
Pineapple Tart Recipe
Equipment
- 1 Large baking sheet
- 1 Food processor
- 1 pastry brush
Ingredients
- 1 small can pineapple rings, drained
- 1 teaspoon fresh ginger, minced
- 2 tablespoons maple syrup
- 1 teaspoon kosher salt
- 2 sheets puff pastry
- 1 egg, lightly beaten
- 1 teaspoon coarse sugar
Instructions
- Begin the recipe by preheating the oven to 400 degrees F. and line a large baking sheet with parchment paper. Open the can of pineapple rings, drain off the liquid, and set aside 4 of the pineapple rings to use later to top the pastry.
- Using a food processor, add the main ingredients of the remaining pineapple rings, 1 teaspoon minced ginger, 2 tablespoons maple syrup, and 1 teaspoon salt. Process until the mixture is well combined and smooth.
- Open up the box of puff pastry and remove the 2 sheets. Place on the prepared baking sheet and unfold into two separate sheets. Cut into eight equal-sized squares. Space four of them out on the baking sheet. Set aside the other four squares to use later to top the pastries.
- Spread about a heaping rounded tablespoon full of the pineapple tart filling into the center of each puff pastry square.
- To a small bowl, add the 1 egg and beat/whisk until thoroughly mixed. Take a pastry brush and dip it into the egg mixture and brush the outer edges of each pastry.
- Top each pastry with the other four puff pastry squares that you set aside earlier. Gently press the sides to seal the top and bottom of each pineapple tart together. Brush the top of each puff pastry square evenly with the egg mixture.
- Top all four of the pastries with a whole pineapple slice in the middle. Evenly sprinkle the top of each tart with 1 teaspoon coarse sugar. Place the tarts into the oven to bake for 20 to 25 minutes, until the tarts are golden brown.
- Carefully remove the baking tray from the oven and allow the pineapple tarts to cool on the baking sheet for about 5 to 10 minutes before removing to serve. Enjoy at room temperature or top with a scoop of vanilla ice cream for a little something extra.
Did You Make This Recipe?
If you give this pineapple tart recipe a try, I'd love to know what you think! Leave a comment below and let me know how they turned out, share a photo on Instagram and tag @SimplyLaKita, or save it on Pinterest for later. And if you have any questions at all, drop them in the comments. I read every single one and I'm happy to help!
Molly says
Hi LaKita, thank you for this lovely recipe. I’ve never used fresh ginger before this afternoon, so I was a bit nervous and stopped just shy of a full teaspoon. This was also the first time I’ve had a puff pastry recipe turn out beautifully brown (Your tip on checking at 20 mins was spot on.)
My husband, who isn’t a huge pineapple lover, actually really enjoyed this tart, which I drizzled with a little honey (another great tip) and served with vanilla ice cream. Thanks again for this lovely recipe.😊 Our home smells so good right now!
LaKita says
Thank you so much for this sweet comment Molly!😊 I'm especially happy to hear that this was your first time cooking with fresh ginger and that the tart turned out so well. The combination of the pineapple, honey drizzle, and vanilla ice cream sounds absolutely delicious! 🍍✨
I'm glad the baking tip helped you get that beautiful golden puff pastry, and it makes me smile to hear that even your husband, who isn't usually a pineapple fan, enjoyed it. One of my favorite things about baking is how it fills the house with amazing aromas, so I love that your home smelled wonderful too.
Thank you for giving the recipe a try and for taking the time to share your experience! 💛
Sonya says
I miss pastry puff. I've never seen gluten-free pastry puff in the store.
I bet your recipe tastes amazing ☺Cooked pineapples are always yummy.
admin says
Aww 🙁 I haven't seen it either...you would probably have to make it yourself from scratch or try the Bob's Red Mill recipe.
Akaleistar says
Puff pastry looks so fancy! I'm on a real pineapple kick, so I need these tarts in my life 🙂
admin says
Yes you will surely enjoy these and they are so easy to make 🙂
Steven says
Pineapple slices in puff pastry! Ummmm my favorite!
admin says
Yes...my favorite as well 🙂
Tamara says
I feel the same way about puff pastry. FANCY! And it tastes great.
You really sell this wonderfully to me. The ginger, the pineapple, the puff pastry. YES.
admin says
Thank you! I could not agree more 🙂