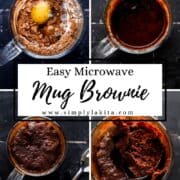
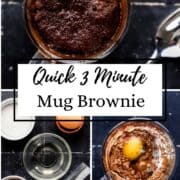
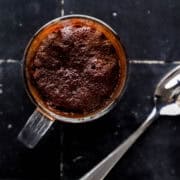
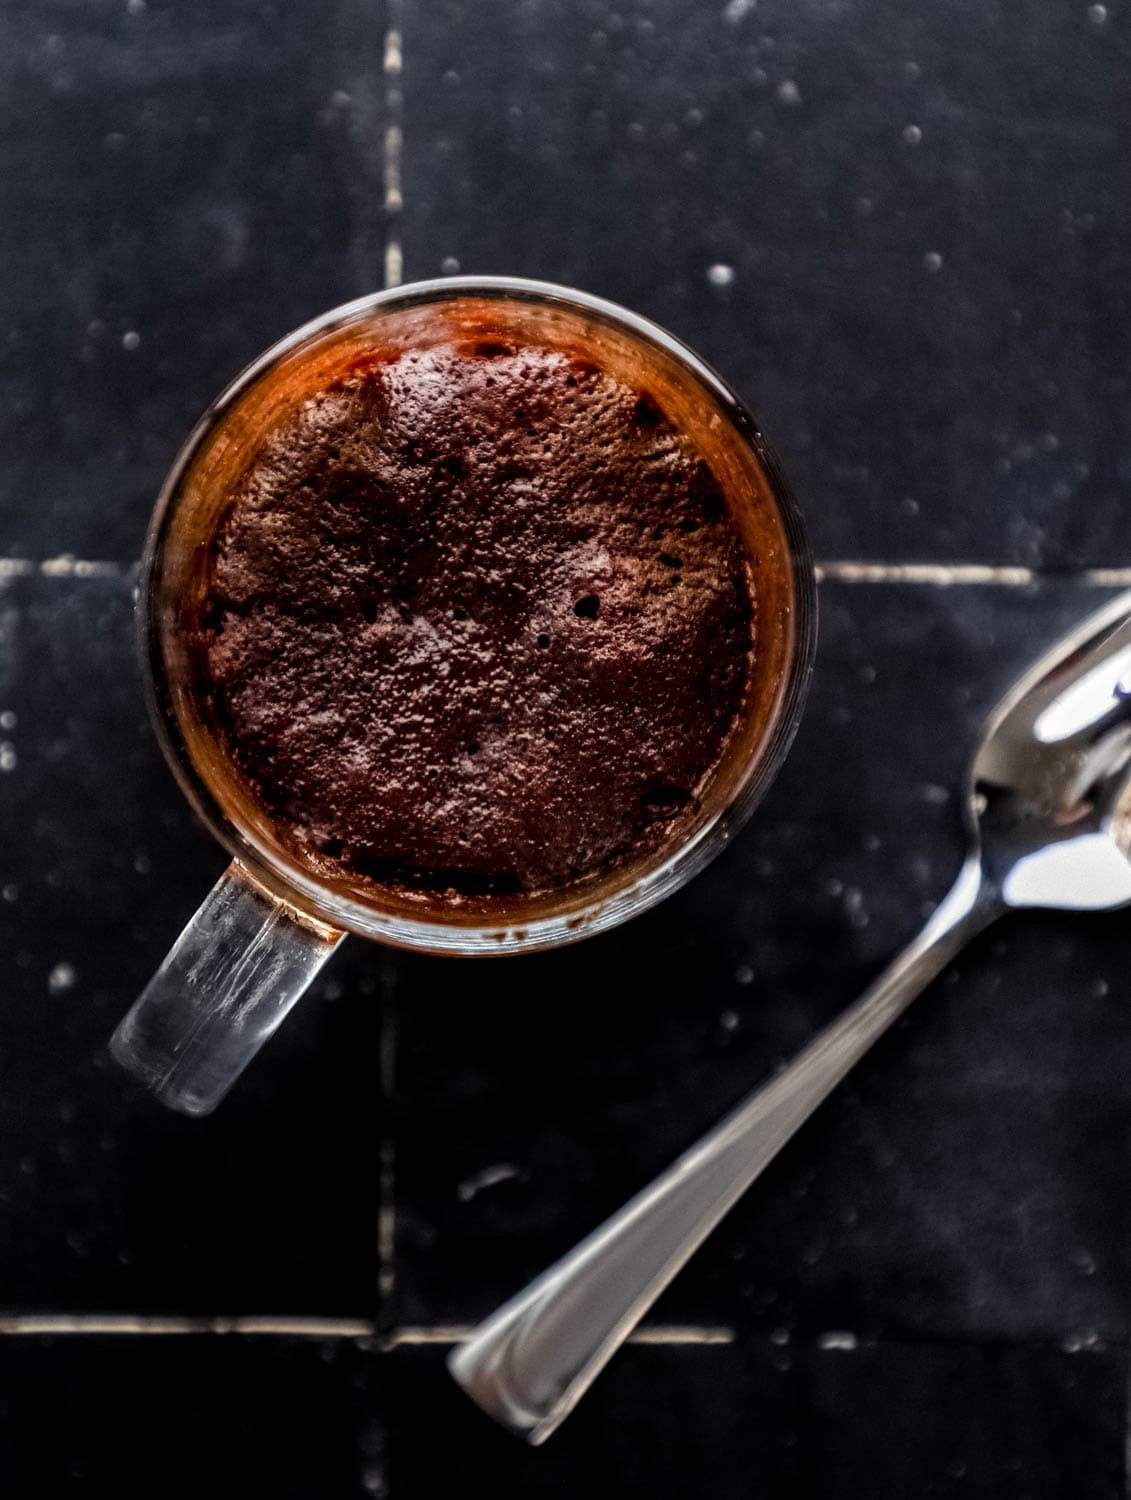
Try making this easy Mug Brownie Recipe! It's a deliciously chocolate, gooey, and rich single-serve brownie that can be made in less than 2 minutes. The perfect sweet treat in a hurry.
Updated February 2026: I've added a wattage guide, a troubleshooting section, variations, and a DIY brownie mix jar gift idea based on your questions and feedback. The recipe was originally posted on February 14, 2020.
Watch this quick video tutorial!
Some nights you just need a brownie. Not a whole batch. Not a long baking project. Just one warm, fudgy, chocolatey brownie in the next five minutes. I am very personally familiar with this feeling, and this microwave mug brownie is my answer.
I've tested this recipe more times than I'd like to admit. Adjusting the butter ratio, the cocoa level, and the flour amount, all chasing the same thing: a mug brownie that actually tastes like a brownie instead of a rubbery sponge. The key is getting the fat-to-flour ratio right and not overcooking it. Once I figured that out, this became one of the most-used recipes in my kitchen on a regular weeknight.
You need one mug, about 5 minutes, and standard pantry ingredients you almost certainly already have. This one is for all of us who need a single-serving chocolate moment on a Tuesday. Let's get started!
Jump to:
- Watch this quick video tutorial!
- Why You'll Love This Microwave Mug Brownie
- Ingredients You'll Need
- How to Make a Mug Brownie
- Wattage Guide: Microwave Timing by Power
- Troubleshooting: Why Is My Mug Brownie Rubbery?
- Mug Brownie Variations
- Mug Brownie Mix in a Jar (A DIY Gift Idea)
- Expert Tips
- Make-Ahead & Storage
- What to Serve with a Mug Brownie
- Frequently Asked Questions
- Want More Delicious Chocolate Recipes? Try These:
- 📖 Recipe
- Did You Make This Recipe?
Why You'll Love This Microwave Mug Brownie
- Ready in 90 seconds - from 'I want a brownie' to 'I have a brownie' in under five minutes total.
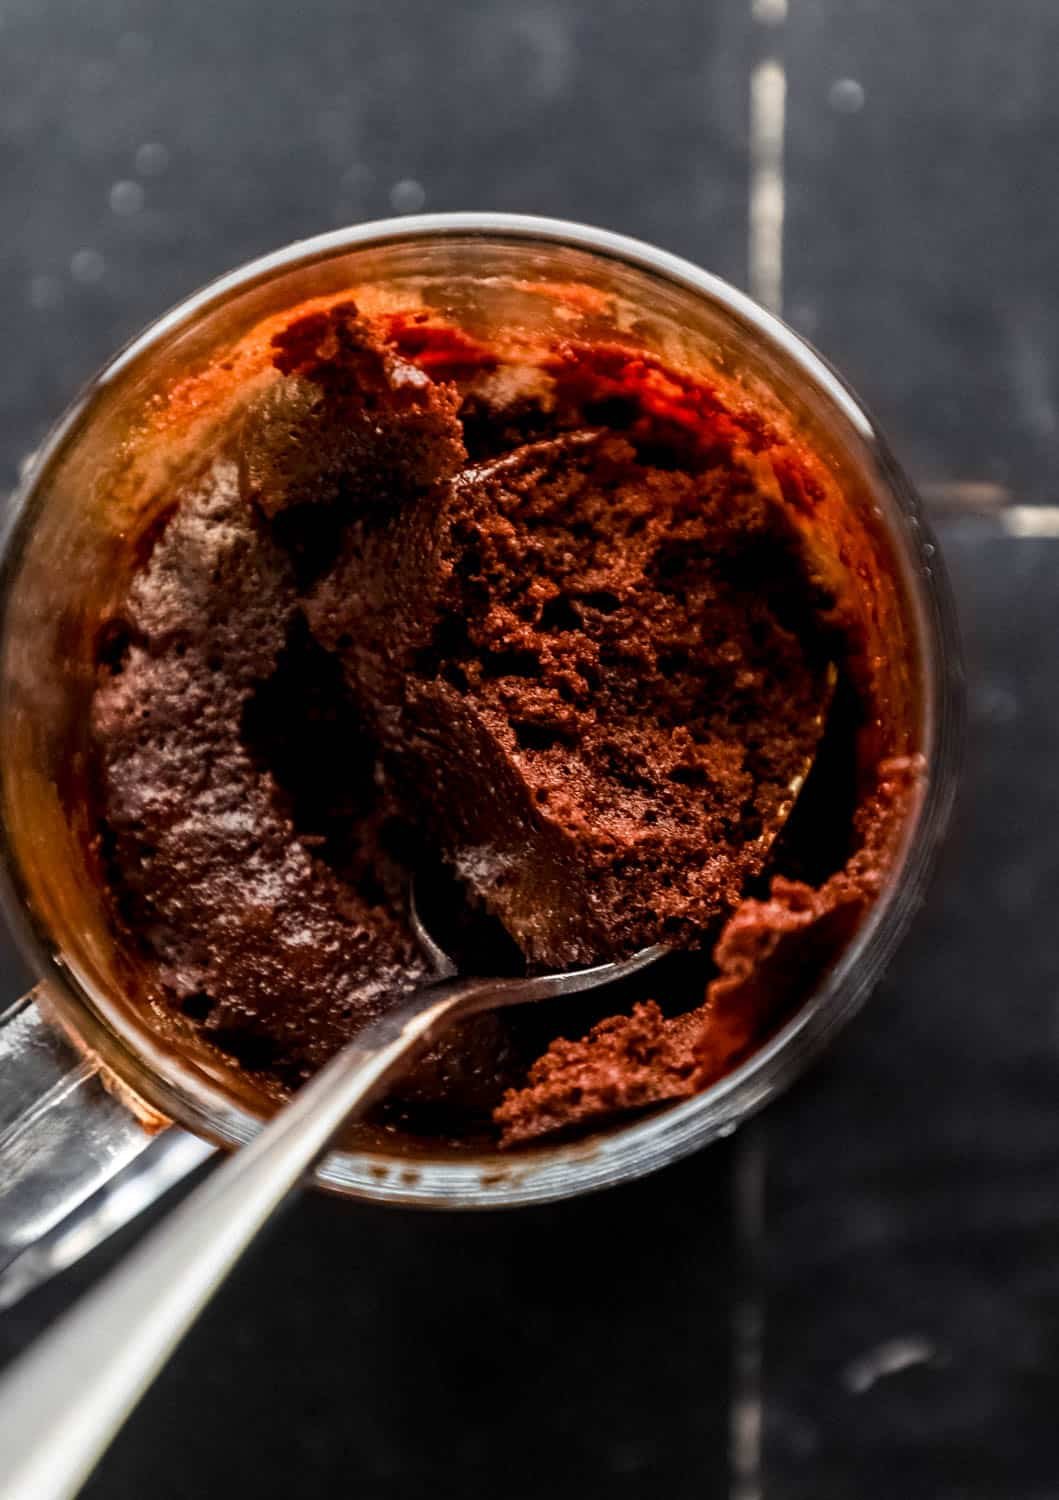
- Genuinely fudgy - not rubbery, not dry, not cakey. Actually fudgy. The right butter and cocoa ratio makes all the difference.
- No oven, no baking sheet, minimal cleanup - one mug, one spoon. Rinse and done.
- Endlessly customizable - peanut butter swirl, mint chip, s'mores, Nutella. There are so many ways to make this your own. See the variations section below.
Ingredients You'll Need
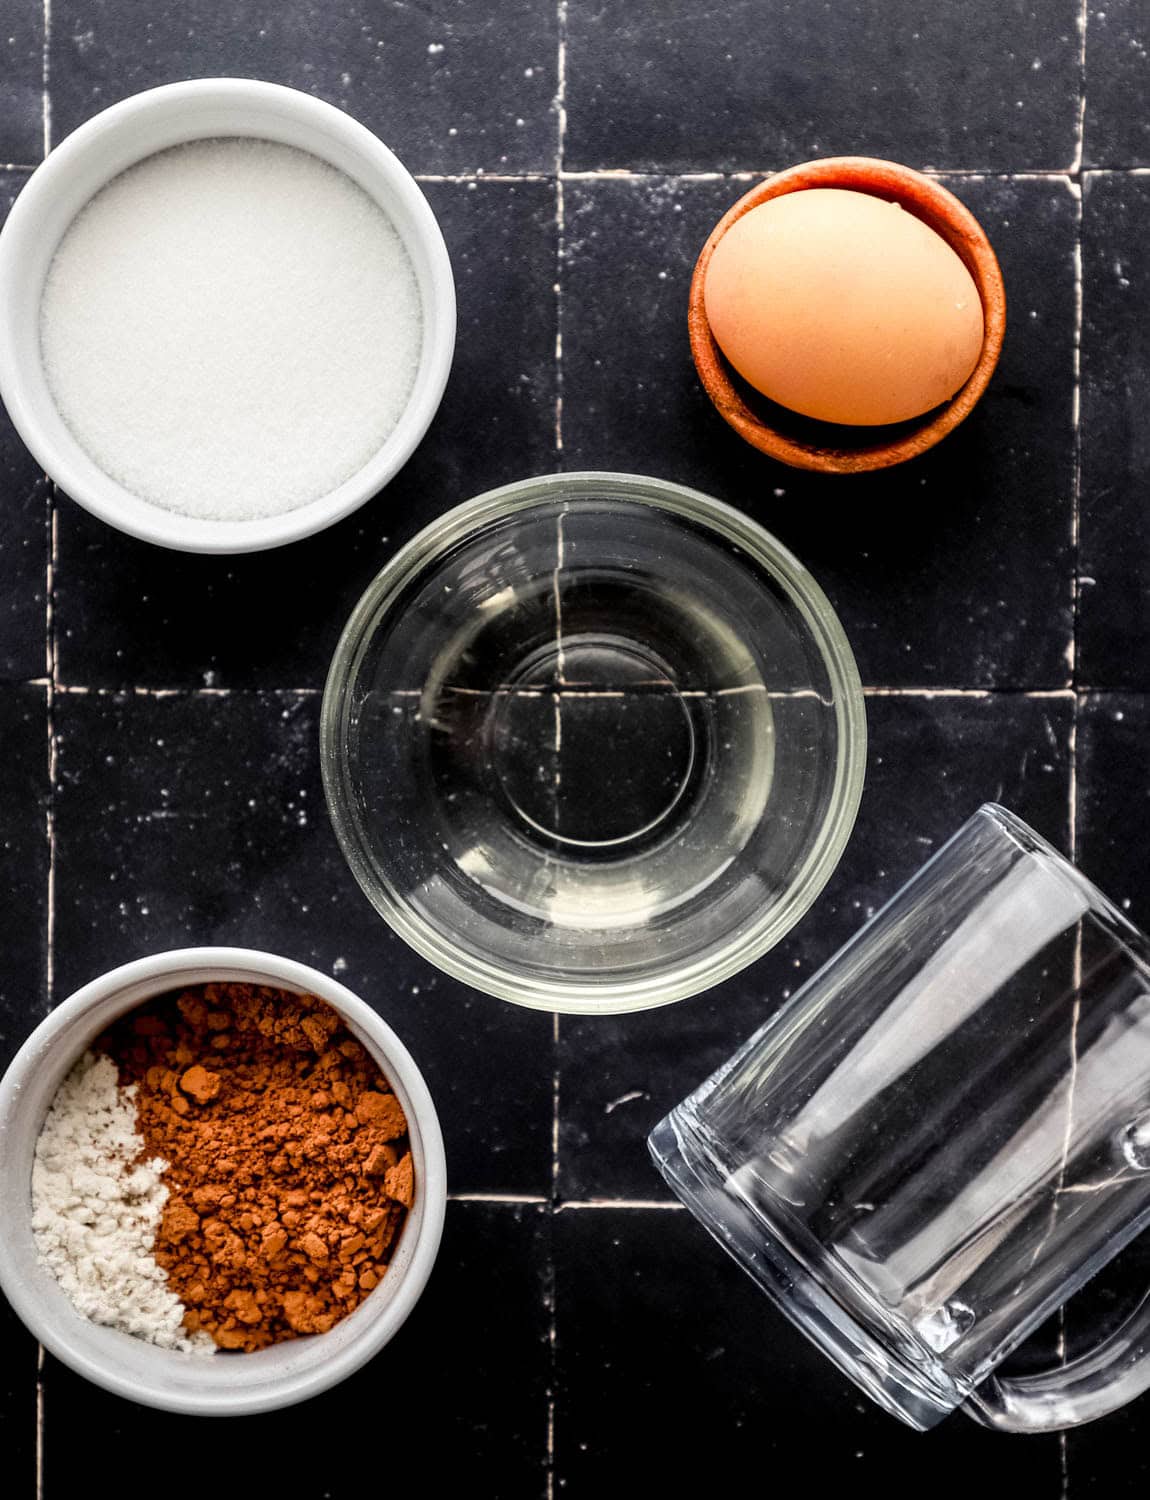
- All-Purpose Flour - Plain all-purpose flour is needed to form the base of the brownie and allow it to become thick and chewy. Be sure to use plain flour with no other added ingredients.
- Unsweetened Cocoa Powder - The main ingredient in any good brownie recipe. Helps to make the brownie chewy and loaded with chocolate flavor. Use high-quality unsweetened cocoa powder for the best results.
- Granulated Sugar - Use plain white granulated sugar or cane sugar to sweeten the microwave mug brownie. You may adjust the amount of sugar or use a sugar substitute if you prefer.
- Large Egg - A single large egg is all that is needed. This helps to bind the ingredients together and give the recipe a creamy richness.
- Vegetable Oil - Vegetable oil, canola oil, or any neutral-flavored oil will work to keep the brownie moist. Coconut oil could be used as a substitute.
👉🏾 See the recipe card below for exact quantities and full instructions.
How to Make a Mug Brownie
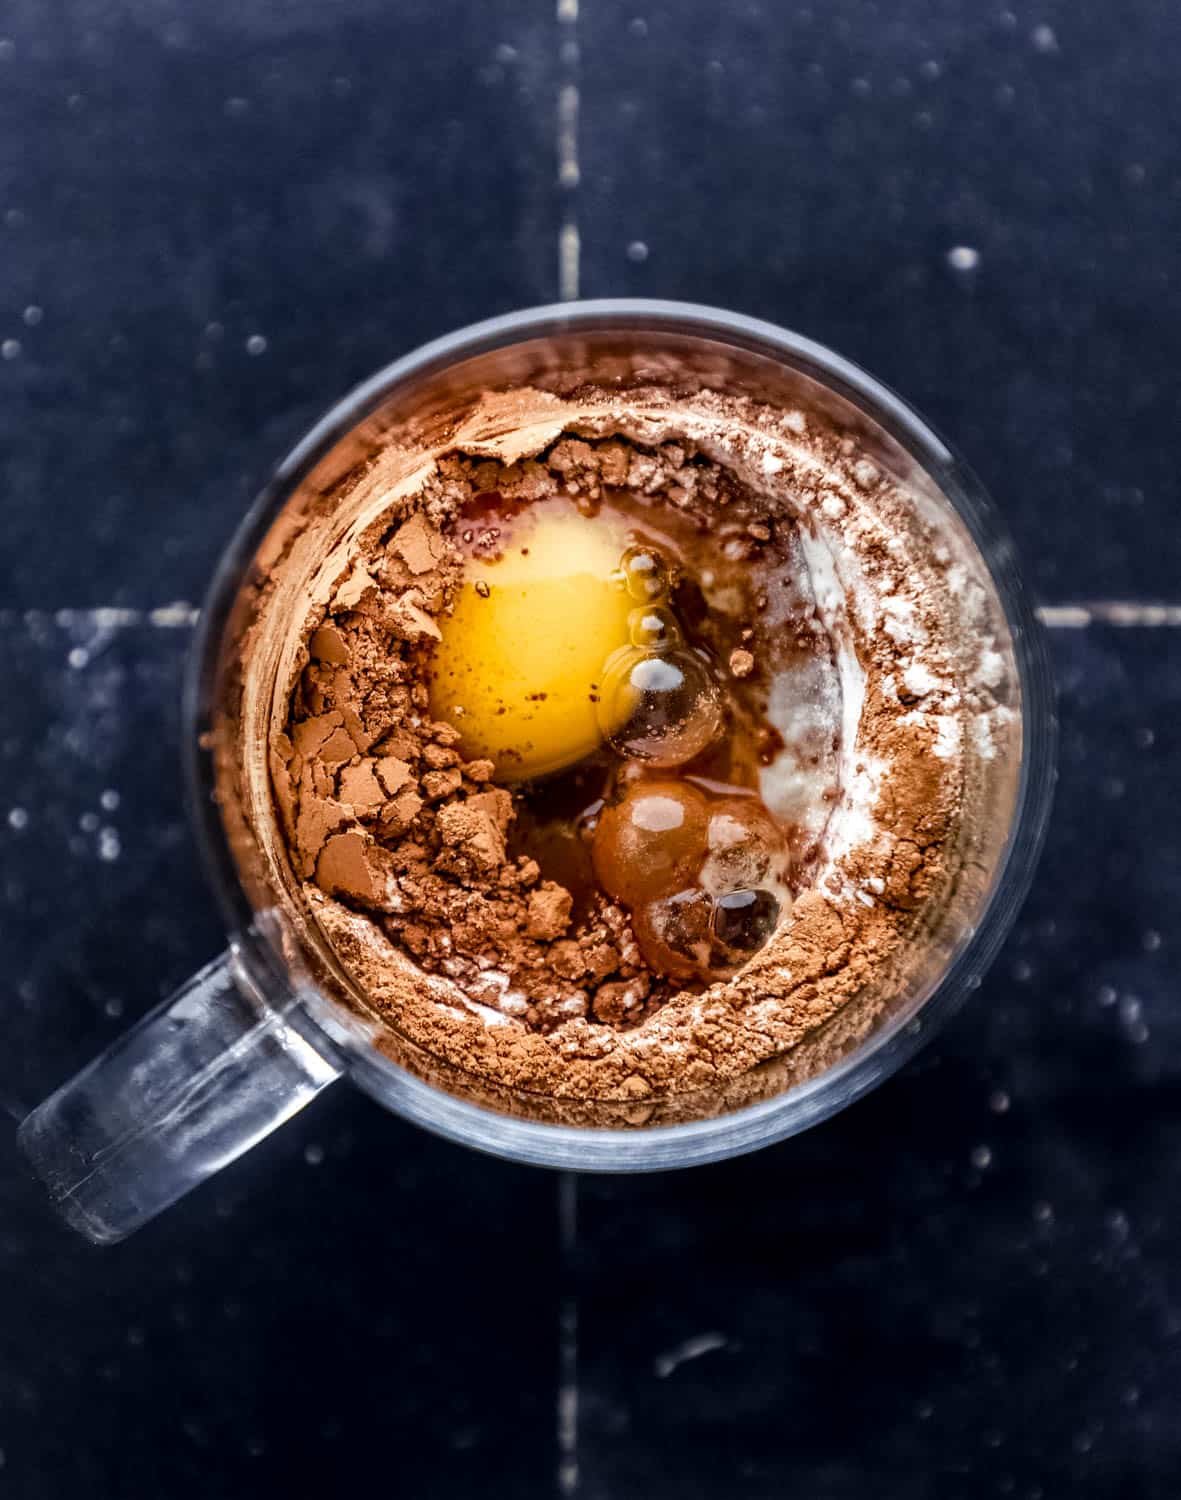
Step 1: Mix in the Wet Ingredients
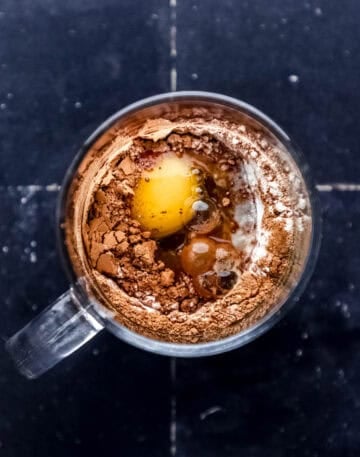
Stir in the egg and oil until combined. Make sure it's fully incorporated before adding the dry ingredients. Don't whisk or beat aggressively, you just want everything combined.
Step 2: Add the Dry Ingredients
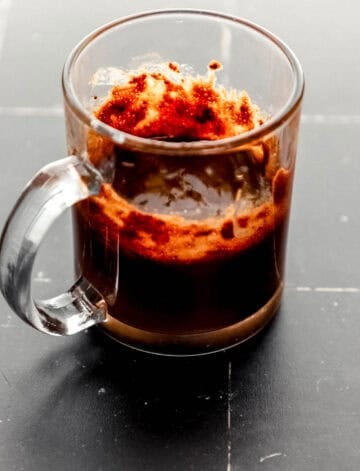
Add the cocoa powder, flour, and sugar. Stir until just combined. Don't overmix, but make sure there are no pockets of dry flour at the bottom of the mug. The batter will look thick and glossy.
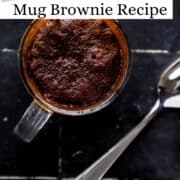
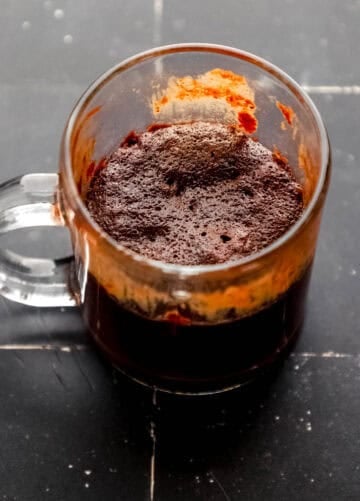
Step 3: Microwave, And Watch the Timing
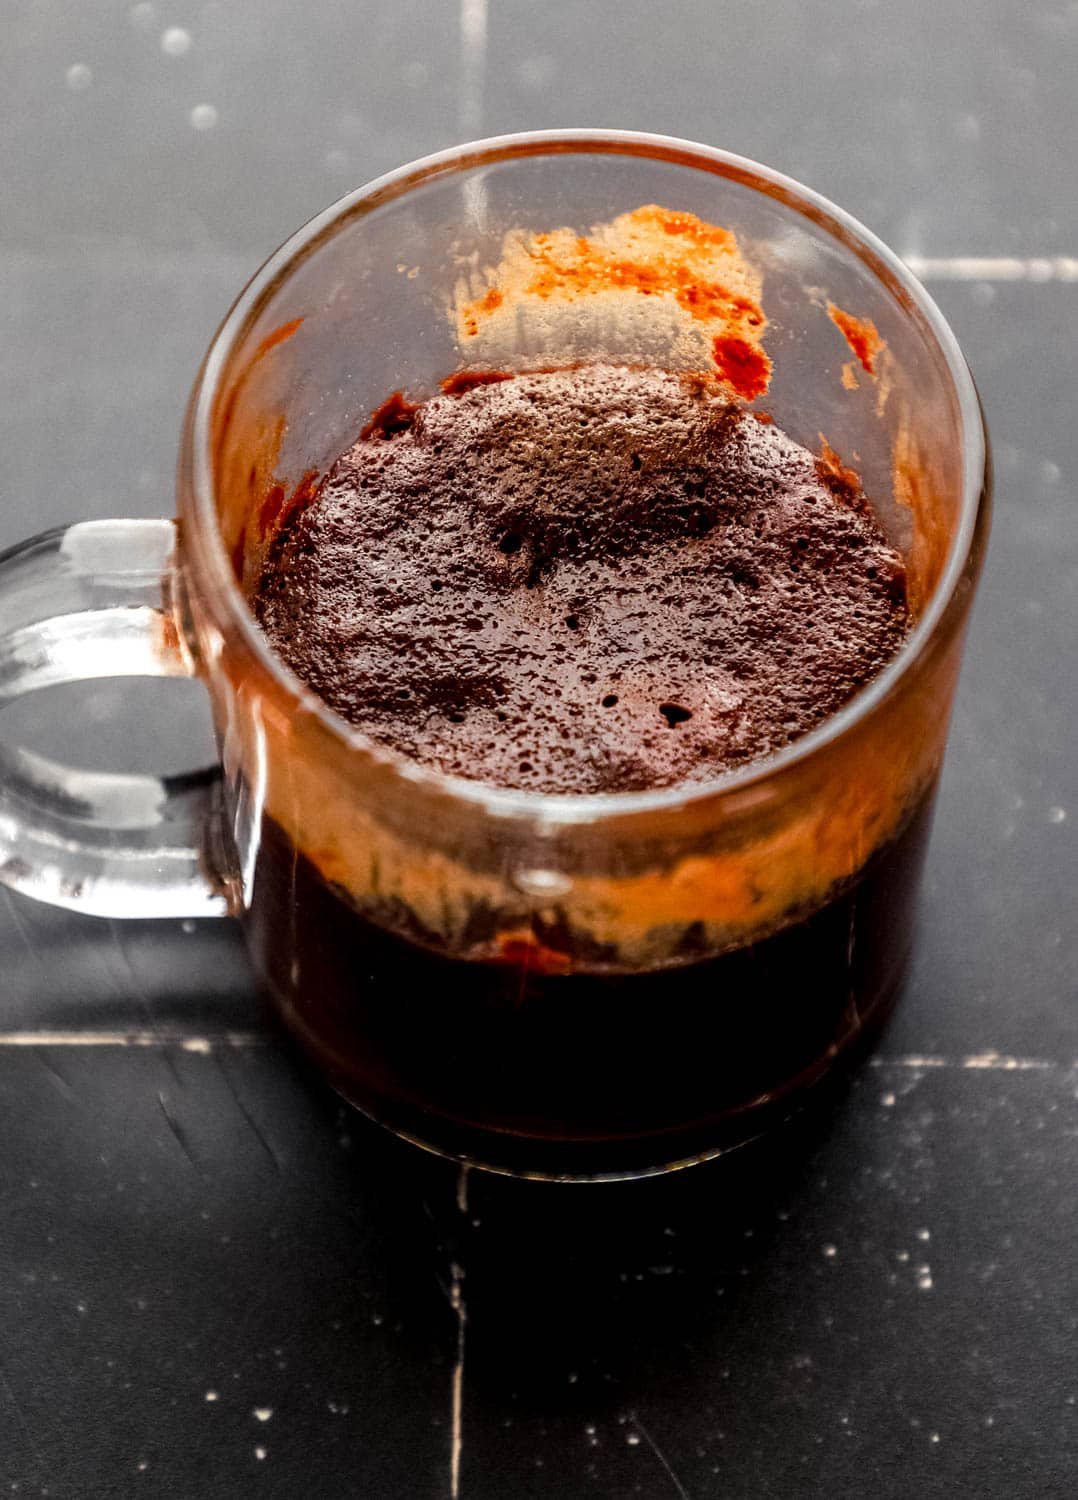
This is where knowing your microwave matters. See the wattage guide below. Microwave in 30-second increments, checking after each one. The brownie is done when the edges look set but the very center looks just barely done and slightly glossy. It will continue to cook and firm up from residual heat for 1-2 minutes after you take it out. If you wait for the center to look fully set in the microwave, it will be overbaked and rubbery when you eat it.

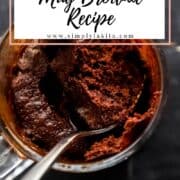
Step 4: Rest, Then Eat
Let the mug brownie rest for 1-2 minutes before eating. This isn't just for safety (it's very hot), it's also for texture. The brownie finishes cooking slightly during this rest time and reaches that ideal fudgy consistency. Top with a scoop of ice cream, a drizzle of chocolate sauce, or eat it straight from the mug. No judgment.
Wattage Guide: Microwave Timing by Power
Microwave wattage varies widely, and it's the single biggest reason mug brownies fail. Here's a general guide:
- 700W microwave - microwave for 90-100 seconds total, checking at 60 seconds.
- 900W microwave - microwave for 70-80 seconds total, checking at 60 seconds.
- 1,100W microwave - microwave for 60-70 seconds total, checking at 50 seconds.
- 1,200W+ microwave - microwave for 50-60 seconds total, checking at 45 seconds.
When in doubt: start lower, check early, and add time in 10-second increments. A slightly underdone mug brownie that finishes cooking in the mug is far better than an overdone rubbery one.
Troubleshooting: Why Is My Mug Brownie Rubbery?
Rubbery texture is the most common mug brownie complaint, and it almost always comes down to overcooking. Here's how to diagnose and fix it:
- Overcooking - the most common cause. The center should still look slightly glossy and just barely done when you pull it from the microwave. If it looks fully set in the microwave, it's already overcooked. Try 10 fewer seconds next time.
- Too much flour - flour absorbs moisture and creates a more cake-like, dense texture. This recipe uses a very small amount of flour intentionally. Don't round up on the flour measurement.
- Too little butter - butter is what keeps a mug brownie fudgy. Make sure you're measuring accurately and not skimping.
- Mug is too small - a small mug causes the batter to cook unevenly. The sides and bottom cook faster than the center, leading to a rubbery exterior and raw center. Use a mug that's at least 12 ounces.
Want To Save This Recipe?
Mug Brownie Variations
This is where it gets really fun. Here are my favorite ways to change up the base recipe:
- Peanut Butter Mug Brownie - drop 1 tablespoon of peanut butter into the center of the batter before microwaving. It melts into a swirl of peanut butter through the brownie.
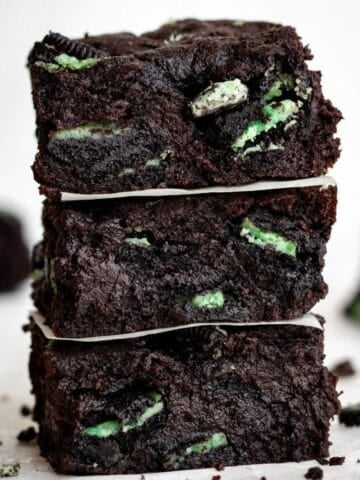
- Mint Chocolate Mug Brownie - add ¼ teaspoon peppermint extract to the batter and fold in a few mint chocolate chips. A great holiday single-serving treat.
- S'mores Mug Brownie - press 2-3 graham cracker pieces into the bottom of the mug before adding the batter, then top with mini marshmallows and a few chocolate chips before microwaving.
- Nutella Mug Brownie - replace 1 tablespoon of butter with 1 tablespoon of Nutella for a hazelnut-chocolate variation.
- Espresso Mug Brownie - add ¼ teaspoon of instant espresso powder to the batter for a coffee-chocolate mocha brownie.
- Salted Caramel Mug Brownie - drizzle 1 tablespoon of caramel sauce and a pinch of flaky sea salt over the finished brownie before serving.
Mug Brownie Mix in a Jar (A DIY Gift Idea)
This is one of the most thoughtful, easy-to-make gifts I know, and people absolutely love receiving it. Layer the dry ingredients (flour, sugar, and cocoa powder) in a small mason jar, write the instructions on a tag or a notecard, and you have a ready-to-make mug brownie kit.
It's perfect for teacher appreciation week, holiday stocking stuffers, a hostess gift, or a care package. The recipient just adds oil and an egg at home, that's it. Include a fun mug alongside the jar for an extra-special presentation.
To make the kit: layer the dry ingredients in order in a clean mason jar with a tight-fitting lid. Attach a tag with the instructions: 'Add 2 tablespoons vegetable oil or butter and 1 egg. Mix well. Microwave 60-90 seconds. Enjoy!'
Expert Tips
Here are my best tips for the perfect mug brownie every time.
- Use a large mug that's at least 12 ounces. A small mug causes uneven cooking.
- Don't skip the rest time after microwaving. 1-2 minutes of resting is where the brownie finishes setting up to that fudgy texture.
- Pull it when the center looks barely done. It continues to cook from residual heat.
- Know your microwave wattage! Check inside the door or in the manual. Wattage is the single most important variable in mug brownie success.
- Measure the flour accurately. Too much flour = dry, cakey brownie. Spoon into the measuring spoon and level off.
- Add your mix-ins (chocolate chips, peanut butter, etc.) after mixing the base batter for the most even distribution.
Make-Ahead & Storage
Make-Ahead
The dry ingredients can be pre-mixed and stored in an airtight container (or a mason jar gift kit) for up to 3 months. When ready to make, just add the wet ingredients and microwave.
Storage
A mug brownie is meant to be eaten immediately when it's a fresh, hot, single-serving treat. It doesn't store or reheat particularly well, as the texture changes significantly once cooled. If you have leftovers (unlikely!), you can cover the mug with plastic wrap and refrigerate for up to 24 hours, then microwave for 10 seconds to rewarm. The texture won't be the same as fresh, but it will still taste good.
What to Serve with a Mug Brownie
- A scoop of vanilla ice cream on top. Warm brownie, cold ice cream, perfect contrast.
- A drizzle of chocolate or caramel sauce for an elevated sundae vibe.
- Whipped cream and a sprinkle of flaky sea salt for a quick and beautiful presentation.
- A scoop of No-Churn Vanilla Ice Cream for a fully homemade brownie sundae.
- Nothing! Just eat it straight from the mug with a spoon at 10pm when you need chocolate immediately. That's the whole point.
Frequently Asked Questions
Yes, replace the egg with 1 tablespoon of water or milk, or use 1 tablespoon of applesauce. The texture will be slightly less rich but still gooey and chocolatey. You can also substitute a flax egg (1 tablespoon flax meal + 3 tablespoon water).
Rubbery mug brownies are almost always caused by overcooking. Microwave in 30-second intervals and stop when the top looks slightly underdone, it continues cooking as it sits. Also, avoid overmixing the batter.
Start at 60 seconds, then check. If the edges look set but the center still jiggles slightly, it's done. Continue in 10-second increments if needed. Most microwaves (1000W) take 60-70 seconds total.
Yes, substitute 1 tablespoon of cocoa powder with 1 oz of melted dark or semi-sweet chocolate. Melt it with the butter before adding other ingredients. The texture will be richer and fudgier.
Not recommended! The small quantity in a mug would overbake before the center sets. For oven brownies, try the Fudgy Brownies recipe, which is designed for an 8x8 pan and uses the same rich chocolate base.
At least 12 ounces, ideally 14-16 ounces. A mug that's too small causes the batter to cook unevenly, with the sides and bottom overcooking before the center is done. A larger mug gives the batter room to puff and cook evenly.
Don't double it in one mug, it will overflow and cook very unevenly. If you want two servings, make them in two separate mugs simultaneously (or back to back if your microwave can only fit one).
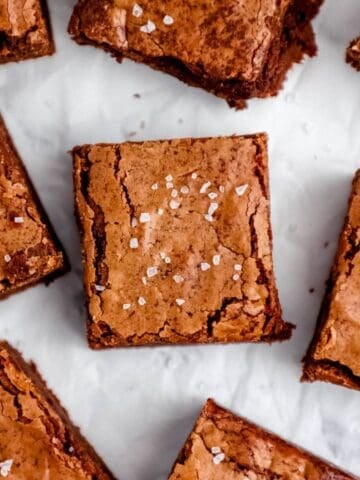
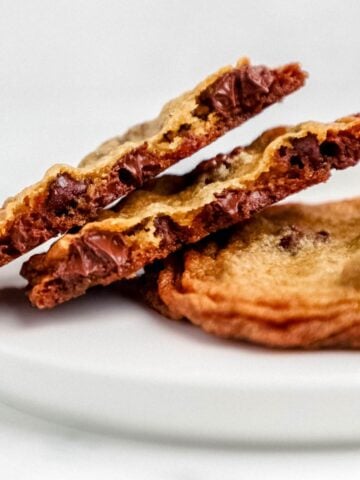
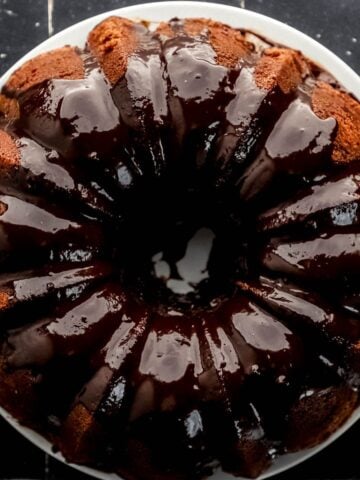
Want More Delicious Chocolate Recipes? Try These:
- Chocolate Delight Recipe
- Chocolate Sour Cream Pound Cake
- 9 Layer Chocolate Cake
- Chocolate Fondue Dessert Board
- Chocolate Cherry Dump Cake

📖 Recipe

Mug Brownie Recipe
Video
Equipment
- 1 microwave
- 1 mug
- 1 spoon
Ingredients
- 1 tablespoon all-purpose flour
- 4 tablespoons granulated sugar
- 2 tablespoons unsweetened cocoa powder
- 1 large egg
- 2 tablespoons vegetable oil
Instructions
- Begin the recipe by grabbing your favorite standard-size mug. Add 1 tablespoon all-purpose flour, 4 tablespoons granulated sugar, and 2 tablespoons unsweetened cocoa powder. Whisk (stir) to combine the dry ingredients together.
- Add 1 large egg and 2 tablespoons of vegetable oil. Stir to combine all of the ingredients together, but try not to overmix.
- Place the mug brownie into the microwave and cook for about 1 minute. Keep in mind microwaves may vary and the cooking time may need to be adjusted. After 1 minute, check the mug and microwave for an additional 10 seconds at a time, until the brownie is slightly spongy but still gooey.
- Carefully remove the brownie from the microwave and allow it to sit for 1 to 2 minutes before serving. Serve warm and top with chopped walnuts and chocolate chips if you prefer. Enjoy!
Did You Make This Recipe?
If you give this mug brownie a try, I'd love to hear how it went! Leave a star rating and a comment below, especially if you tried any of the variations. Share a photo on Instagram and tag @SimplyLaKita. I love seeing your late-night chocolate moments. Save this to Pinterest for the next time your chocolate craving hits at 10pm. Questions? Ask me in the comments!
Julie Cole says
Holy cow! Just made and ate this, super yummy and just hit that sweet spot, right on. Thanks heaps!
LaKita says
Haha, love this! So glad it hit the spot, thank you for giving it a try and taking the time to share. You just made my day! 🙌🏾😊
Leigh says
FINALLY a brownie in a mug recipe that actually tastes like a brownie!! I’ve tried so many and they end up tasting like doodoo. This one has the perfect proportions and was so delicious. I drizzled a little bit of plain ol Hershey’s syrup on top and it made it almost like a molten lava cake. Divine! Thank you so much for this perfect recipe!
LaKita says
Thank you so much for the kind words! I'm so happy to hear that this brownie in a mug hit the mark for you, nothing like a rich, gooey treat! I love the Hershey’s syrup idea; that sounds absolutely delicious. Your feedback made my day, and I’m so glad you enjoyed it! 😊🍫
Cym says
I’m a brownie connoisseur. Your recipe was on Google search at number five. I’m so glad you were the fifth. I’ve had the pleasure of indulging in your mug brownie! Exceptional my dear! Thank you! Went as directed adding a tablespoon of chopped walnuts* personal favorite * thank you for being my lucky number five!
LaKita says
Thank you and I'm happy that I was lucky recipe number five for you! I appreciate you giving the recipe a try and sharing your experience. Plus adding walnuts sounds amazing 🙂
Brittany says
This is so delicious! Easiest recipe I have found and by far the best! I topped mine with a bit of reddi whip and that was a great ice cream substitute. Thanks for this recipe ❤️
LaKita says
Thank you so much Brittany! Glad to hear that you enjoyed the recipe and topped with reddi whip sounds perfect 🙂
Melinda says
I've learned from experience that I never like mug cakes with egg - they come out too cake-y for me, and sometimes even tasting like egg. So I substituted with flax egg this time. The flavor of the brownie was perfect! Texture was great too, but also a bit too oily.... I would rate it 4/5, but because I used the flax egg I don't know how much they will have messed with things so I don't want to give it a REAL rating. 🙂
But thank you for the yummy treat!
LaKita says
Thank you so much for your feedback Melinda!
Meghan Caissie says
This is my go-to mug brownie recipe! It's easy and simple and that's what I want in a quick recipe. I've looked at others that call for sifting flour and cocoa powder and have seven or eight ingredients and multiple steps and teaspoons and half tablespoons... Nah. This is easy and I love that it's just a mug, a tablespoon, and a spoon to mix!
I do reduce the sugar to 1 tablespoon but that's entirely so I can pour tooth-achingly-sweet caramel sauce on top and I like a less sweet base to offset that.
I make this brownie mug recipe one night and save the second half for the next night and it reheats wonderfully the next day.
LaKita says
Thank you so much Meghan! Happy to hear. Also, caramel sauce sounds perfect!!!!
Asia says
Thank you for those! I finally found a brownie mug recipe that I actually liked. I actually enjoyed this one and ate the entire thing, unfortunately all of the other ones ended up in the trash. I substituted cocoa powder for brownie mix, but kept everything else the same including measurements. This was delicious, thank you again!
LaKita says
So glad to heat that you enjoyed this recipe!