


There's nothing quite like a homemade pie crust, buttery, flaky, and perfectly golden. This recipe combines both butter and shortening to give you the best of both worlds: rich flavor and tender, crisp layers. With just a few pantry staples, you'll have a foolproof crust that works for sweet pies like sweet potato or pecan and savory dishes like chicken pot pie or quiche.
Updated August 2025: Updated with new photos, detailed step-by-step instructions, and expert tips for better clarity. Post originally published November 26, 2020.

Watch this quick video tutorial!
Jump to:
If you've always reached for a frozen crust, I promise this method will change your mind. I've been baking pies for years, and once I mastered this crust, I never looked back. Let me walk you through the steps so you can bake with confidence.
Before You Bake, Read This
- Keep it cold: The secret to a flaky crust is using cold butter, cold shortening, and ice water. If your dough warms up, let it chill before continuing.
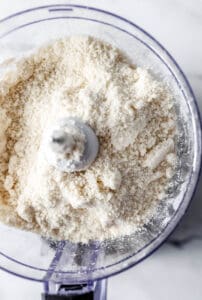
- Tools you'll need: Food processor or pastry blender, rolling pin, and a glass pie dish (it helps the crust bake evenly).
- Double or single: This recipe makes two crusts (top and bottom). For a single-crust pie, freeze the second one for later.
- Versatile: Since there's no sugar, this pie crust works for both sweet and savory pies.
Ingredients You'll Need
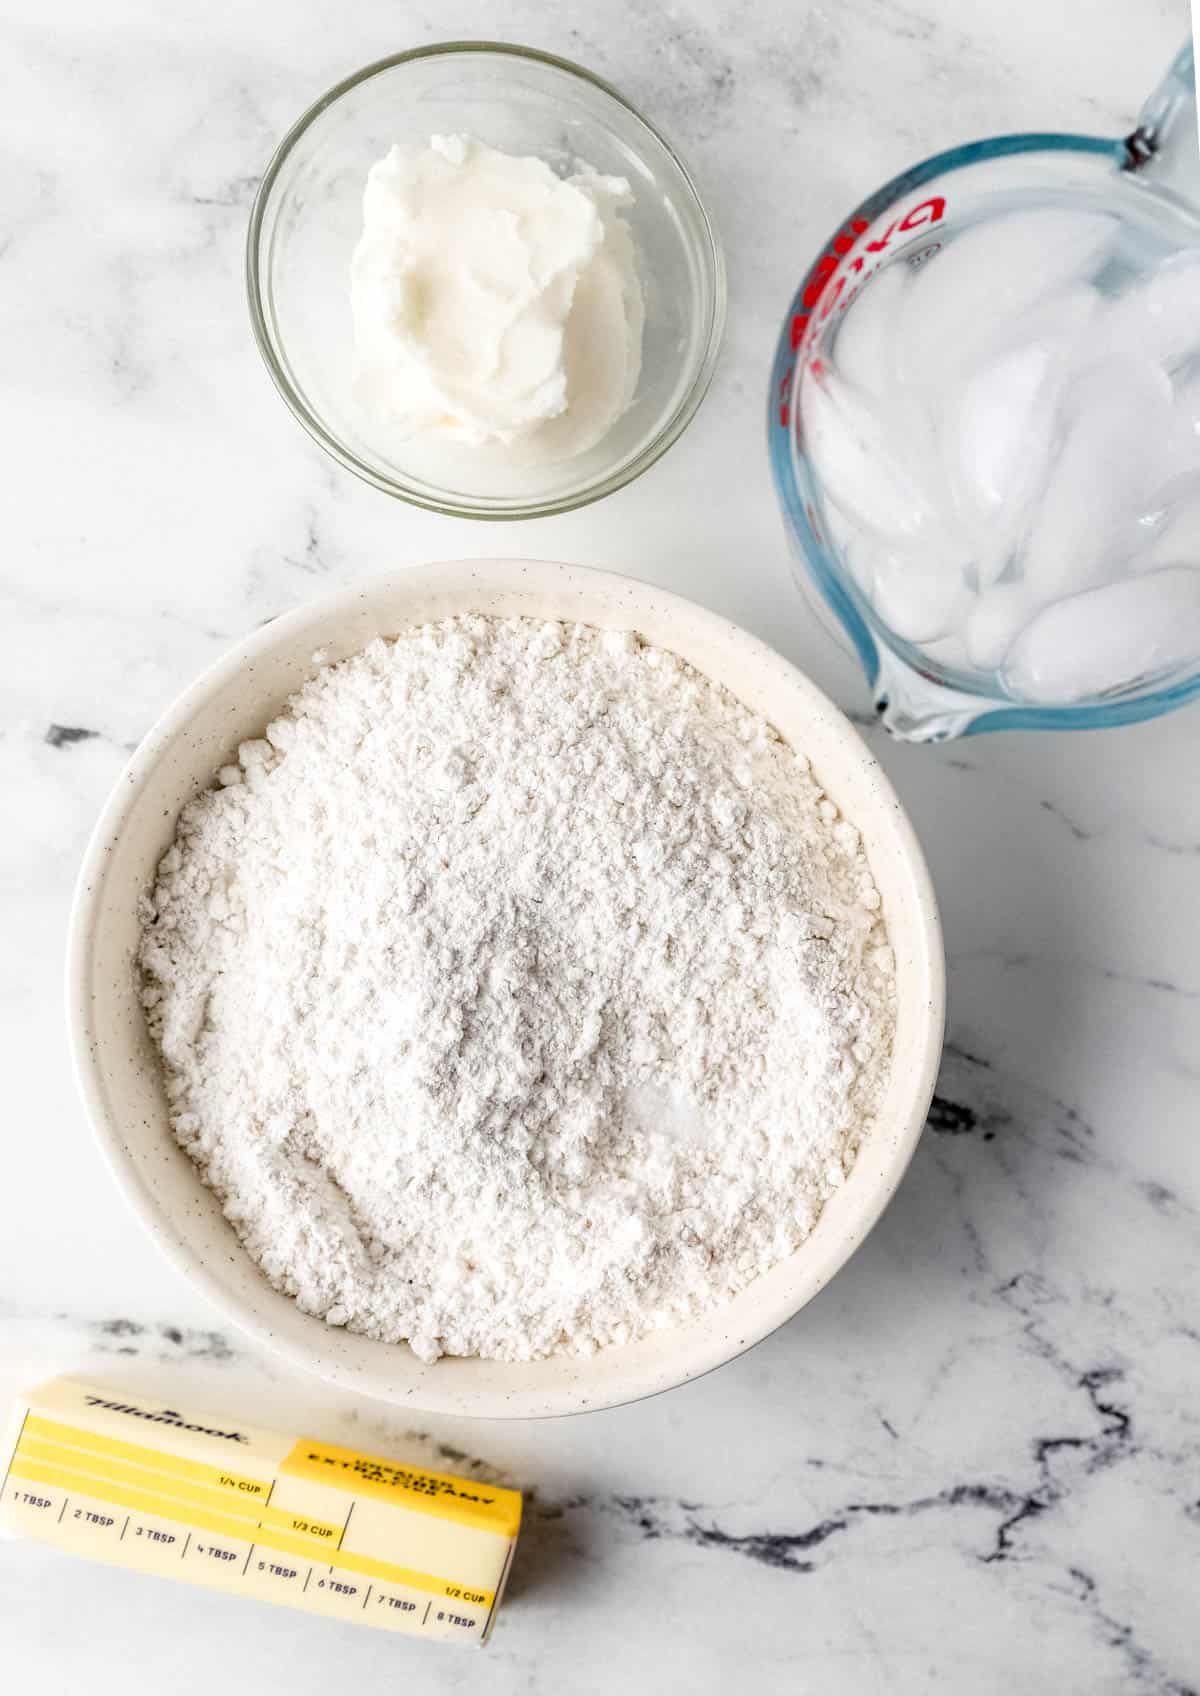
- All-Purpose Flour - Gives the crust structure and texture.
- Butter - Cold, cubed butter adds buttery flavor and flaky layers.
- Shortening - A Southern classic (I love Crisco sticks). It keeps the crust tender and crisp.
- Salt - Brings out the flavor in the crust.
- Ice Water - Pulls everything together into a smooth dough.
👉🏾 See the recipe card below for exact quantities and full instructions.
📖 Recipe
Homemade Pie Crust Recipe
Video
Equipment
- 1 Food processor
- 1 Rolling Pin
- 1-2 Pie Plate(s)
Ingredients
- 2 ½ cups all-purpose flour
- ½ cup cold cubed butter
- ½ cup shortening
- ⅛ teaspoon salt
- 3-5 tablespoons ice cold water
Instructions
- Mix the base: In a food processor (or bowl with a pastry cutter), combine 2 ½ cups flour, ½ cup cold butter, ½ cup shortening, and ⅛ teaspoon salt. Pulse until crumbly.

- Add water: With the processor running, drizzle in ice water 1 tablespoon at a time until dough clumps together.
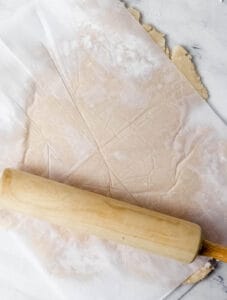
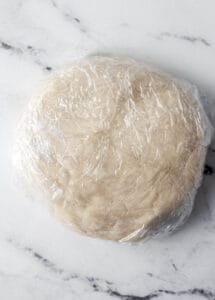
- Form the dough: Turn onto a floured surface. Gently knead just until it forms a ball. Divide into two equal portions for a double crust or keep as one for a single crust.
- Chill: Wrap in plastic wrap and refrigerate at least 2 hours (or overnight).
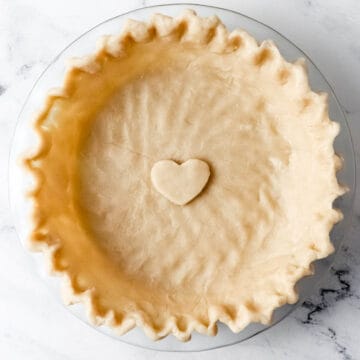
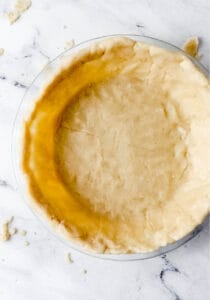
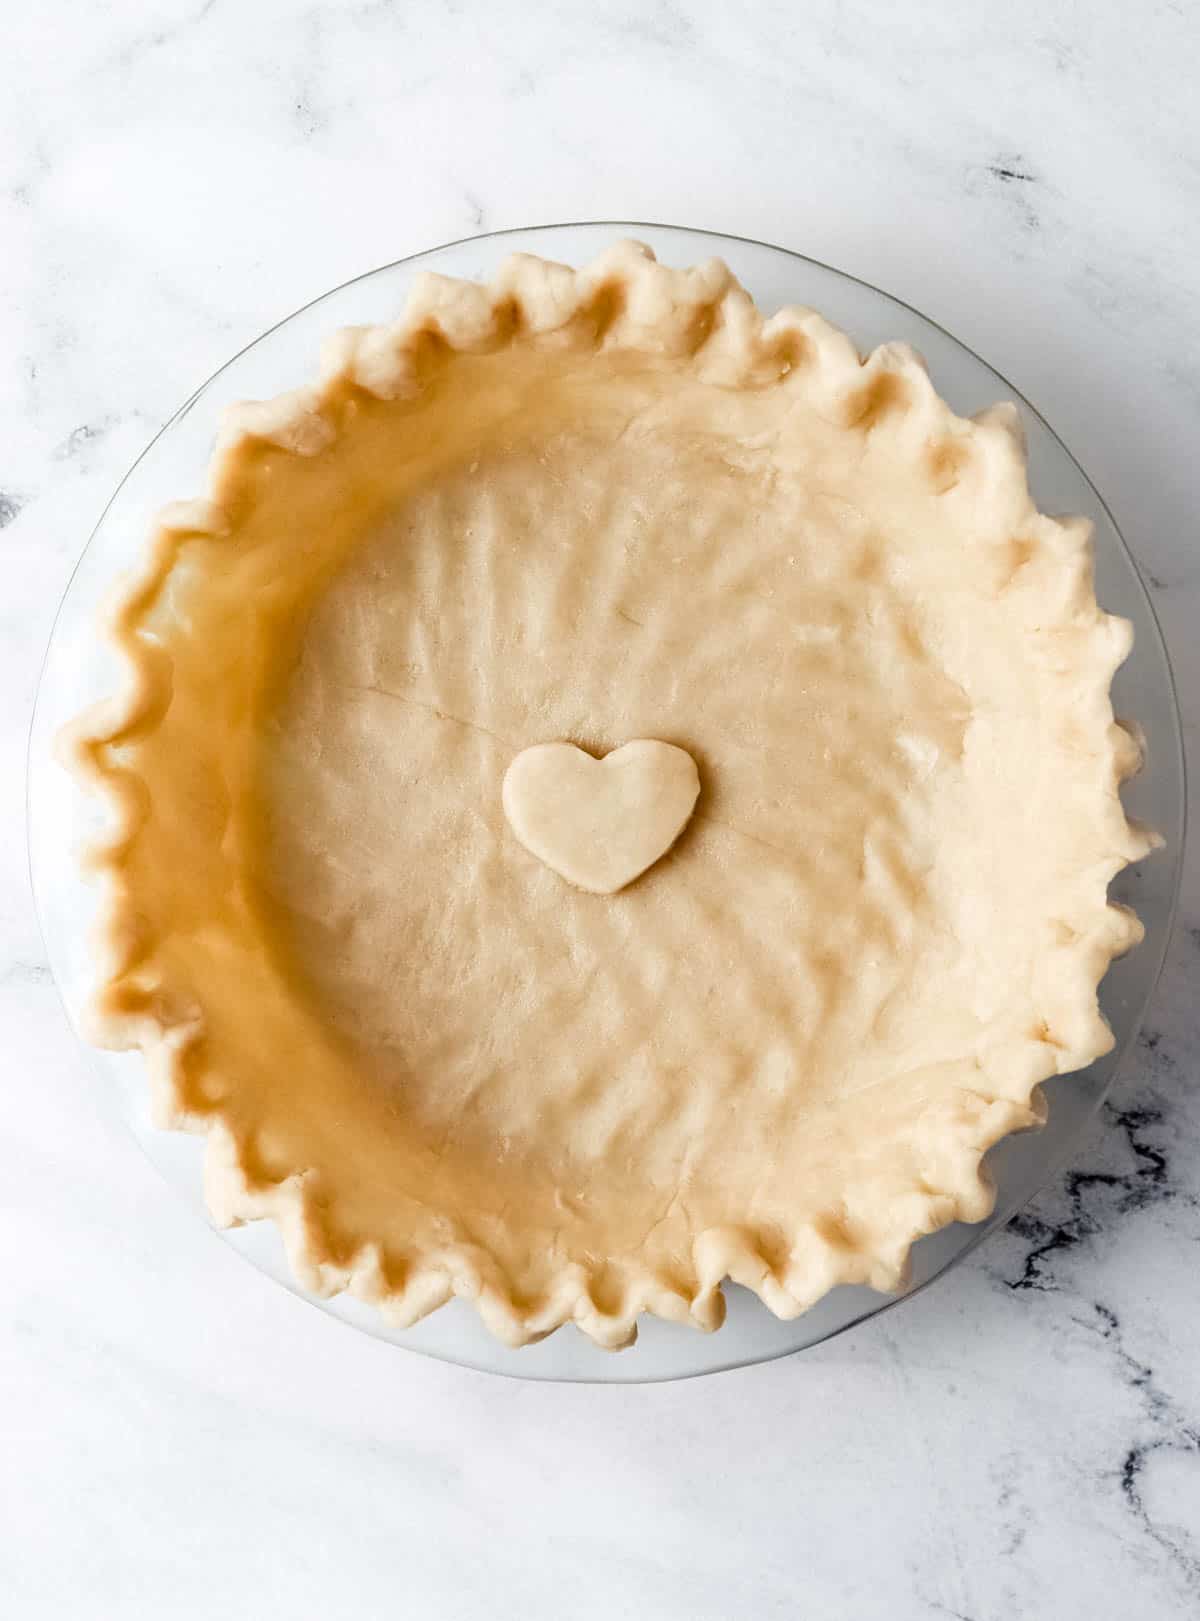
- Roll it out: On a floured surface, roll the dough into a 9-12 inch circle. Transfer to your pie plate, trim, and crimp edges.
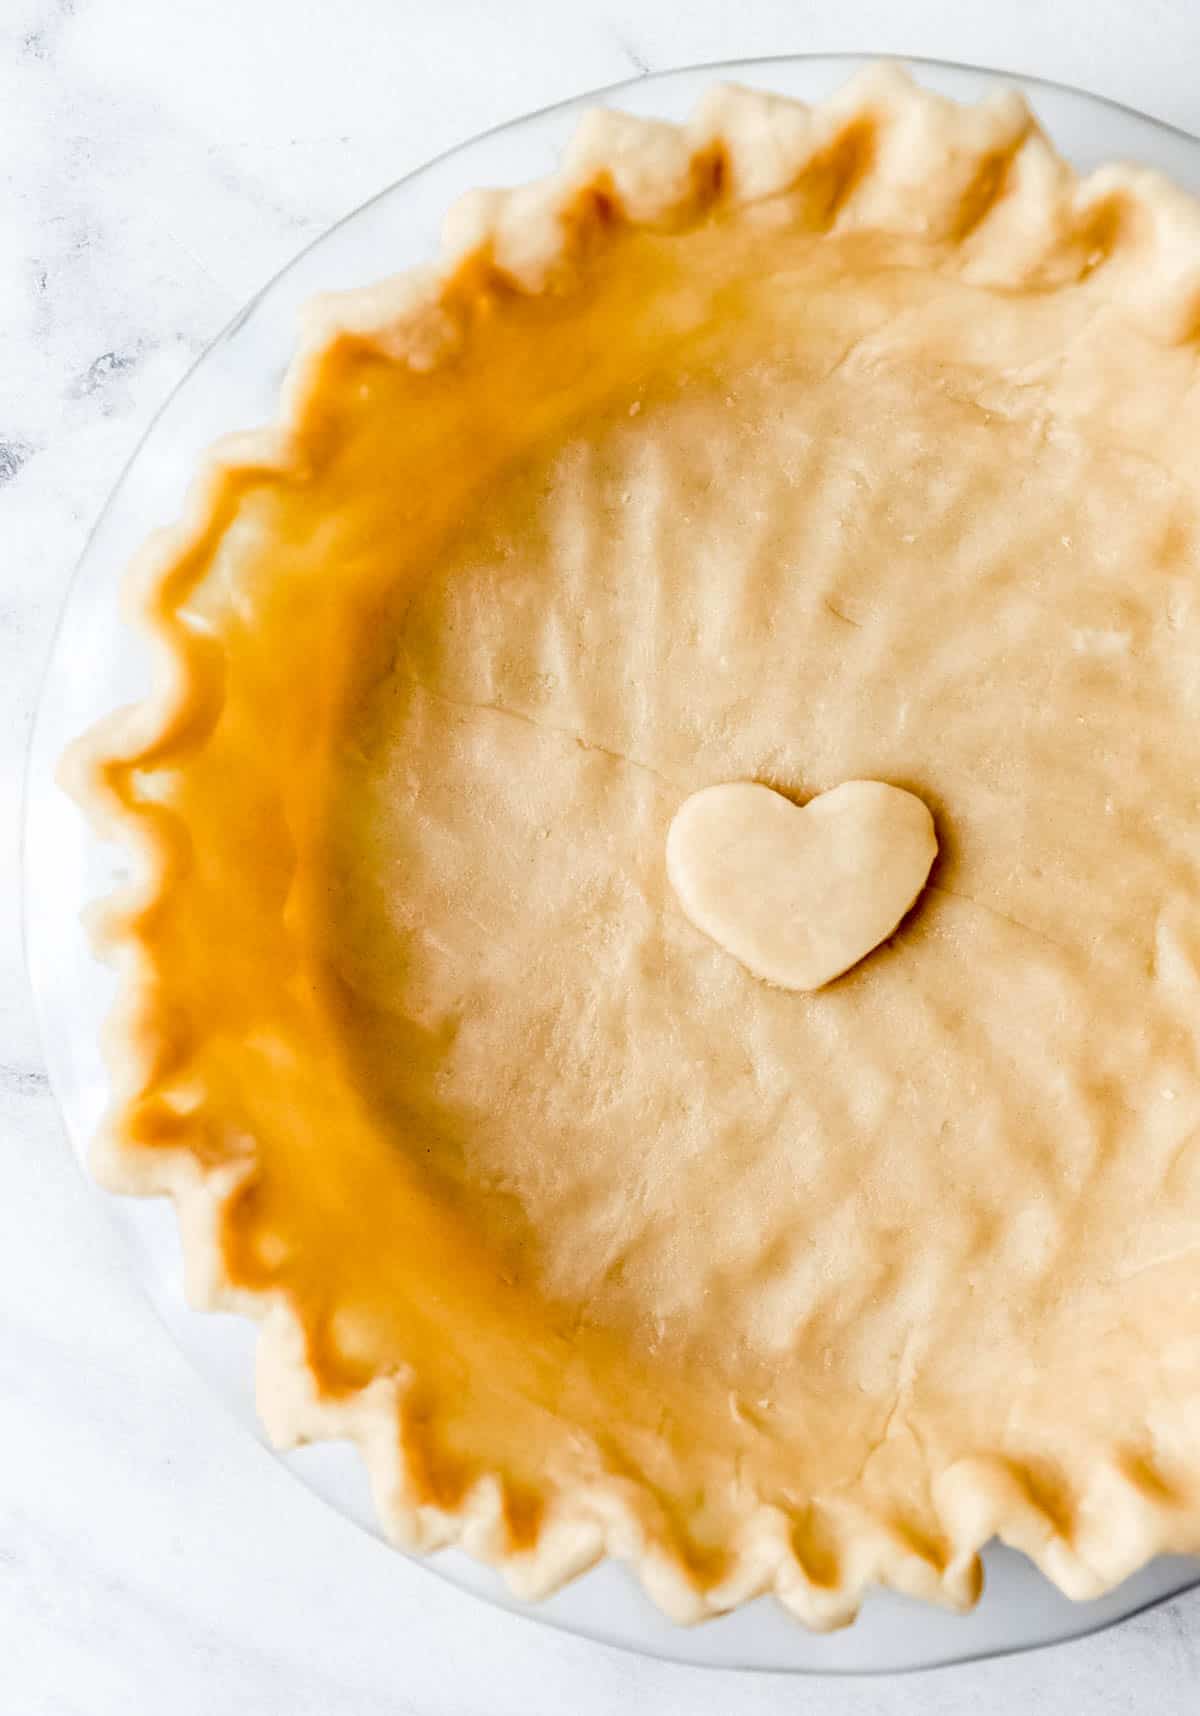
- Chill again: Refrigerate the shaped crust for 30 minutes before baking to prevent shrinking.
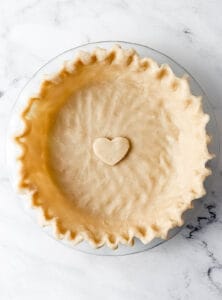
- Bake or fill: Add your pie filling and bake as directed. For blind baking, line with parchment and pie weights, bake at 375°F for 10-15 minutes, then continue until golden.
Notes
- Keep all ingredients cold.
- Works for sweet and savory pies.
- Freeze unbaked dough or baked crusts for later use.
LaKita's Expert Tips
- Don't overwork the dough, stopping early ensures tender, flaky layers.
- If the dough feels sticky, sprinkle in a little extra flour.
- For best results, use a glass pie dish so you can see the bottom brown evenly.
- Freeze unbaked crusts up to 3 months. Thaw in the refrigerator before rolling out.
Storage & Make-Ahead
- Refrigerator: Wrapped tightly, the dough keeps up to 1 week.
- Freezer (unbaked dough): Wrap in double plastic wrap, store up to 3 months.
- Freezer (baked crust): Cool completely, wrap well, and freeze up to 3 months.
Want To Save This Recipe?
How This Pie Crust Recipe Compares to Others
When you search for "pie crust recipe," you'll see dozens of results, some using only butter, others only shortening. Here's how mine stands apart:
- Butter-Only Crusts - Popular on sites like Sally's Baking Addiction, these give great flavor but can sometimes turn out a little too crumbly or melt quickly if your kitchen runs warm.
- Shortening-Only Crusts - Classic Southern cookbooks often use all shortening (like Crisco) because it guarantees flakiness. The downside? You miss out on that rich, buttery flavor.
- This Recipe (Butter + Shortening) - You get the best of both worlds. Butter brings flavor and color, while shortening makes the crust easier to roll, more forgiving, and reliably flaky.
That combination, plus my tips for keeping everything cold, means you'll have a crust that's buttery, flaky, and consistent every single time, whether you're making a holiday sweet potato pie or a weeknight chicken pot pie.
FAQs
Yes! You can refrigerate the dough (wrapped tightly) for up to 1 week or freeze it for up to 3 months. Just thaw overnight in the refrigerator before rolling out.
Absolutely. After blind baking and cooling, wrap the crust well in plastic wrap or foil and freeze for up to 3 months. Thaw in the refrigerator before using.
No, but I recommend it for the best results. Butter gives flavor, while shortening makes the dough easier to handle and ensures flakiness. You can substitute one for the other, but the texture will be slightly different.
Yes! Swap the all-purpose flour with a 1:1 gluten-free baking flour blend. Keep in mind that the dough may be more delicate, so chill it well before rolling.
Line the chilled crust with parchment paper, fill with pie weights (or dried beans), and bake at 375°F for 10-15 minutes. Remove the weights and parchment, then bake another 10-15 minutes until golden if a fully baked crust is needed.
This usually happens if the dough is overworked or if the ingredients weren't kept cold. Handle the dough as little as possible, and always chill before baking.
Delicious Ways to Use This Pie Crust
- Easy Sweet Potato Pie
- Southern Pecan Pie
- Brown Sugar Pie
- Peach Galette
- Chicken Pot Pie
- Sun Dried Tomato Quiche


Tried this Homemade Pie Crust Recipe? Leave a ⭐⭐⭐⭐⭐ rating below or tag @simplylakita so I can see your tasty pie creations!
💌 From my kitchen to yours, happy baking!


Leave a Reply