

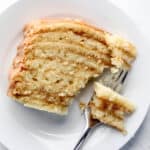


This Southern 9-layer chocolate cake recipe is a true labor of love. Thin, delicate layers stacked high with rich chocolate frosting. Worth every minute!
Updated February 2026: I've added a full make-ahead guide, a troubleshooting section, and the Southern cultural history of little layer cakes based on your questions and feedback. Originally posted on October 24, 2014.
Watch this quick video tutorial!
There are recipes you make because they're quick and easy. And then there are recipes you make because they're special. Because they tell a story. Because they connect you to something bigger than one afternoon in the kitchen. My 9-Layer Chocolate Cake is that second kind.
This is a Southern little layer cake, a tradition especially beloved in Alabama and across the Deep South. Thin, delicate cake layers, each just slightly thicker than a crêpe, stacked high with a rich, silky chocolate frosting between every single layer. It's a labor of love, and I won't pretend otherwise. But I've made this recipe enough times to know every shortcut, every troubleshooting tip, and exactly how to make the process feel manageable rather than overwhelming.
If you've ever seen one of these cakes at a church potluck, a family reunion, or a Southern grandmother's Thanksgiving table and wondered how on earth someone made it, I'm going to show you. This cake is entirely worth the time you'll spend on it. Let's get started!
Jump to:
- Watch this quick video tutorial!
- What Is a Little Layer Cake?
- Why You'll Love This 9-Layer Chocolate Cake
- Ingredients You'll Need
- How to Make a 9-Layer Chocolate Cake
- Expert Tips
- Troubleshooting
- Make-Ahead Guide (Bake Over Two Days)
- Storage
- Can I Use a Boxed Cake Mix?
- What to Serve with 9-Layer Chocolate Cake
- Frequently Asked Questions
- 📖 Recipe
- Did You Make This Recipe?
What Is a Little Layer Cake?
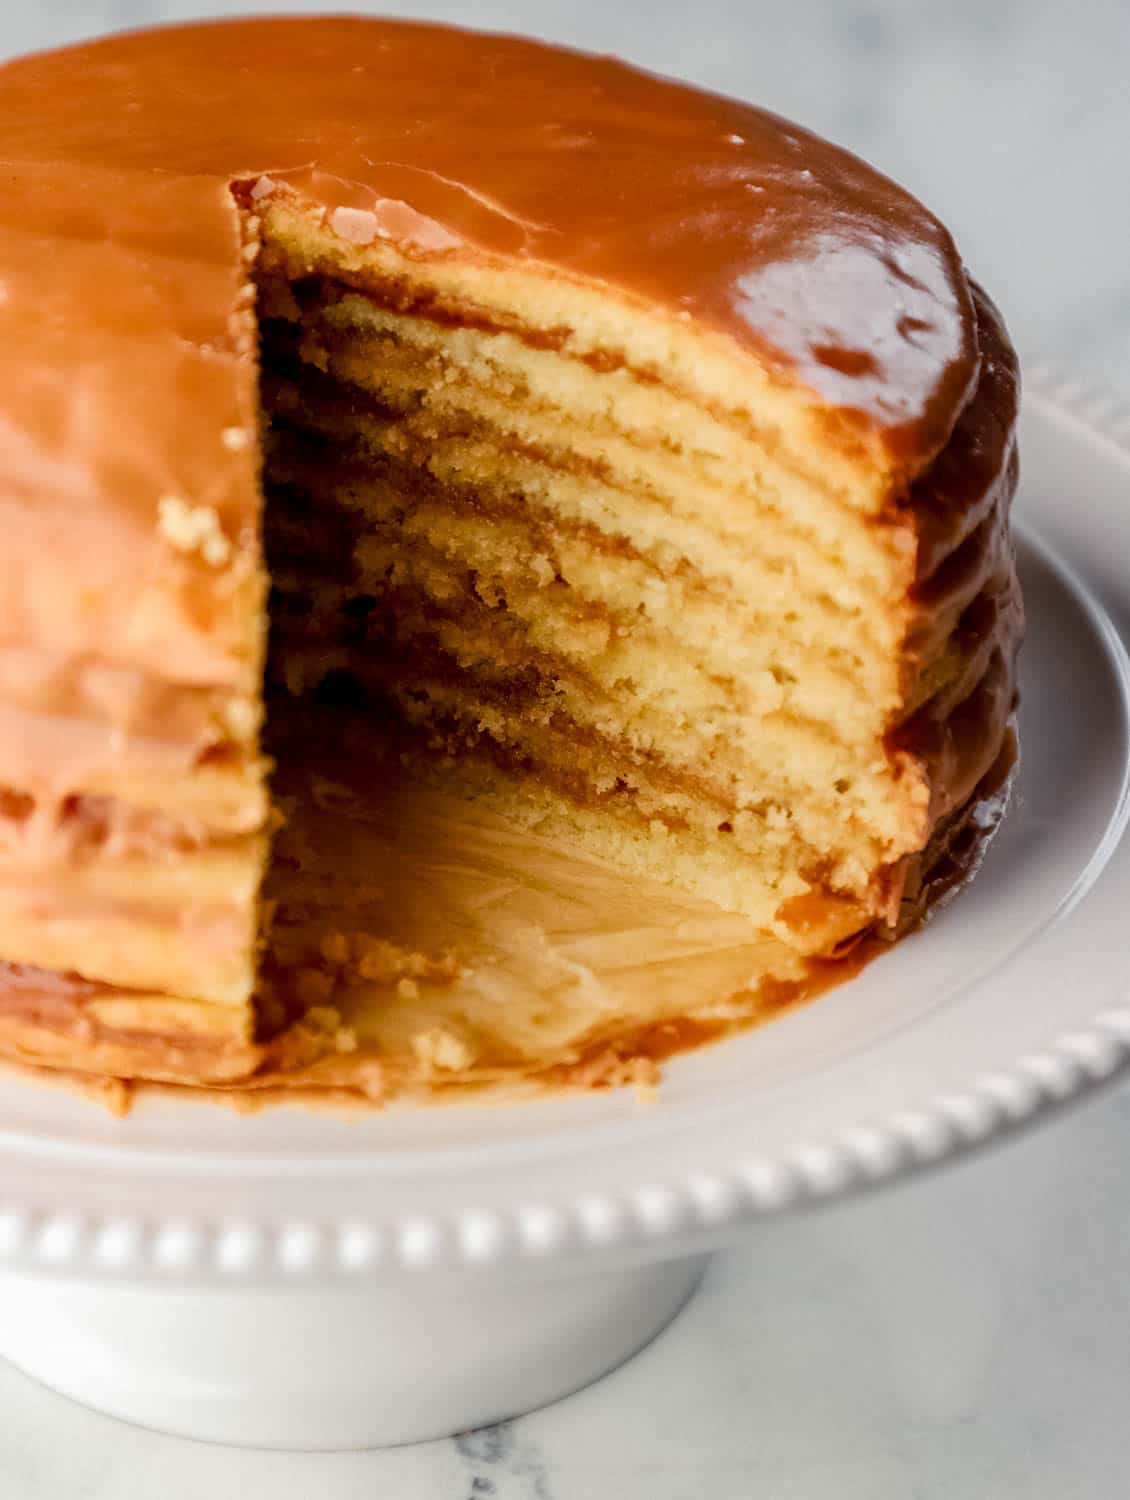
A little layer cake (also called a stack cake or a thin layer cake) is a distinctly Southern tradition, particularly associated with Alabama, Georgia, and the broader Deep South. Unlike a standard 3 or 4-layer cake, a little layer cake is made with anywhere from 8 to 15 very thin layers, each baked separately in the same pan, and assembled with a filling or frosting between every layer.
The tradition dates back generations, when cooks prided themselves on how many delicate layers they could stack. The number of layers was a point of pride, the more layers, the more skill required. A 9-layer cake was considered impressive while 12 or 15 layers were reserved for the most dedicated bakers.
My version uses 9 thin chocolate layers with a rich chocolate frosting that soaks slightly into each layer as the cake rests, creating a deeply fudgy, almost brownie-like texture at the center. It is unlike any other cake you've ever tasted.
Why You'll Love This 9-Layer Chocolate Cake
- A true showstopper - there is simply nothing more impressive to set on a table. Nine beautiful layers of chocolate cake are visible from every angle.
- Deep, fudgy flavor - the frosting soaks slightly into each thin layer as the cake rests overnight, creating a texture closer to fudge than standard cake.
- A connection to Southern history - this recipe carries generations of tradition. Making it means being part of something that matters.
- Worth every minute - yes, it takes time. But with the make-ahead guide in this post, you can break the process into two manageable days.
Ingredients You'll Need
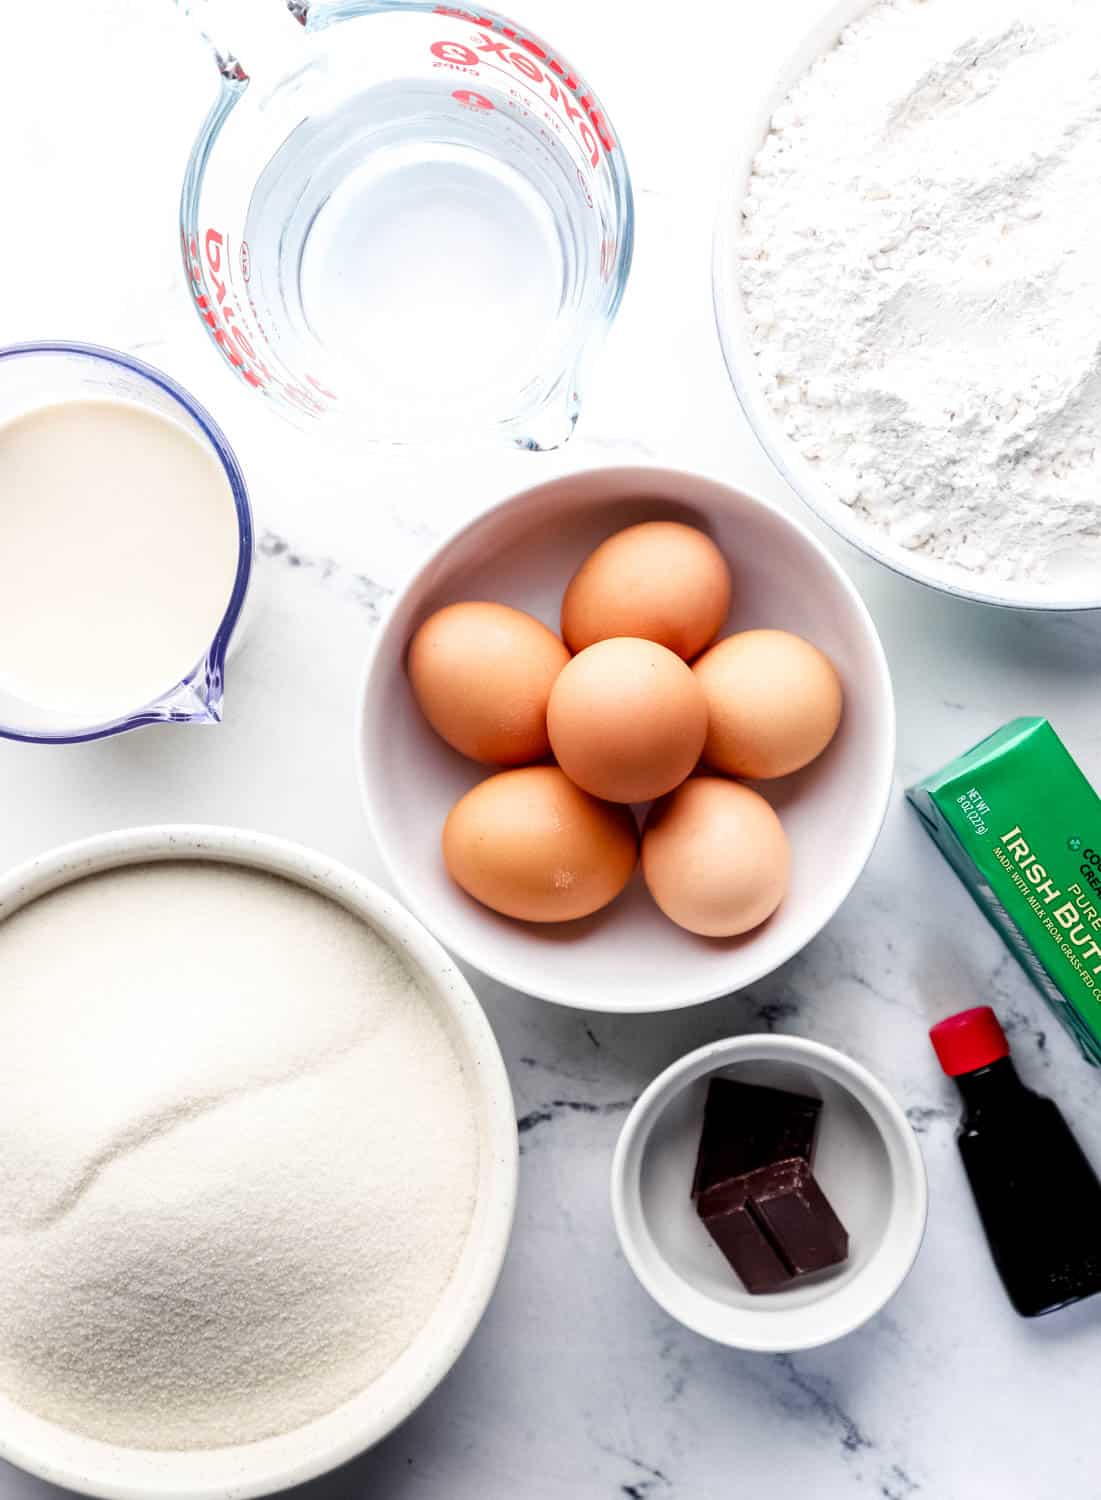
- All-purpose flour provides the structure for each thin layer. Make sure to measure correctly, spoon the flour into your measuring cup, and level off with a knife. Never scoop directly from the bag, as this packs in extra flour and makes the layers stiffer.
- Whole milk keeps the batter pourable and creates tender, thin layers. Don't substitute with lower-fat milk, the fat content matters for texture.
- Unsalted butter adds richness and flavor. Use it at room temperature for the batter so it creams properly, and melts easily for the frosting.
- Eggs at room temperature incorporate better into the batter. Pull them from the refrigerator 20-30 minutes before starting.
- For the chocolate frosting: good-quality cocoa powder, butter, whole milk, and powdered sugar. This is a poured-style frosting that's slightly thinner than a standard buttercream. It needs to be spreadable enough to soak slightly into each layer as the cake rests. Don't make it too thick.
👉🏾 See the recipe card below for exact quantities and full instructions.
How to Make a 9-Layer Chocolate Cake
Step 1: Make the Cake Batter
This batter is thinner than a standard cake batter, it's meant to spread easily into thin layers. Cream your butter and sugar until light, then add eggs one at a time. Alternate adding the dry ingredients and milk, starting and ending with the dry ingredients. The batter should be pourable but not watery. If it looks too thick, add milk one tablespoon at a time.

Step 2: Bake Each Layer Separately
Each of the 9 layers bakes individually in the same pan. Pour just enough batter to barely cover the bottom. Approximately ¼ to ⅓ cup per layer depending on your pan size. Spread it evenly all the way to the edges. Each layer bakes quickly, about 6-8 minutes at 350°F. Watch carefully, the edges should be set, and the center should look done but not browned. These are thin enough that they can overbake fast.

Step 3: Cool and Stack Strategically
This is where patience matters. Each layer must cool completely before stacking, or the frosting will melt and slide. Set each layer on a wire rack as it comes out of the pan. If you're making all 9 layers in one day, you can set them out on a large counter or use cooling racks. Just make sure no two warm layers are touching each other.

Step 4: Make the Chocolate Frosting
The frosting for a little layer cake is thinner and more spreadable than standard buttercream. It needs to soak slightly into each layer as the cake rests, which is what creates that legendary fudgy texture. Whisk together melted butter, cocoa powder, milk, and powdered sugar until smooth and pourable. It should be the consistency of a thick syrup, not a stiff frosting. If it's too thick, add milk a tablespoon at a time.

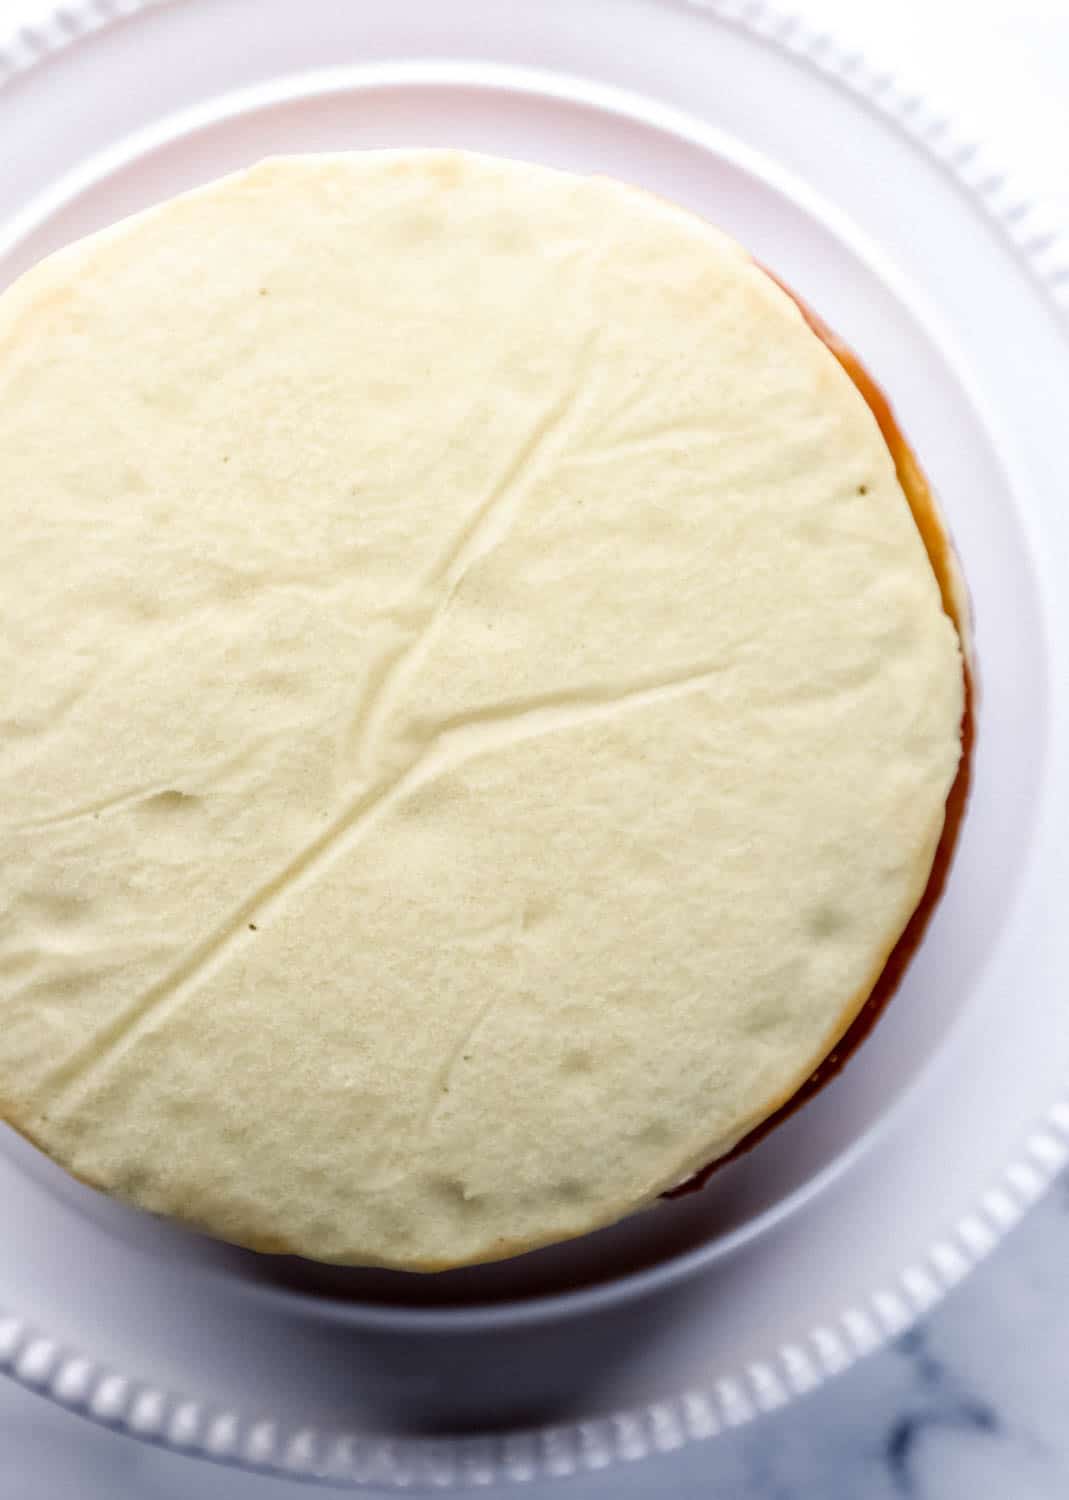
Step 5: Assemble Layer by Layer
Place the first layer on your serving plate or cake stand. Spread a thin, even layer of frosting all the way to the edges. Place the next layer on top, pressing gently to adhere. Repeat with each layer, ending with frosting on the very top and spreading any remaining frosting down the sides. Don't worry about perfection, a slight lean or imperfect edges are part of the charm of a handmade little layer cake.
Step 6: Rest Overnight
This step is non-negotiable. The cake must rest at room temperature for at least 8 hours, preferably overnight, before slicing. This resting time allows the frosting to soak into each layer and the whole cake to settle and firm up into its iconic dense, fudgy texture. A freshly assembled little layer cake will be wobbly and soft. After an overnight rest, it will be firm, sliceable, and extraordinary.
Expert Tips
- Use the same pan for all 9 layers, this ensures consistent size. Measure your batter for each layer so they're all the same thickness.
- Line the pan with parchment paper and spray with cooking spray for every single layer. Don't skip this step even once or a layer will stick and tear.
- Cool each layer on a flat surface. Layers that cool while slightly curved (from a round rack) will be harder to stack flat.
- Make your frosting slightly thinner than you think it should be. It will thicken as it cools and needs to be spreadable through all 9 layers.
- Assemble on the serving plate you'll use. Once assembled and rested overnight, this cake is heavy and difficult to move without disturbing the layers.
- Don't rush the overnight rest. The transformation that happens as the cake rests is the entire secret to a little layer cake's texture. It genuinely tastes better the next day.
- Use a sharp, thin-bladed knife and a straight downward cut to slice, this shows off all 9 beautiful layers in every slice.
Want To Save This Recipe?

Troubleshooting
- Layers are falling apart when I remove them from the pan: the pan wasn't greased thoroughly enough, or the layer was removed before it was fully cooled. Let it cool in the pan for 2-3 minutes before turning out, and make sure you're using fresh parchment and cooking spray for every layer.
- The batter keeps running to the edges and leaving bare spots: the batter is too thin or the pan isn't level in the oven. Use a small offset spatula to spread the batter to the edges immediately after pouring.
- The frosting is soaking in too fast and I'm running out: the frosting is too thin, or you're applying too thick a layer per layer. Use a thinner layer of frosting between each cake layer. You want just enough to coat, not a thick layer.
- The assembled cake is leaning: This is normal! A slight lean is part of the handmade charm. To minimize it, make sure each layer is level before stacking, and alternate the direction of any slight dome on each layer.
Make-Ahead Guide (Bake Over Two Days)
This is the strategy I recommend for everyone making this cake for the first time:
- Day 1: Bake all 9 layers. Cool completely. Stack layers carefully between sheets of parchment paper and store at room temperature covered loosely with plastic wrap. They will keep perfectly for up to 24 hours.
- Day 2: Make the frosting and assemble the cake. Allow to rest overnight before serving.
This approach means you never feel rushed, you're not baking and assembling in the same 4-hour window, and the cake still gets its full overnight rest before it's served.
Storage
Store the assembled cake covered at room temperature for up to 3 days. The texture actually improves over the first 2 days as the frosting continues to soak in. For longer storage, wrap individual slices in plastic wrap and refrigerate for up to 5 days, bring to room temperature before serving. This cake does not freeze well once assembled.

Can I Use a Boxed Cake Mix?
Yes, and there's no shame in it! A good chocolate boxed cake mix prepared according to package directions will give you a workable batter for this cake. The layers may be slightly more uniform in texture than a from-scratch version, but the overall result is still 9 thin layers with chocolate frosting. If using a boxed mix, prepare one box for approximately 6-7 layers, and a second box for the remaining layers. Don't try to stretch one box across all 9 layers, or they will be too thin.
What to Serve with 9-Layer Chocolate Cake
- A cold glass of milk! The classic, simple pairing that lets the cake be the star.
- A scoop of vanilla ice cream for a warm-weather serving that balances the richness of the chocolate.
- Strong coffee or chicory coffee for a deeply Southern dessert moment, the bitterness of the coffee cuts the sweetness of the cake beautifully.
- A full Southern dessert table alongside Easy Banana Pudding Recipe, Chocolate Delight, and Chess Squares for a celebration spread.

Frequently Asked Questions
Budget 3-4 hours for baking all 9 layers and cooling, plus 30 minutes for the frosting and assembly. Then the cake needs to rest for at least 8 hours (overnight is ideal) before slicing. I highly recommend the two-day approach in my make-ahead guide above, bake the layers on Day 1, frost and assemble on Day 2, and serve on Day 3. It makes the whole process feel much more manageable.
Each layer should be about ¼ inch thick when baked. Thin enough that you can see through a single layer slightly when held up to light, but sturdy enough to handle. If your layers are coming out much thicker than this, you're using too much batter per layer. If they're falling apart when you handle them, they may be slightly underbaked or too thin.
Absolutely, this is the recommended approach. Bake all 9 layers up to 24 hours in advance, cool completely, and stack between parchment sheets at room temperature. They'll be fresh and ready to assemble the next day.
The overnight rest is what transforms this from a stack of thin cake layers into a little layer cake. The frosting softens and soaks partially into each layer, the whole structure settles and firms up, and the flavors meld together. A freshly assembled little layer cake is soft and wobbly. But, after an overnight rest, it's dense, fudgy, and easily sliceable.
Yes, 6 or 7 layers is still a beautiful and impressive little layer cake. Simply adjust your batter quantity and plan for slightly thicker layers. The overnight rest and assembly process are the same.
A standard layer cake has 2-4 thick layers (usually 1-2 inches each). A little layer cake has 8-15 very thin layers (about ¼ inch each), each baked separately. The thin layers soak up the frosting differently, creating a dense, fudgy texture throughout the entire cake rather than just at the frosting lines.
Use a sharp, thin-bladed knife and cut with a straight downward motion, no sawing. Wipe the knife clean between each slice. Serving it cold (refrigerated for 1 hour before slicing) can also make the cake easier to cut cleanly while still showing off all 9 layers.
Two most common causes: the pan wasn't greased thoroughly enough before each layer, or the layer was removed before it had cooled enough. Make sure to spray with cooking spray AND line with parchment for every single layer, and let each layer rest in the pan for 2-3 minutes before turning out.
📖 Recipe

9 Layer Chocolate Cake Recipe
Video
Equipment
- 1 large skillet or saucepan
- 1 stand mixer or hand mixer
- 9-inch round cake pans
Ingredients
- Chocolate Icing:
- 3 cups granulated sugar
- 4 blocks unsweetened baking chocolate
- 10 ounces evaporated milk
- ½ cup butter
- 1 teaspoon vanilla extract
- Cake Layers:
- 1 ½ cups granulated sugar
- 1 cup butter
- 6 large eggs
- 3 ½ cups self-rising flour
- 1 ¾ cups water
- 1 teaspoon vanilla extract
Instructions
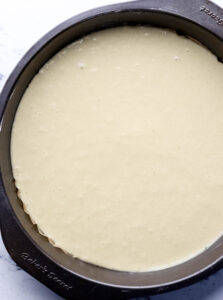
- Allow all of the ingredients to come up to room temperature. Preheat the oven to 400 degrees F. Grease at least three 9-inch round cake pans with shortening, or line with parchment paper, and set aside.
- Make the chocolate icing first, place a large (heavy bottom) skillet or saucepan on the stovetop over medium-high heat. Add in the 3 cups sugar, 4 blocks unsweetened chocolate, 10 ounces evaporated milk, ½ cup butter, and 1 teaspoon vanilla. Whisk/stir to combine and allow the sugar time to fully dissolve and the icing to become smooth.
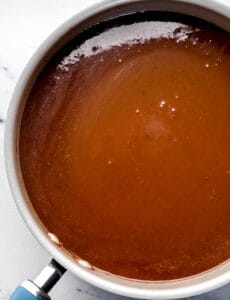
- You may need to adjust the temperature to make sure the icing does not burn. Do not allow the icing to come to a high rolling boil. Once the icing ingredients are combined, adjust the heat to low and begin making the cake layers.
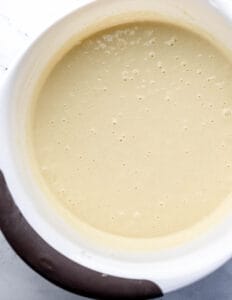
- In a large mixing bowl, using an electric mixer, cream together the 1 ½ cups sugar and 1 cup butter. Then add in all 6 large eggs into the mixture at once and mix well until incorporated. Add in the 3 ½ cups self-rising flour and alternate with the 1 ¾ cups water, beginning and ending with flour. Mix in the 1 teaspoon vanilla extract and grab your cake pans.
- Pour about ¾ cup of cake batter into each prepared pan and smooth (pat the bottom of the pans) until the batter reaches the edges. Place into the oven and bake for 7 to 10 minutes until golden brown and a cake tester comes out clean. I used 3 pans at a time and washed and regreased with shortening for a total of three times.
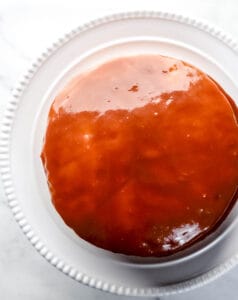
- Once you remove the baked cake layers from the oven turn one layer onto a large plate and frost with icing from the center of the cake layer all the way to the edges until it covers the sides, then add another layer and frost again with the icing until you have a total of 9 layers.

- When all of the layers have been stacked and frosted, spread the remaining icing over the top and sides to cover the entire cake. As the icing cools it will thicken.

- Allow the cake to fully cool for about 10 to 15 minutes before slicing to serve. Enjoy!
Notes
- Use room temperature ingredients as they are easier to mix and combine.
- Make sure you're using canned evaporated milk to make the icing.
- Use parchment paper to line the bottom of each individual cake pan to prevent sticking. If you prefer to use disposable cake pans, be sure to line those as well.
- A candy thermometer can be used when making the icing to make sure that it doesn't get too hot and burn.
- Using a baking scale to measure the cake mixture and icing will ensure that you have even layers.
Did You Make This Recipe?
If you give this 9-layer chocolate cake a try, I'd love to see it! Leave a star rating and a comment below. It genuinely helps other readers find this recipe and helps me keep creating content you love. Share a photo on Instagram and tag @SimplyLaKita so I can see your masterpiece, or save it to your Southern desserts board on Pinterest.


Frances says
I’ve never made this cake or icing. Would using parchment paper help to remove the layers when done? How long do you need to let them cool once removed from the oven.
LaKita says
Hi Frances! Parchment paper is not necessary. The layers are very thin and only need to cool in the pan for about 2 to 3 minutes before removing completely from the pan.
Julie @ Girl on the Move says
This looks yummy! I definitely need to try this out for the holidays!
admin says
Thank you so much! It was very yummy and a nice treat if you decided to give it a try I am sure it will be a hit for the holidays 🙂
Mrs. AOK says
I'm not a huge cake fan.... but CHOCOLATE cake is different 🙂 Chocolate cake is special, it's happiness wrapped in chocolate, no? I use to work at a place called Boston's waaaaaaaay back in the day, and the chocolate cake was GOOD, BUT when I moved to Illinois, I had one of the best chocolate cakes EVER there. Have you ever tried a Portillo's chocolate cake? It's DIVINE. Whenever friends or family would visit us there we would get them 'the' cake. I need to find a good chocolate cake here in South Carolina.
XOXO
admin says
Chocolate Cake IS SPECIAL!! I love any type of chocolate cake...it is by far my favorite. I have never tried Portillo's chocolate cake, but it looks delicious and I will be sure to check it out the next time that I am in Illinois. If you are close to Charleston, SC check out Christophe Artisan as I recall he had delicious chocolate cake...along with macaroons and pastries 🙂