

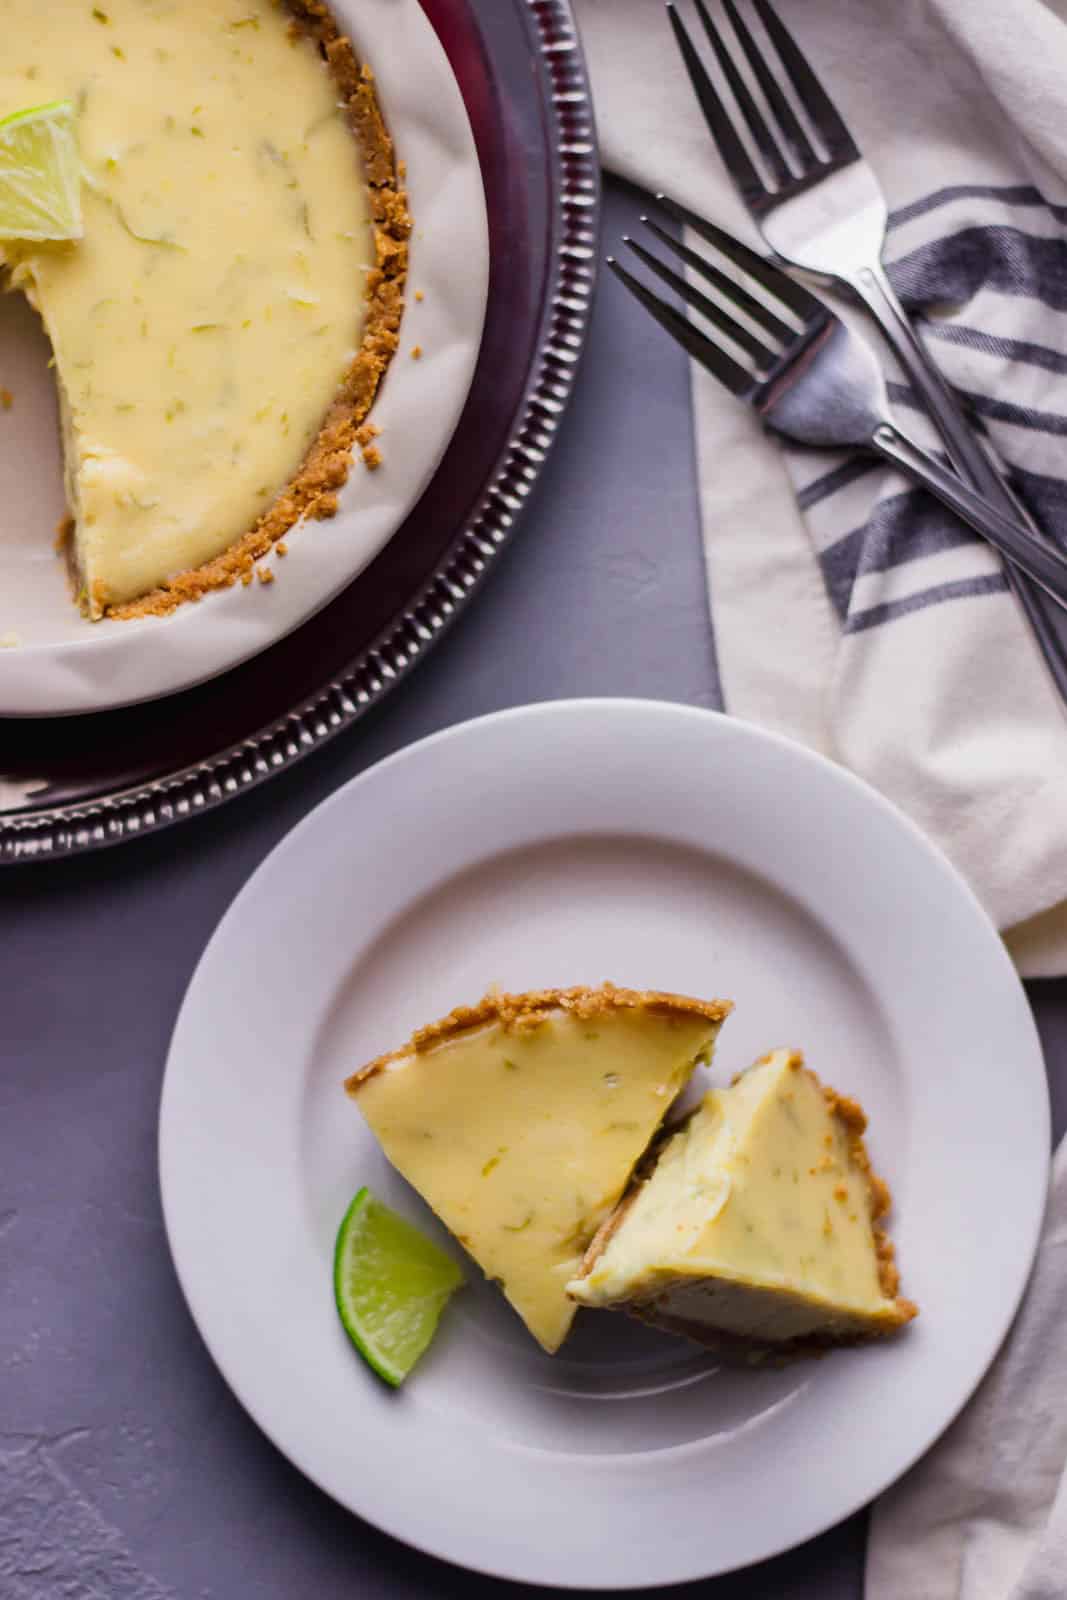
This Small Batch Key Lime Pie is bright, creamy, and made with a buttery crust for a simple dessert that feels just right for sharing. With its bold lime flavor and smooth, sweet filling, it's the perfect small-batch treat when you want something easy and special.
Updated April 2026: I've refreshed this post with a dedicated section on the Rice Krispie crust, expanded FAQs, make-ahead instructions, and serving suggestions based on your questions and feedback. Originally posted on February 8, 2018.
There's something about key lime pie that just feels like summer. That sharp, bright tartness against a cool, creamy filling that makes you close your eyes on the first bite. I grew up eating key lime pie at church potlucks and family gatherings down here in Florida, always made in a big dish meant to feed a crowd. But sometimes, you don't need a crowd. Sometimes it's just you and one other person, and you want something special without a week's worth of leftovers staring at you from the refrigerator.
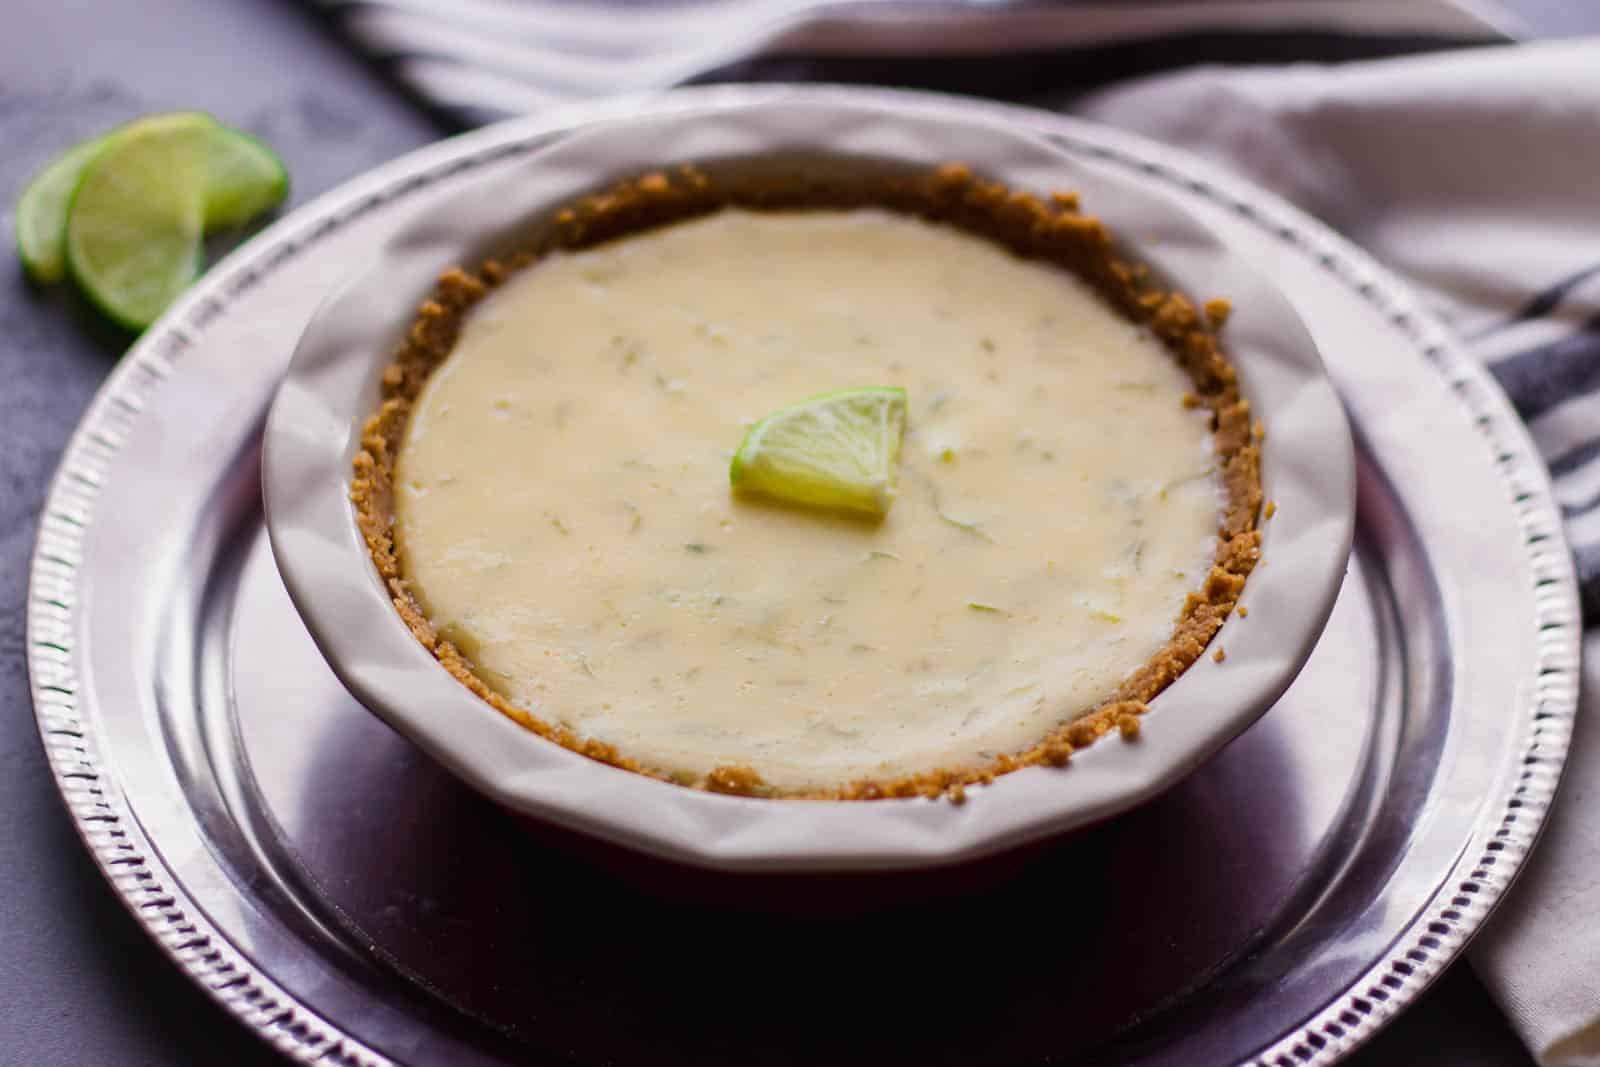
That's exactly why I developed this small batch key lime pie recipe designed to make just enough for two people, with a Rice Krispies crust that I genuinely think is better than a traditional graham cracker crust. It's got crunch, a subtle toasty sweetness, and it holds up beautifully when you slice into it. I've made this recipe more times than I can count, tested it with my family, adjusted the lime-to-sweetened-condensed-milk ratio until it hit that perfect balance of tart and creamy, and this is the version that never disappoints.
Whether you're planning a date night, celebrating an anniversary, making something just for yourself (no judgment, I do this regularly), or just craving a slice of something bright and Southern, this one is for you. Let's get started!
Jump to:
Why You'll Love This Small Batch Key Lime Pie
- Made for two - The recipe is perfectly sized for two generous servings, so nothing goes to waste and you're not eating the same dessert all week.
- That Rice Krispie crust - Buttery, crunchy, and slightly toasty, the Rice Krispie crust adds a texture dimension that a standard graham cracker crust just can't match.
- No special equipment needed - No pie weights, no blind baking, no springform pan. A small pie dish and a mixing bowl are all you need.
- Make it ahead - The filling actually tastes better the longer it chills, so this is the perfect dessert to make the day before a special occasion.
Ingredients You'll Need
- For the Rice Krispie crust: The crust comes together with Rice Krispies cereal, butter, and a touch of sugar. The butter binds everything together and helps the crust firm up in the refrigerator, no baking required. You'll want to press it firmly and evenly into your pie dish so it holds a clean slice.
- Sweetened condensed milk: This is the base of the filling and provides all the sweetness you need. Don't substitute evaporated milk, it won't thicken or sweeten the same way. Full-fat gives the richest, creamiest result.
- Key lime juice: Fresh-squeezed is always best if you can find key limes, but regular Persian lime juice works beautifully in a pinch. Bottled key lime juice (like Nellie & Joe's) is also a solid option and delivers that authentic flavor year-round. You want that bright, slightly floral tartness, it's what makes this pie sing.
- Egg yolks: The yolks give the filling structure and that characteristic pale yellow color. They bind with the condensed milk and lime juice during baking to set the filling properly.
👉🏾 See the recipe card below for exact quantities and full instructions.
How to Make Small Batch Key Lime Pie
Step 1: Make the Rice Krispie Crust
Melt your butter, mix in the Rice Krispies and sugar, then press the mixture firmly into a small pie dish. Pressing up the sides as well as the bottom. Use the bottom of a measuring cup to get an even layer. Refrigerate the crust for at least 15 minutes before adding the filling; this helps it firm up and hold its shape when you pour in the filling.
Step 2: Mix the Filling
Whisk together the sweetened condensed milk, egg yolks, and key lime juice until smooth and well combined. The filling will look thin at this stage, that's completely normal. It tightens up significantly in the oven. Taste it before baking and adjust the lime juice if you want more tartness.
Step 3: Bake and Chill
Pour the filling into your chilled crust and bake until the filling is just set. It should have the slightest jiggle in the very center when you give the pan a gentle shake. Pull it out of the oven at this point, it will firm up completely as it cools. Overbaking leads to a grainy, curdled texture. Let it cool to room temperature on the counter, then refrigerate for at least 2 hours (overnight is even better) before slicing and serving.
Expert Tips
- Press the crust firmly. A loose crust will crumble when you slice. Use the back of a flat-bottomed measuring cup or glass to really compact the Rice Krispies mixture against the bottom and sides of the dish.
- Chill the crust before filling. Even 15 minutes in the refrigerator makes a difference, it sets the butter so the crust holds its structure when the wet filling goes in.
- Don't overbake. The center of the filling should still have a slight jiggle when you pull it out of the oven. It looks underdone, but it isn't residual heat and refrigerator time will set it completely.
- Make it the night before. This pie genuinely improves after a full night in the refrigerator. The filling gets denser, the crust firms up, and the flavors meld. If you're making it for a special occasion, make it the day before.
- Zest before you juice. If using fresh limes, zest them before cutting and juicing, it's nearly impossible to zest a juiced lime. Mix a pinch of zest into the filling or use it as a garnish on top.
- Room temperature ingredients blend more smoothly. Pull your egg yolks and condensed milk out of the refrigerator about 20 minutes before mixing to get a silkier filling.
- Use a small (5-6 inch) pie dish. A standard 9-inch pie dish will spread the filling too thin. Look for a 5-inch or 6-inch dish for the right depth of filling-to-crust ratio.
Want To Save This Recipe?
Variations & Substitutions
- Graham cracker crust: If you can't find Rice Krispies or prefer a classic version, swap in a graham cracker crust. Use the same butter-sugar ratio and press it in the same way. The texture will be slightly softer and less crunchy, but just as delicious.
- Lemon instead of lime: Swap key lime juice for fresh lemon juice for a lemon version of this small batch pie. It's a completely different flavor profile, softer and tangier versus sharper and tart, but the filling method is identical.
- No-bake version: Skip the egg yolks and bake step entirely. The filling won't be as dense or custardy, but if you need a truly no-bake option, whip some heavy cream to stiff peaks and fold it into the condensed milk and lime juice mixture. Chill for at least 4 hours before serving.
- Coconut twist: Toast a small handful of shredded coconut and mix it into the Rice Krispie crust for a tropical flavor note that pairs beautifully with the lime.
- Mini individual pies: Use ramekins or a muffin tin lined with parchment to make individual portions. Great for a dinner party or when you want single-serve desserts without slicing.
Make-Ahead & Storage
Make-Ahead
This is one of the best desserts to make ahead. You can prep the full pie. Crust, filled, and baked up to 2 days in advance. Store it covered tightly in the refrigerator. The flavor and texture actually improve after the first night, making it an ideal make-ahead dessert for date nights or small gatherings. Hold off on adding whipped cream until right before serving.
Storage & Reheating
Store leftover key lime pie covered in the refrigerator for up to 4 days. The crust will soften slightly over time, but the flavor stays bright. This pie does not reheat well, it's meant to be served cold or at cool room temperature. It can be frozen (wrap individual slices tightly in plastic wrap, then foil) for up to 1 month. Thaw overnight in the refrigerator before serving.
What to Serve with Small Batch Key Lime Pie
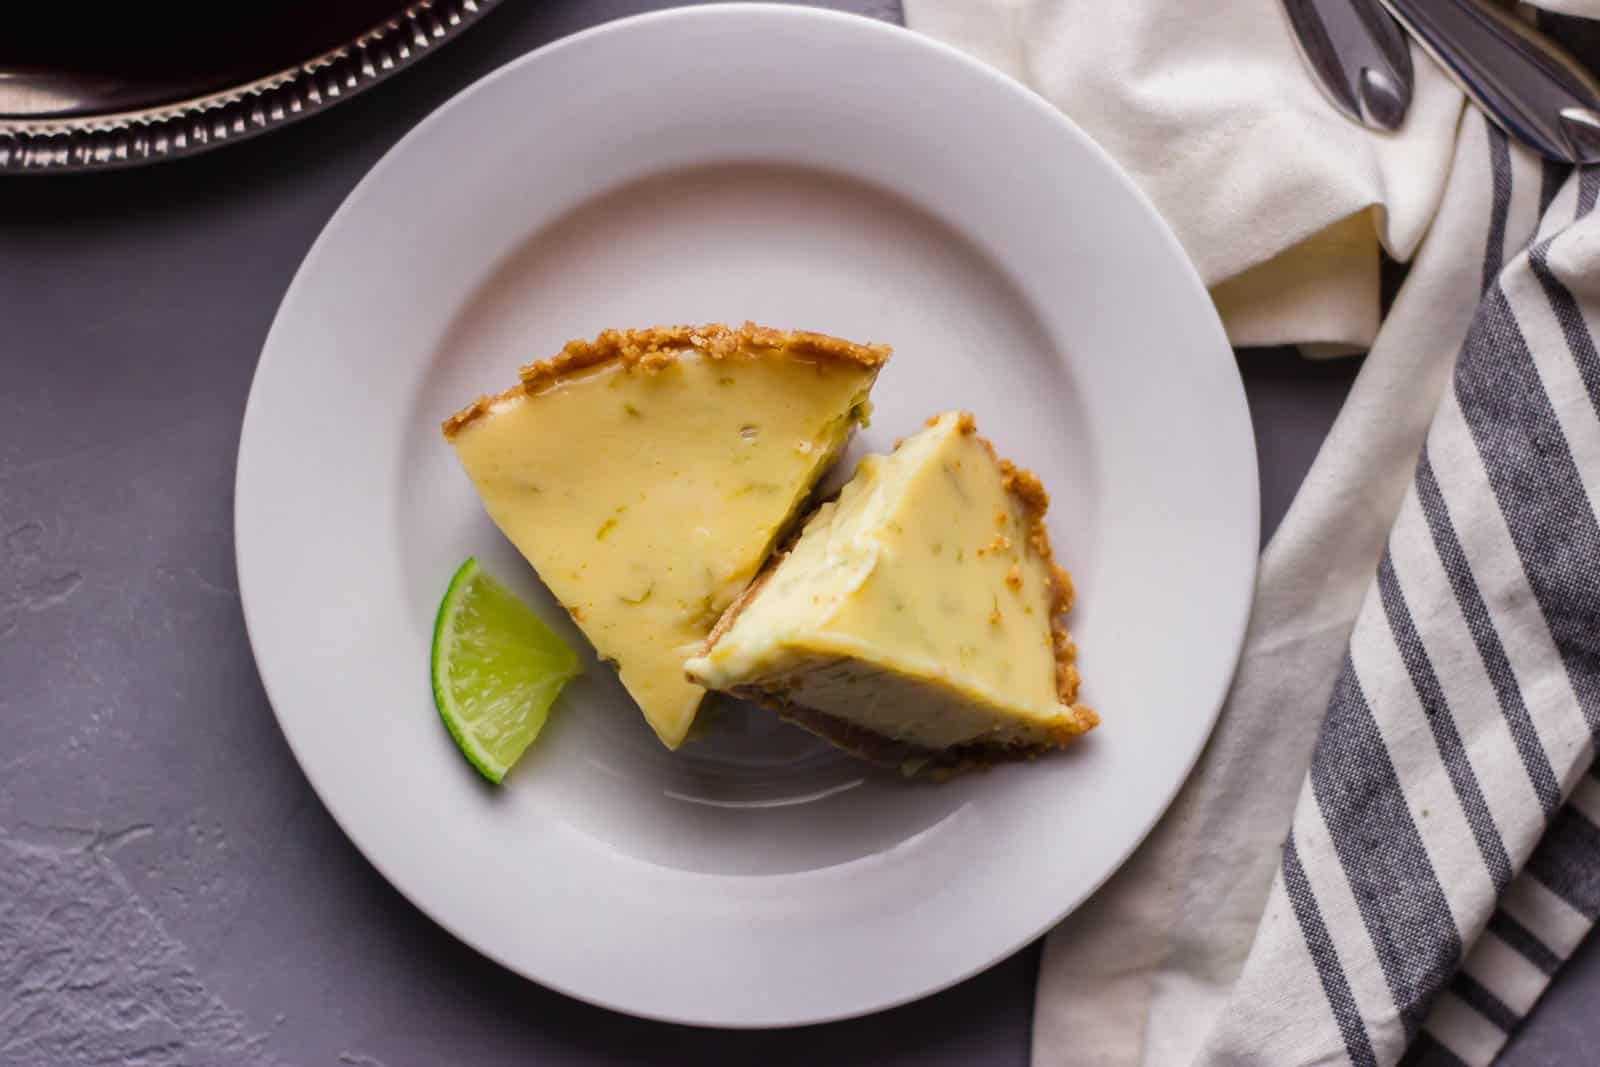
- Top it simply - A dollop of freshly whipped cream and a sprinkle of lime zest is all this pie needs. Let the filling do the talking.
- As a date night dessert - Serve alongside a light dinner. Try it after a meal of baked shrimp scampi for a bright, refreshing finish.
- With fresh berries - A handful of fresh raspberries or sliced strawberries on the side cuts through the richness and adds a beautiful color contrast.
- Alongside other Southern sweets - If you're doing a small dessert spread, pair it with a couple of Chess Squares or Mini Peach Cobbler for a Southern dessert sampler.
- As a summer celebration dessert - This pie is a natural fit alongside Banana Pudding for a warm-weather dessert table.
Frequently Asked Questions
Absolutely. Bottled key lime juice, especially Nellie & Joe's Famous Key West Lime Juice, is a widely respected substitute and what many Southern cooks use year-round. Fresh key limes are beautiful when you can find them, but they're small, require a lot to juice, and aren't always available. Bottled works perfectly here.
Yes. Regular Persian limes (the kind you find at every grocery store) work well in this recipe. The flavor is slightly less floral and a bit more straightforward tart, but it makes a delicious pie. Many cooks prefer Persian limes for their ease and availability.
The filling should be mostly set around the edges with a slight jiggle in the very center, like a cheesecake. It should not look liquid or sloshy, but it won't look fully firm either. Pull it at this point. It will firm up completely once chilled. Overbaking causes the filling to curdle and become grainy.
The egg yolks give the filling its dense, custard-like texture and the traditional pale yellow color. For an egg-free version, use the no-bake method described in the Variations section. Fold whipped cream into the condensed milk and lime juice and chill without baking. The texture is lighter and mousse-like rather than custardy.
Yes! Double all ingredients and use a standard 9-inch pie dish. Baking time will increase slightly. Start checking at 18-20 minutes using the same jiggle test.
Yes, always. The filling contains egg yolks and condensed milk, which require refrigeration. Keep it covered and cold until right before serving.
Yes. The Rice Krispie crust can be made up to 24 hours in advance, covered, and refrigerated. Pour in the filling and bake when you're ready. This is actually a great workflow for making the process feel less rushed.
It wasn't pressed firmly enough during assembly, or it didn't chill long enough before the filling went in. Make sure to really compact the Rice Krispies mixture. Use the bottom of a measuring cup and press with some force. Chill it for at least 15-20 minutes before filling.
Yes. Slice it, wrap each piece tightly in plastic wrap followed by foil, and freeze for up to 1 month. Thaw slices overnight in the refrigerator. Do not thaw at room temperature, the filling becomes watery. Do not add whipped cream before freezing.
It's perfect for it, that's exactly why I developed a small batch version. Two servings, elegant enough to feel special, no leftovers. Make it the night before and all you have to do is plate and top with whipped cream when you're ready to serve.
📖 Recipe

Small Batch Key Lime Pie Recipe
Equipment
- 1 6-inch pie pan
Ingredients
- For the Filling:
- 2 large egg yolks
- 2 teaspoons lime zest
- ¼ cup lime juice
- ⅔ cup sweetened condensed milk
- For the Crust:
- 4 whole graham crackers, crushed
- 2 tablespoons unsalted butter, melted
- 4 teaspoons sugar
- whipped topping (optional)
Instructions
- In a small bowl, whisk together the egg yolks and lime zest until the mixture has a light green tint.
- Whisk in the condensed milk until smooth and then whisk in the lime juice.
- Cover and place in the refrigerator for 15 minutes to allow it to thicken.
- Preheat the oven to 325 degrees F. and using a food processor add in the graham crackers and process until you have a fine crumb mixture.
- Add the melted butter, sugar, and continue to pulse until incorporated and the mixture clumps together.
- Place the crust mixture into a 6-inch pie plate and press in the bottom and sides in a flat even layer.
- Bake the crust only until it is lightly browned and fragrant, about 15 minutes.
- Remove the crust from the oven and while still warm add the filling.
- Place the pie in the oven and bake for 15 to 20 minutes, until firm around the edges.
- Transfer the pie to a wire rack and allow to cool completely.
- Place in the refrigerator to allow the pie to become chilled and set.
- Serve with whipped topping.
Did You Make This Recipe?
If you give this small batch key lime pie a try, I'd love to know what you think! Leave a comment below, share a photo on Instagram and tag @SimplyLaKita, or save it on Pinterest for later. If you used the Rice Krispie crust for the first time, I especially want to hear what you thought, it's one of my favorite little surprises in this recipe. And if you have any questions at all, drop them in the comments and I'll answer every single one.


MP says
I've made this 3 times now and never manage to get a picture! Making 2 more tomorrow to give a way to neighbors so I'll see if I can remember.
Super tasty, and perfect size!! Thank you for sharing this recipe!!
LaKita says
Thank you Maggie, that makes me so happy to hear! It really is the perfect size to share 🙂
Tamara says
I have the same thing with sweet things. Moderation and to make it matter! I love Key Lime Pie ever since I went to the Florida Keys and every restaurant there boasts to have the "best" Key Lime Pie on Key West island! Made me crack up. They were all good! And yours looks great too.
LaKita says
Thank you!! YES!! I actually think it's a Florida thing for everyone to claim they have 'The Best' Key Lime Pie...it is pretty funny when you think about it 🙂