


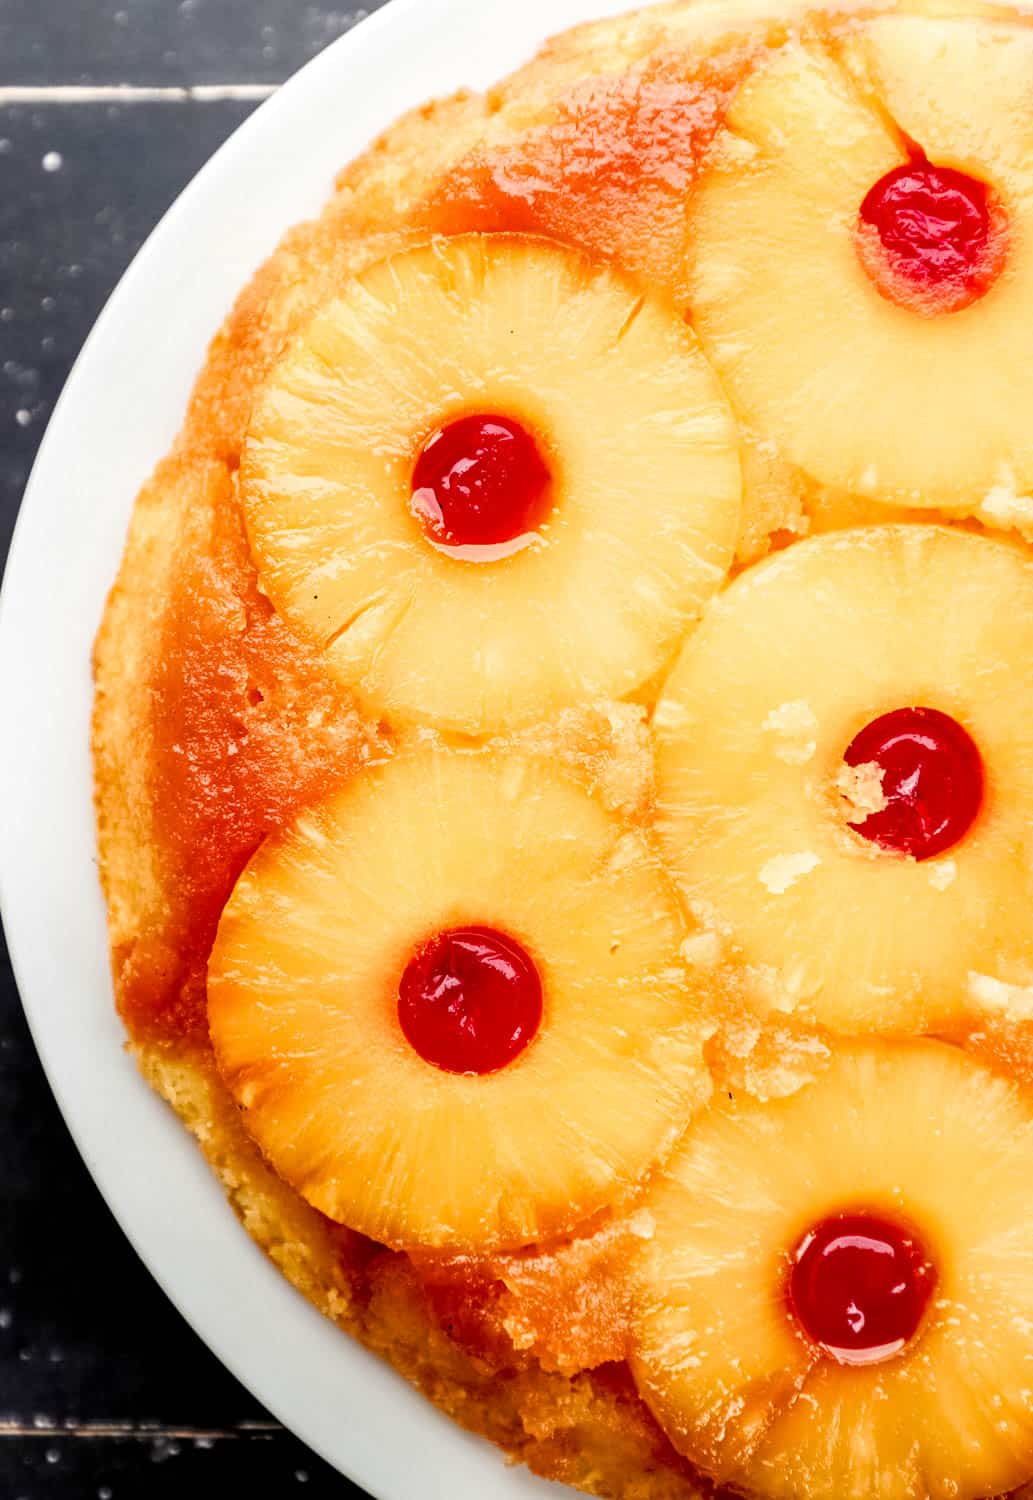
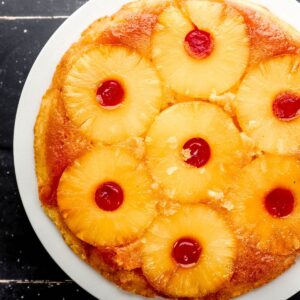
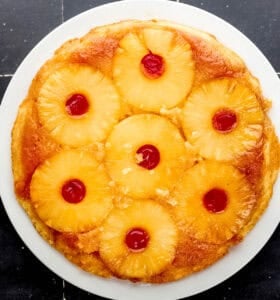
Take a trip down memory lane with this Cast Iron Skillet Pineapple Upside Down Cake. It's a beautiful cake that's rich, buttery, and melt in your mouth delicious. Be sure to make this classic recipe to share with your family and friends that are sure to give it rave reviews.
Updated May 2026: I've refreshed this post with new tips, expanded FAQs, a make-ahead section, and answers to all the questions y'all have been sending me. Originally posted on June 21, 2024.
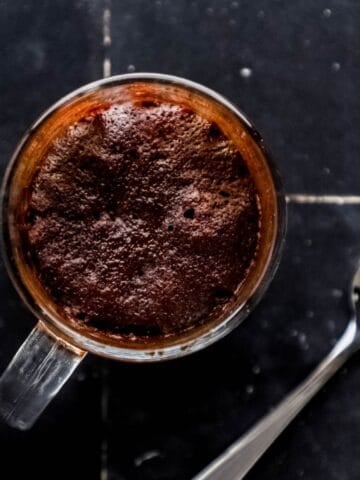
Watch this quick video tutorial!
I cannot tell you the exact moment I fell in love with pineapple upside down cake, but I can tell you it smelled like my mother's kitchen. There was always a cast iron skillet involved, a little ring of golden pineapple, and that one cherry placed right in the middle like a tiny ruby. Before it flipped, it honestly didn't look like much, and then it did, and the whole table went quiet.
I've made this cake more times than I can count, and I tested this version until the cake came out tender and buttery every single time instead of dry the way so many recipes turn out. This is a true from-scratch cast iron skillet pineapple upside down cake. No boxed mix and the cast iron is what gives you that deep, caramelized brown sugar crust you just can't fake in a regular pan.
It's a showstopper that's secretly one of the easiest desserts you'll ever pull off, and I'm going to walk you through every step so yours flips out perfectly. Let's get started!
Why You'll Love This Cast Iron Skillet Pineapple Upside Down Cake
- Pure nostalgia - Buttery yellow cake under a glossy layer of caramelized pineapple and cherries tastes like Sunday dinner at grandma's.
- Made from scratch - No cake mix here, just simple pantry staples, and the flavor difference is real (you can still grab a shortcut in the Variations section if you're short on time).
- The cast iron magic - A seasoned skillet gives you a crisp, caramelized edge and releases the cake cleanly, so it slides right out onto your plate.
- Flexible and forgiving - Works in a 9-inch or 12-inch skillet, mixes by hand or by machine, and looks impressive with almost no effort.
Ingredients You'll Need
Here's everything you'll need to make this recipe.
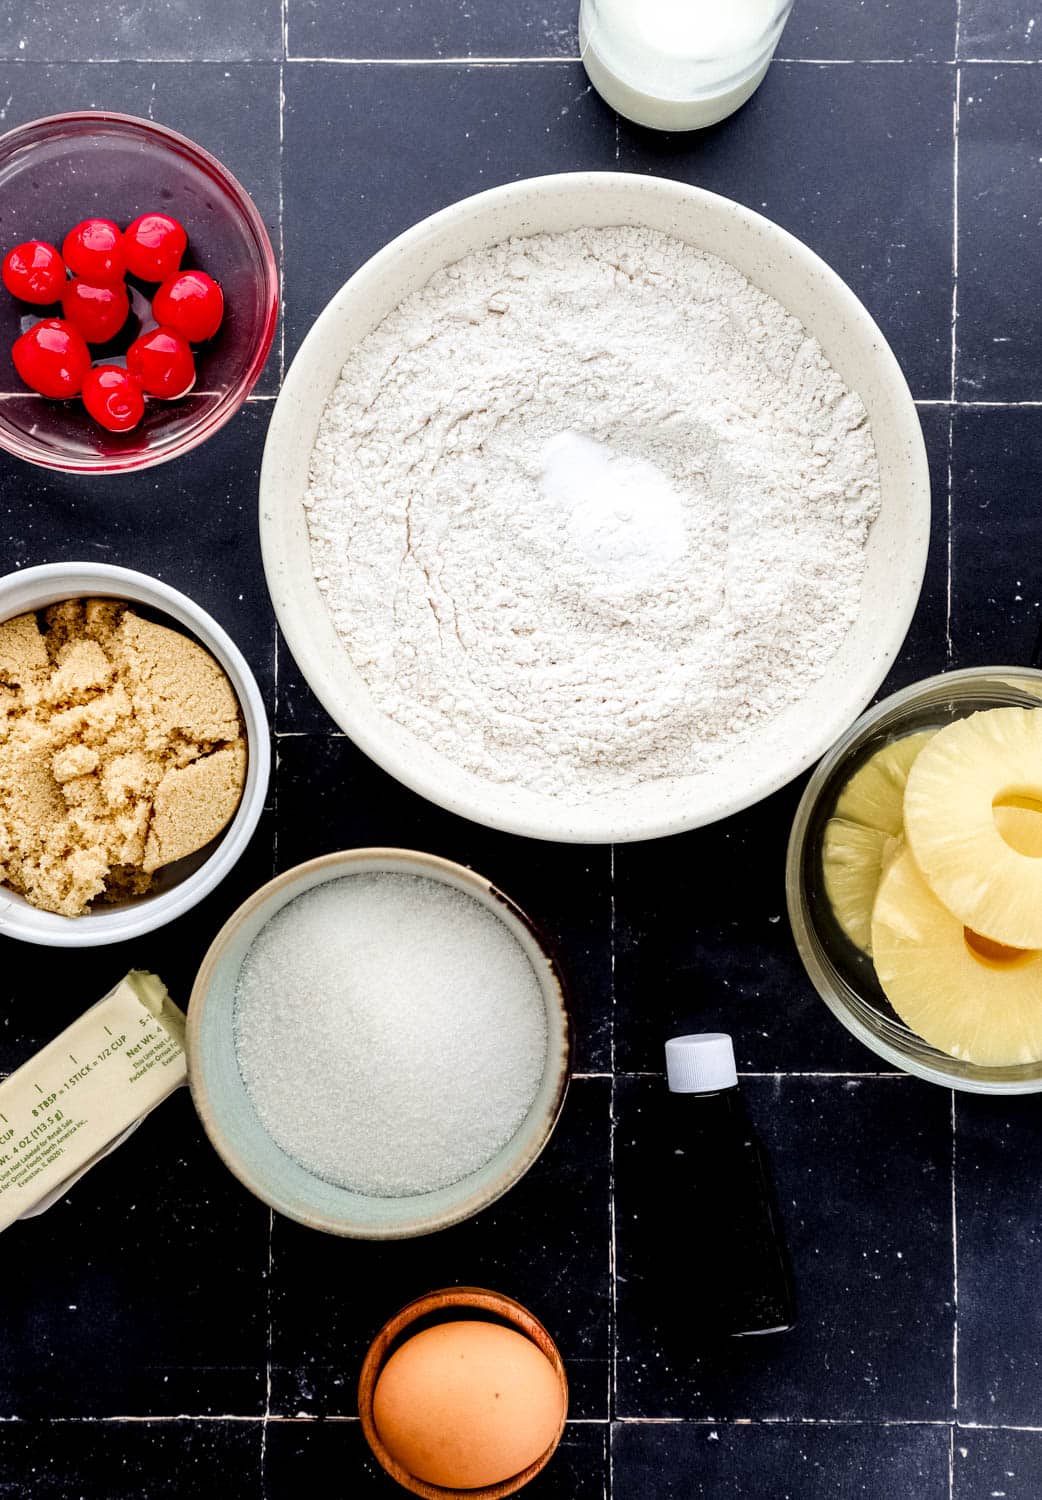
- Butter - Does double duty here: it builds the caramel topping in the skillet and makes the cake itself rich and tender. Unsalted gives you the most control over the final sweetness.
- Brown sugar - This is what turns into that sticky, caramelized layer over the pineapple. I reach for light brown sugar, but dark brown sugar works beautifully if you want a deeper, almost molasses-like edge.
- Pineapple slices - The classic choice. Canned rings are easiest to arrange and bake up softer than fresh. Crushed pineapple works too (that's what my mom always used). See the Variations section for how to switch.
- Maraschino cherries - One in the center of each ring for that signature pop of red and a little tart bite. If you go the crushed-pineapple route, you can leave these out.
- All-purpose flour - Plain flour, nothing self-rising, for a cake with good structure that still stays soft.
- Baking powder - Your lift. Check the date on the can, old baking powder is the number one reason a cake bakes up flat.
- Granulated sugar, egg, whole milk, and vanilla - These build the actual cake batter. Whole milk keeps it moist, and pure vanilla (not imitation) makes a noticeable difference in a cake this simple.
👉🏾 See the recipe card below for exact quantities and full instructions.
How to Make Cast Iron Skillet Pineapple Upside Down Cake
Here's a quick overview of the process. Full step-by-step instructions are in the recipe card below.
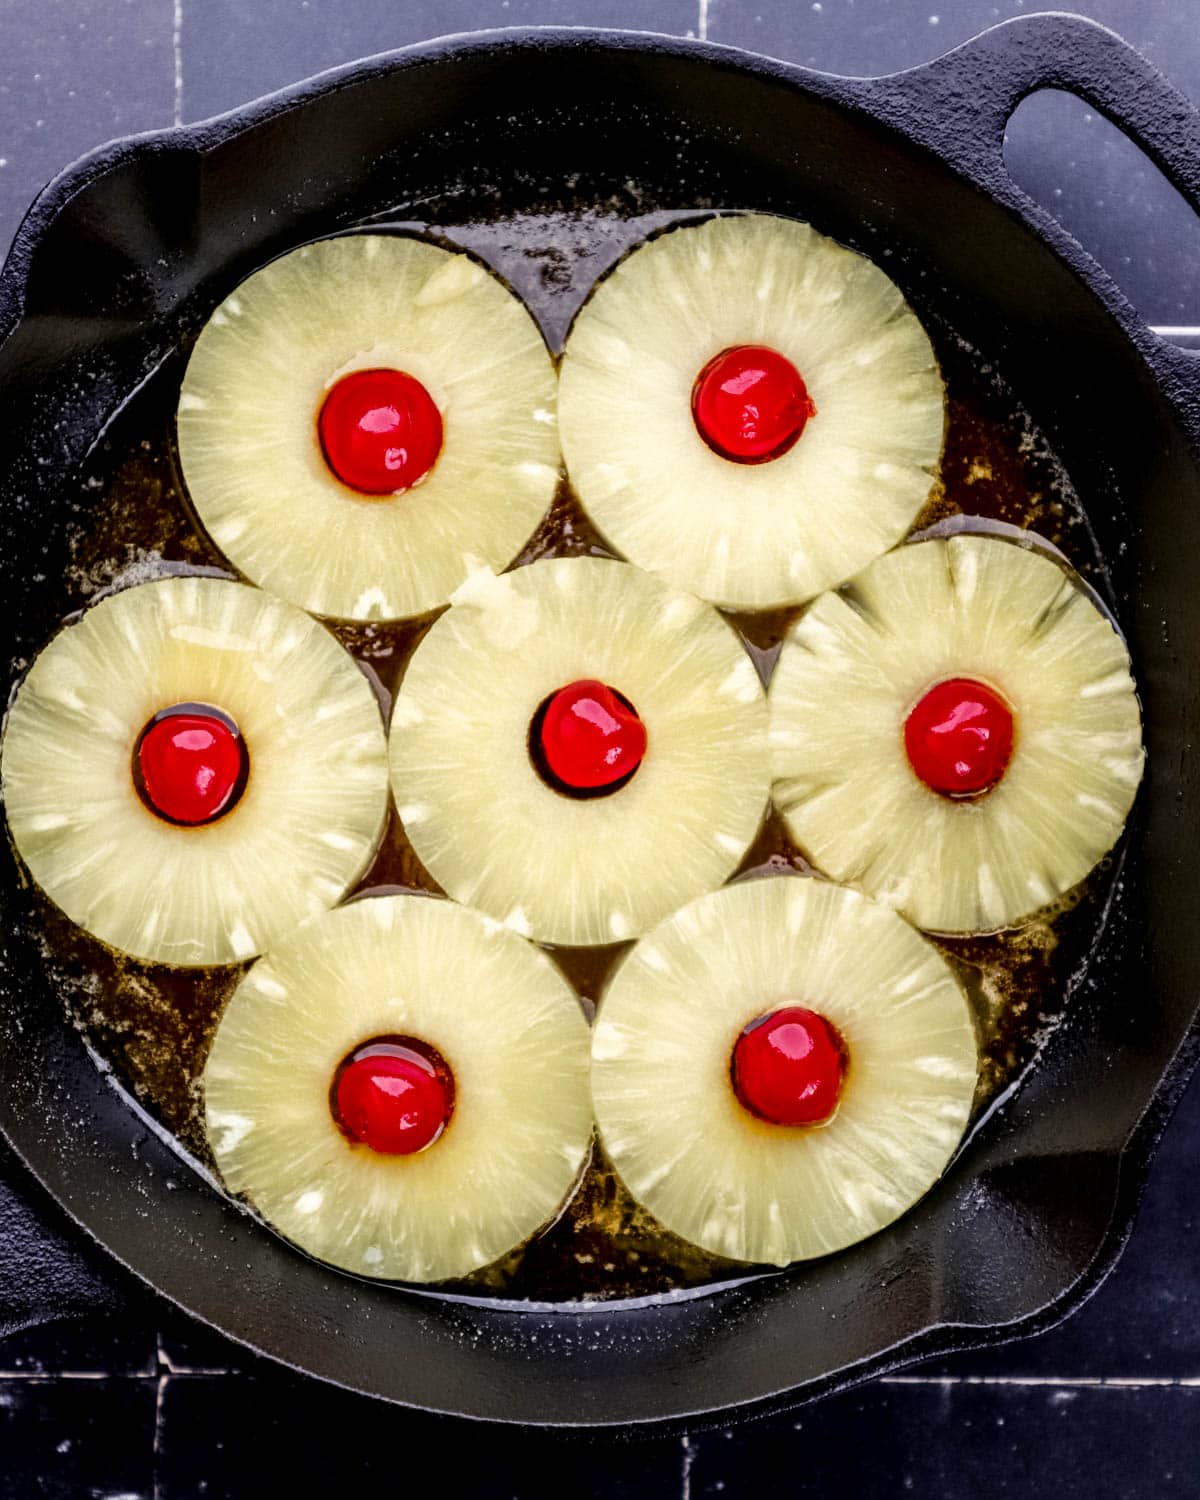
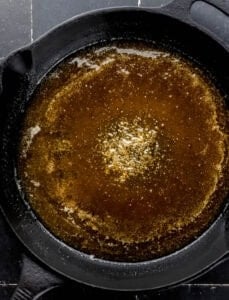
Step 1: Build the caramel right in the skillet
Melt the butter in your cast iron skillet over medium heat, then stir in the brown sugar and a splash of the reserved pineapple juice until the sugar dissolves into a glossy caramel. Doing this directly in the skillet instead of just sprinkling dry sugar is the secret to an even, set caramel that doesn't pool in the middle.

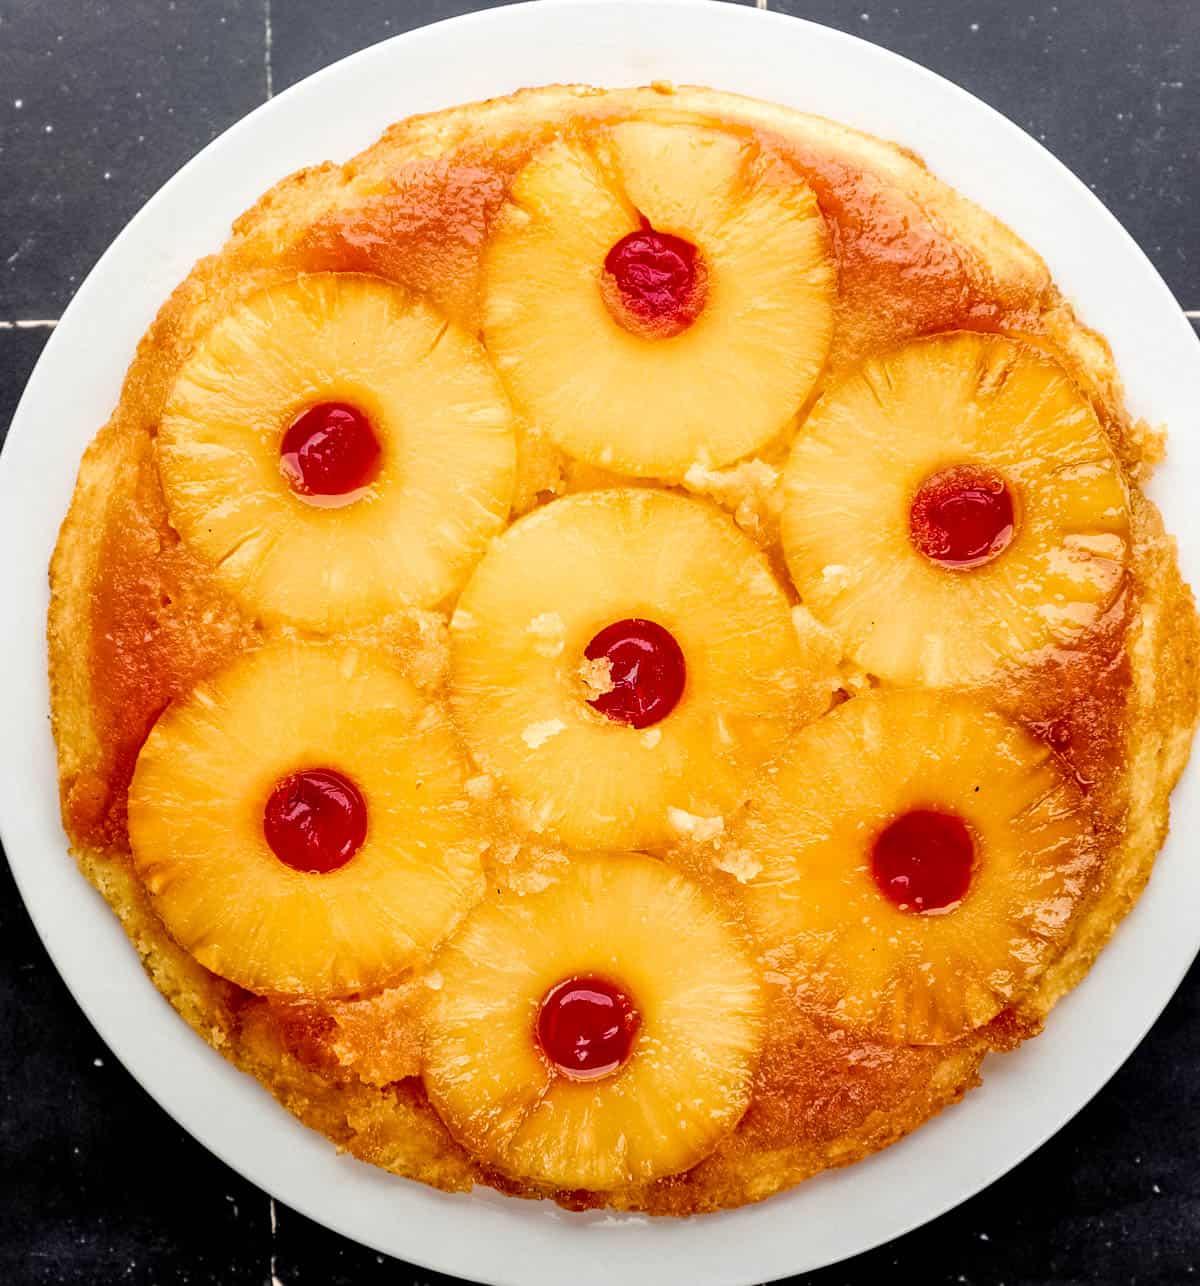
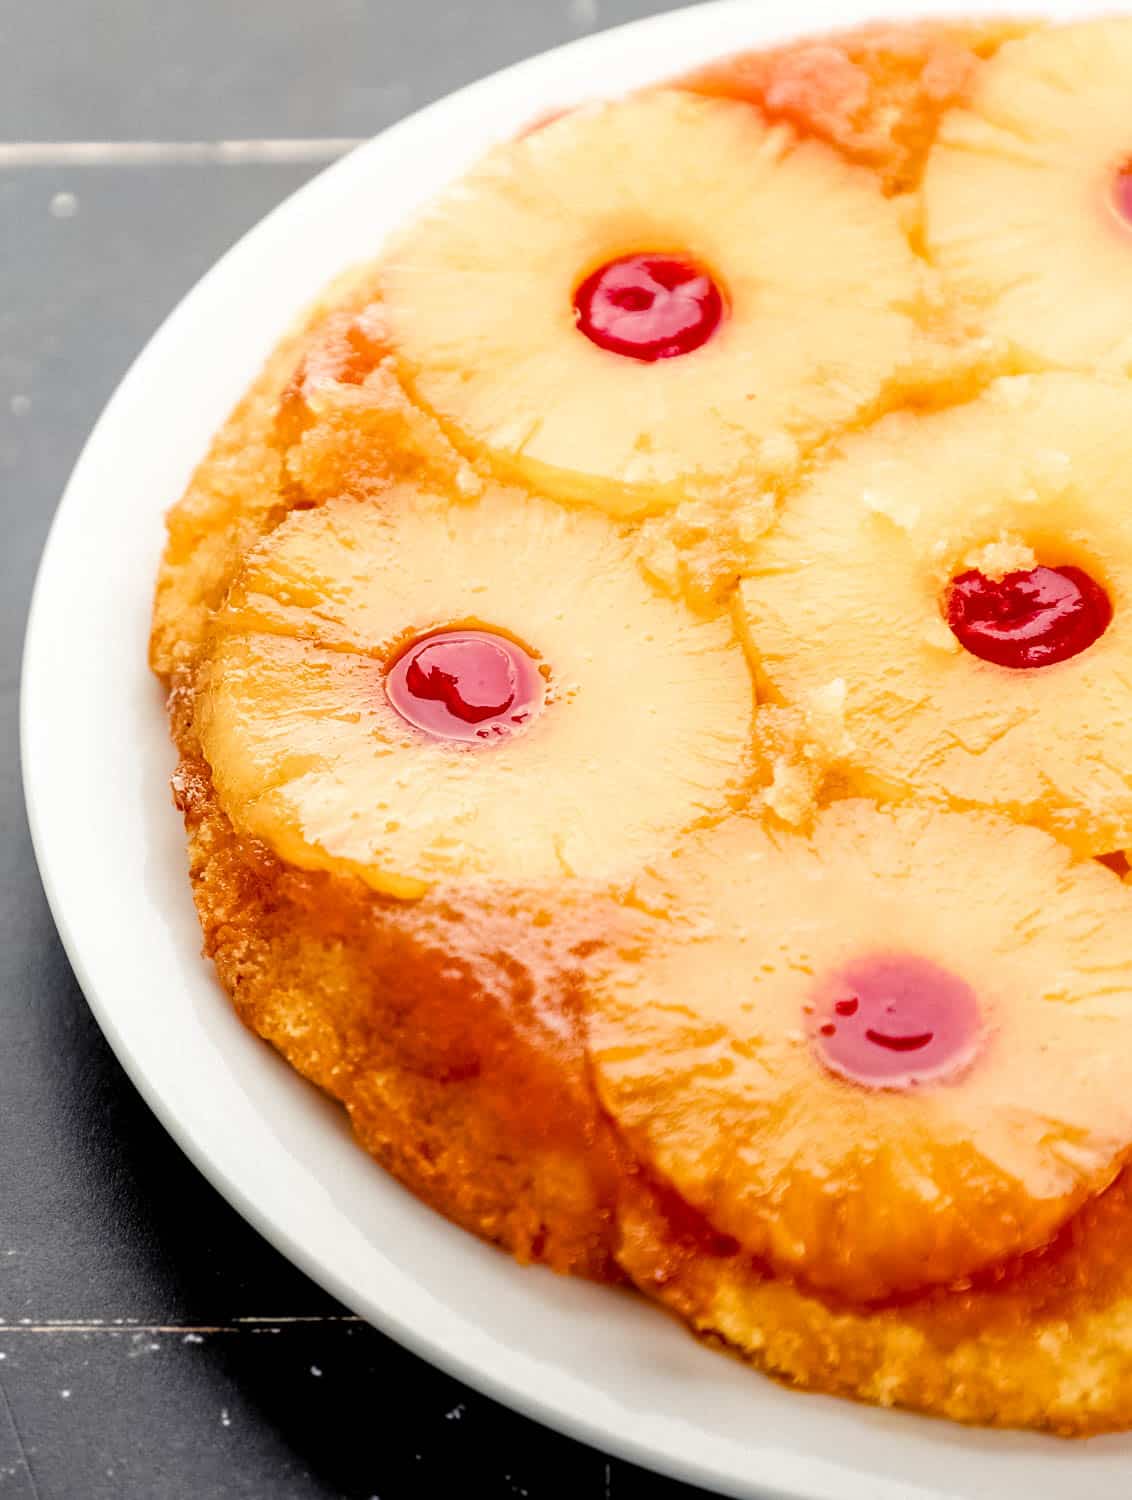
Step 2: Arrange the pineapple and cherries
Pull the skillet off the heat and lay your pineapple rings over the caramel, then tuck a cherry into the center of each. Work from the outside in so the pattern looks intentional. This is the side everyone sees, so take your thirty seconds here.
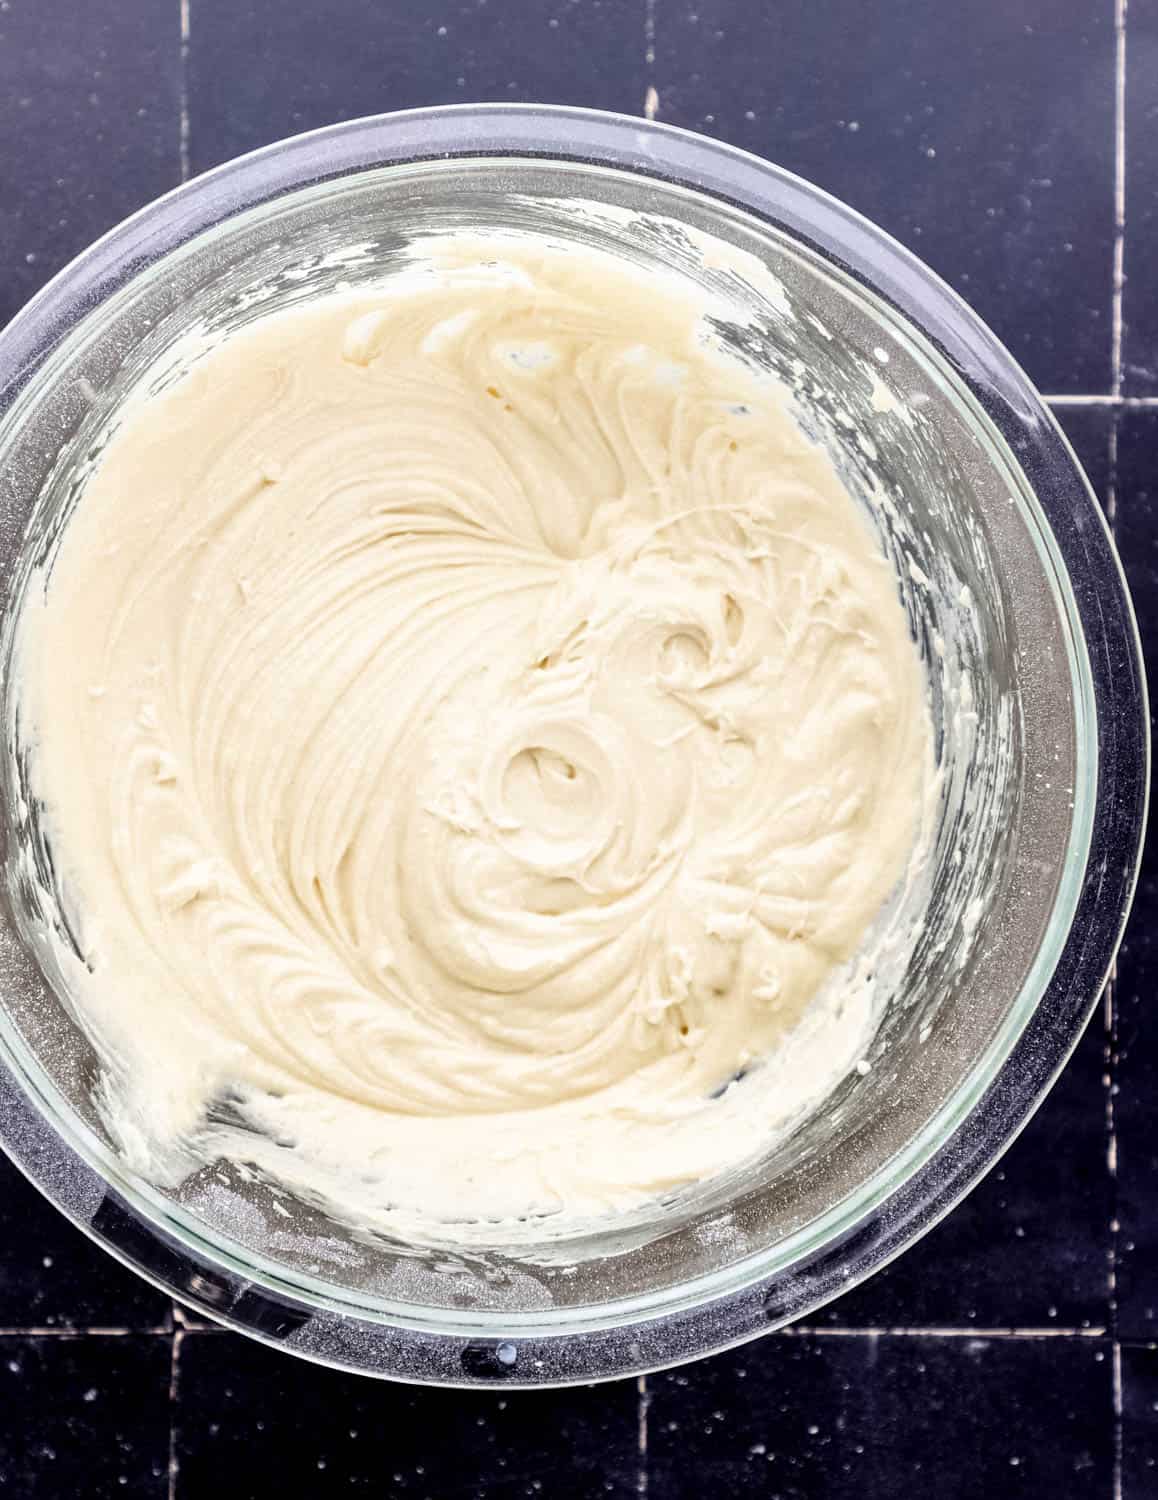
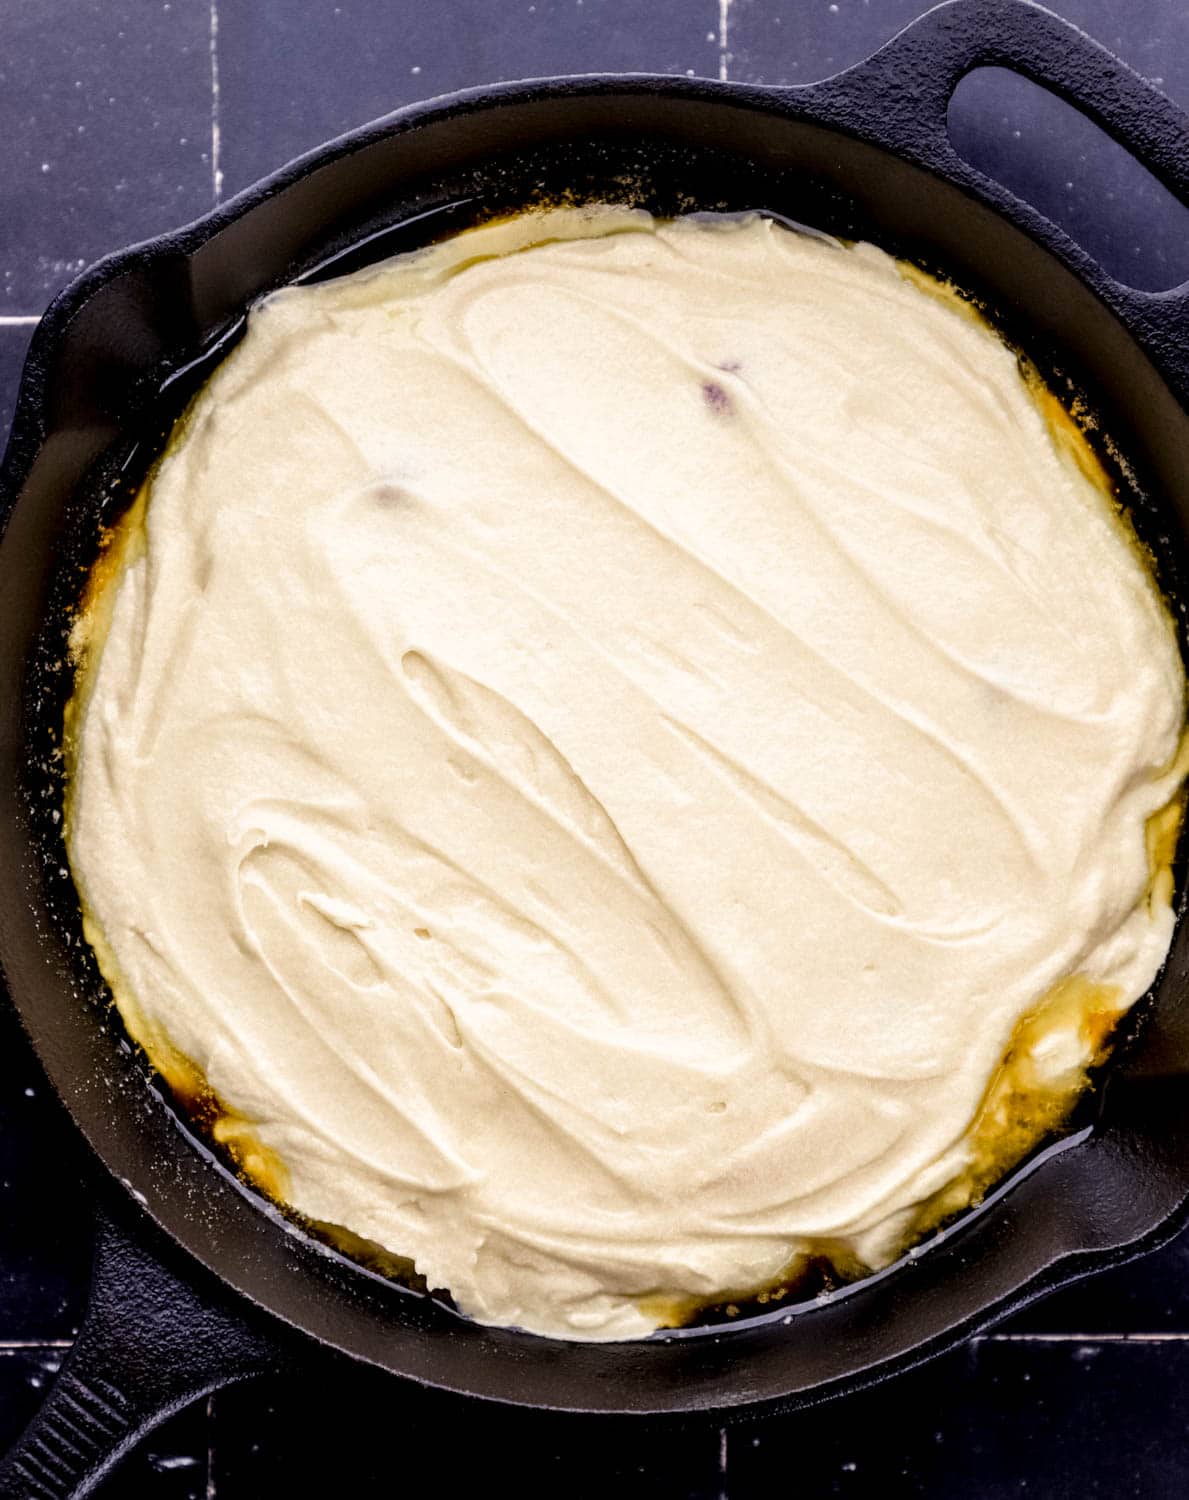
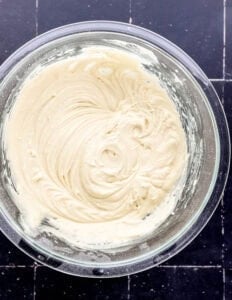
Step 3: Mix the batter without overworking it
Cream the butter and sugar until truly light and fluffy (a full 2-3 minutes), then add your wet ingredients, and finally the flour mixture. Mix just until it comes together. Overmixing once the flour goes in is what makes a cake tough and dry, so stop as soon as you don't see streaks.
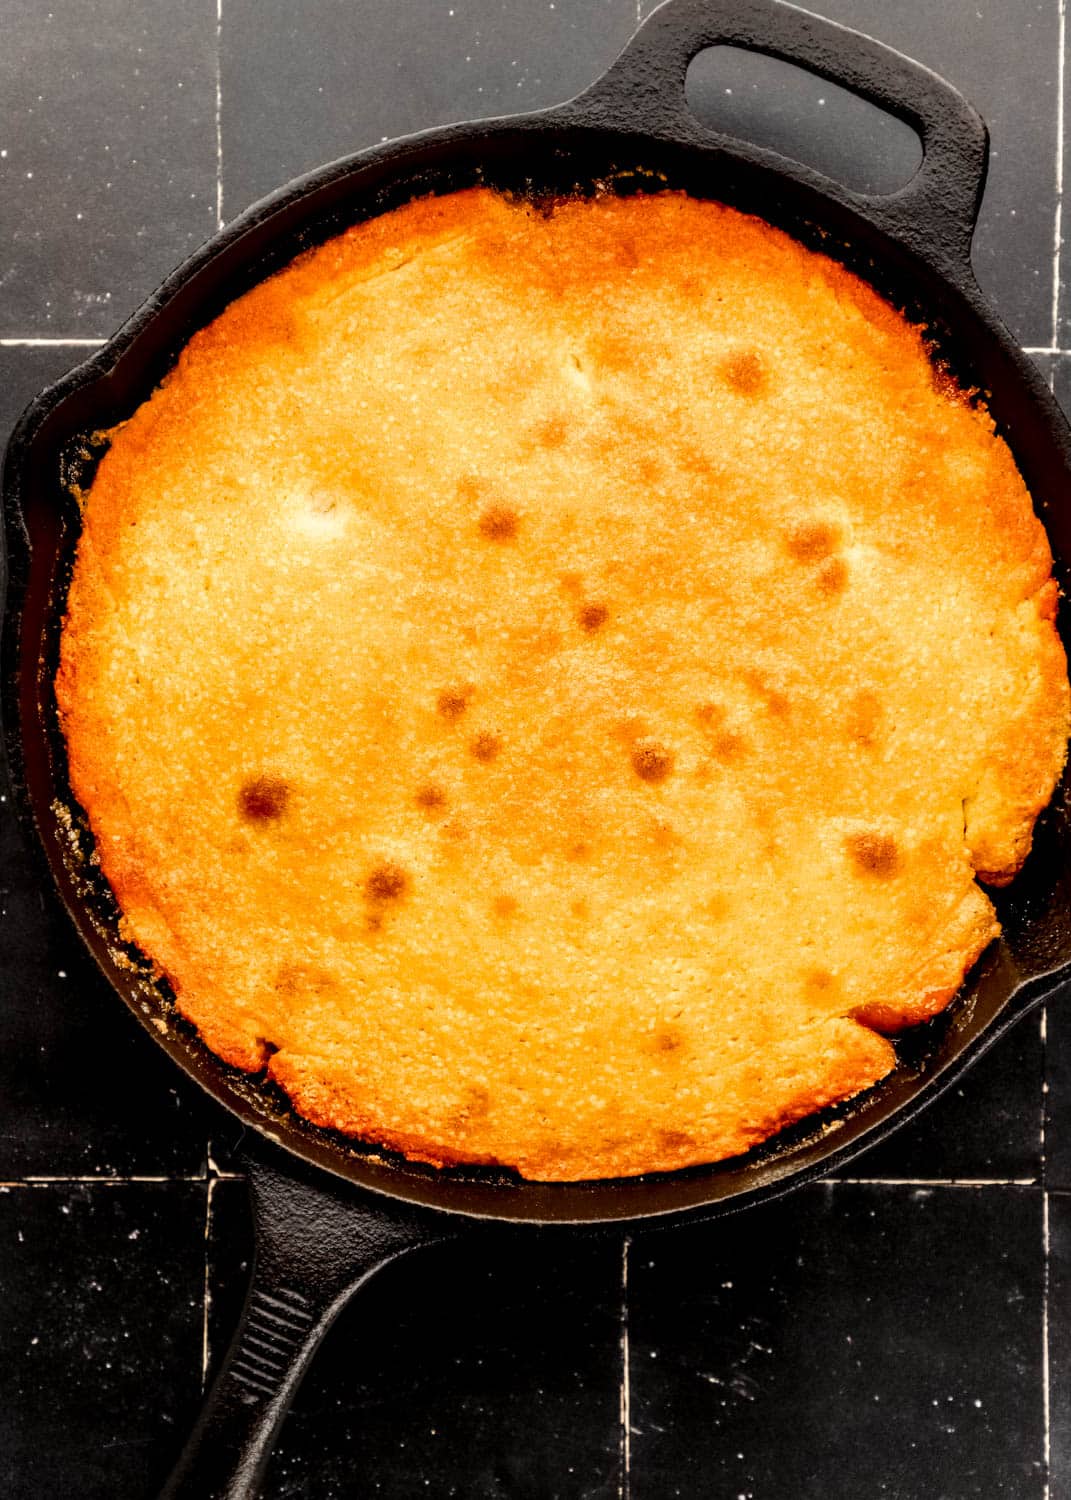
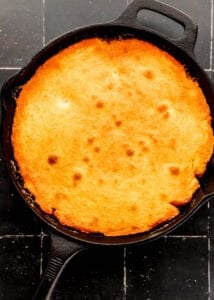
Step 4: Pour, bake, and flip
Spoon the batter gently over the pineapple and smooth it level without disturbing the fruit underneath. Bake until a tester comes out clean, then, and this is the important part, let it cool just 10 to 15 minutes before inverting. Too soon and it falls apart; too long and the caramel glues itself to the pan.
LaKita's Expert Tips
Here are my best tips for making this recipe turn out perfectly every time.
- Loosen before you flip. Run a thin knife all the way around the edge of the cake before inverting, this is cheap insurance against a stuck edge.
- Don't skip the cool-down window, but don't overdo it. Ten to fifteen minutes is the sweet spot. The caramel needs to set slightly but still be warm enough to release.
- Room-temperature ingredients matter. Cold egg and milk fight the creamed butter and give you a denser cake. Let them sit out 30 minutes first.
- Bring your serving plate to the skillet, not the other way around. Place the plate over the skillet, hold them together firmly, and flip in one confident motion. Hesitation is what makes cakes slide.
- Watch the edges, not the clock. Ovens vary; pull the cake when a tester comes out with a few dry crumbs and the edges just start pulling from the pan.
- Catch the drips. Set your skillet on a rimmed baking sheet in the oven. A full skillet can bubble over, and caramel on the oven floor is no fun to clean.
- A 12-inch skillet bakes faster. The thinner cake layer in a larger skillet sets sooner, so start checking 5 minutes early.
Want To Save This Recipe?
Variations & Substitutions
This recipe is flexible, here are some easy ways to make it your own.
- Crushed pineapple instead of rings - Spread well-drained crushed pineapple over the caramel for a more rustic look. You can skip the cherries or scatter them in.
- Fresh pineapple - Slice it thick and pat it dry. It's a little firmer than canned, so the rings hold their shape beautifully.
- Boxed cake mix shortcut - Short on time? Prepare the skillet caramel and pineapple from scratch, then top with a prepared yellow cake mix batter. You'll still get the cast iron crust with less effort.
- Add warm spice - A pinch of cinnamon or ground ginger in the batter plays gorgeously against the caramelized pineapple.
- Swap the milk for buttermilk - For a slightly tangier, extra-tender crumb.
- Make it boozy - A tablespoon of dark rum in the batter leans this toward a grown-up tropical dessert.
Make-Ahead & Storage
Make-Ahead
This cake is at its absolute best the day it's made, but you can get ahead a little. Measure and whisk your dry ingredients the night before, and have your pineapple drained (save that juice for the caramel) and cherries patted dry. You can also bake the full cake earlier in the day and flip it a few hours before serving, just leave it loosely covered at room temperature.
Storage & Reheating
Storage. Once fully cooled, store the cake at room temperature for 1 to 2 days in an airtight container or tightly wrapped. In warm weather or for longer keeping, refrigerate up to 4 days and bring slices back to room temperature before serving. To freeze, wrap the fully baked cake well and store up to 1 month, then thaw overnight in the fridge, though I'll be honest, the texture is best fresh.
Reheating. To bring back that just-baked warmth, reheat individual slices in a 325°F oven or toaster oven on a parchment-lined sheet for 5 to 10 minutes until the caramel softens. A 15-20 second zap in the microwave works in a pinch but won't re-crisp the edges the way the oven does.
What to Serve with Cast Iron Skillet Pineapple Upside Down Cake
Here are some of my favorite ways to serve this dish.
- With a drizzle of the leftover skillet caramel spooned over the top for anyone with a serious sweet tooth.
- A warm slice with a scoop of vanilla ice cream or a cloud of fresh whipped cream. The cold against the warm caramel is everything.
- Alongside a pot of coffee for an afternoon treat, it pairs beautifully with my Hummingbird Coffee Cake on a weekend baking spread.
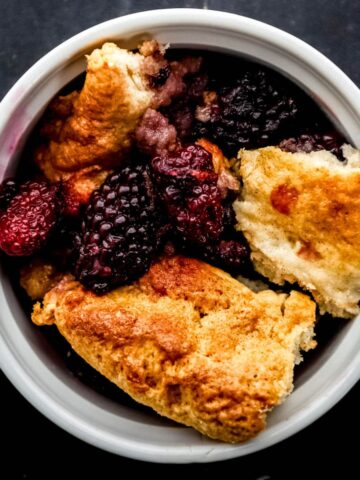
- As part of a Southern dessert table next to a Homemade Sour Cream Pound Cake and a fruit cobbler.
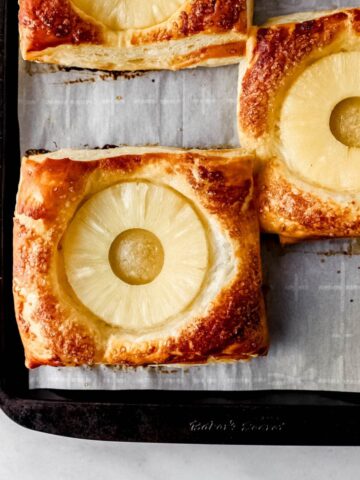
- For a tropical-themed gathering, serve it after a round of Pineapple Tarts with Puff Pastry to keep the pineapple theme going.
Frequently Asked Questions
Cast iron holds and distributes heat evenly, which caramelizes the brown sugar topping deeper and gives you those crisp, candied edges a regular cake pan just can't. A seasoned skillet is also naturally non-stick, so the cake releases cleanly when you flip it. You start the caramel right on the stovetop and move the whole thing to the oven, one pan, start to finish.
A 9-inch skillet gives you a taller, classic cake, while a 12-inch makes a wider, slightly thinner cake. Both work, just know the 12-inch bakes a few minutes faster because the layer is thinner. Spread the batter all the way to the edges in a larger skillet so it covers the pineapple completely.
Yes, that's exactly what this recipe is. It uses simple pantry staples (flour, sugar, baking powder, butter, egg, milk, and vanilla) and comes together in one bowl. From-scratch gives you a more tender, buttery crumb than a box, and it's genuinely not much more work.
Absolutely, if you're short on time. Make the brown sugar caramel and arrange the pineapple in the skillet as written, then top with a prepared yellow cake mix batter and bake. You'll still get the signature cast iron crust with less hands-on effort.
Canned rings are the easiest to arrange and bake up the softest, which is why they're traditional. Fresh pineapple works well too, slice it thick and pat it dry. Crushed pineapple gives a more rustic, casual look. Just drain it well so the topping doesn't turn soggy.
Usually it's one of two things: the cake cooled too long and the caramel re-hardened, or the edges weren't loosened first. Flip within 10 to 15 minutes of taking it out, and always run a knife around the edge before inverting. A well-seasoned skillet helps a lot here.
Don't overmix the batter once the flour goes in, use whole milk, and pull the cake the moment a tester comes out with a few dry crumbs, not when it's bone dry. Overbaking is the most common culprit behind a dry pineapple upside down cake.
Yes. You can prep the dry ingredients and pineapple in advance, or bake the whole cake earlier in the day and flip it a few hours before serving. It holds well loosely covered at room temperature, though it's best enjoyed the same day.
Keep it in an airtight container at room temperature for 1 to 2 days, or refrigerate up to 4 days. Warm individual slices in a 325°F oven for 5 to 10 minutes to soften the caramel back up. It also freezes for up to a month, thawed overnight in the fridge.
This recipe is written for the oven, which is what sets the cake evenly. A true stovetop-only version is tricky to get cooked through without scorching the bottom, so I recommend the oven method here for reliable results.
📖 Recipe
Cast Iron Skillet Pineapple Upside Down Cake Recipe
Video
Equipment
- 1 cast iron skillet or large oven-safe skillet (9-inches)
- 1 large mixing bowl
- 1 stand mixer or hand mixer
Ingredients
- 10 tablespoons butter, divided
- ½ cup brown sugar (light or dark)
- 8 ounces canned pineapple slices
- 5 tablespoons pineapple juice (reserved from can), divided
- 8 - 10 whole maraschino cherries
- 1 cup all-purpose flour
- 1 teaspoon baking powder
- ¼ teaspoon kosher salt or baking salt
- ¾ cup granulated sugar
- 1 large egg
- ⅓ cup whole milk
- 1 teaspoon vanilla extract
Instructions
- Begin the cake recipe by preheating the oven to 350 degrees F. Grab a 9-inch cast-iron skillet and place it on the stovetop over medium heat.
- Allow it to heat and add 4 tablespoons butter until melted and foamy. Stir in the ½ cup brown sugar and 1 tablespoon pineapple juice. Continue stirring the mixture until the sugar dissolves.
- Remove it from the heat and add the 8 ounces pineapple slices to the top. Place the 8-10 maraschino cherries into the center of each pineapple ring.

- In a small bowl, whisk together the 1 cup all-purpose flour, 1 teaspoon baking powder, and ¼ teaspoon salt until combined. Use a stand mixer with a paddle attachment or a large bowl with a hand mixer.
- Add 6 tablespoons butter, and ¾ cup granulated sugar, and mix until light and fluffy, about 3 minutes.
- Scrape down the sides of the bowl before adding in the 1 large egg, ⅓ cup whole milk, 1 teaspoon vanilla extract, and 4 tablespoons pineapple juice. Add the flour mixture and mix enough to combine.
- Carefully pour the cake batter into the prepared skillet on top of the pineapple mixture, trying not to disturb the pineapple topping.

- Smooth out the cake mixture into an even layer. Place into the oven and bake for about 25 to 30 minutes, until a cake tester comes out clean or with a few dry crumbs.
- Carefully remove the cake from the oven and allow it to cool for 10 to 15 minutes before inverting it on a serving plate to serve. Slice and enjoy!
Did You Make This Recipe?
If you give this cast iron skillet pineapple upside down cake a try, I'd love to know what you think! It's one of those recipes that means a lot to me, and nothing makes my day like seeing y'all make it in your own kitchens. Leave a comment and a star rating below, share a photo on Instagram and tag @SimplyLaKita, or save it on Pinterest for later. And if you have a question before you bake, drop it in the comments. I read every single one.
Leave a Reply